What are they?
Clean, dry berries are the main purpose of the support. The simplest models are sold in every gardening department. This is a small green plastic structure in the form of a loop on a pin. It must be used correctly. Install in early spring immediately after cutting off old leaves.
Stick in the support so that the circle lies on the ground around the future bush. Pull it out gradually as the strawberries grow. When used correctly, leaves, flower stalks, and berries are not harmed. It is difficult to install the structure on an overgrown bush.
Features of the holder device and advantages of its use
In appearance, the structure is a kind of support consisting of several thin rods. It can have different diameters. Supports are made from plastic and metal. They prevent the bush from sinking to the ground under the weight of the fruit and reduce the risk of contamination. This leads to increased commercial quality.
Attention! The main advantage of such stands is that they reliably support the plant and do not block access to sunlight.
Types of supports
There are many options for supports. A disposable plastic fork is the most basic. This life hack won’t be useful on a large strawberry plantation, but for a small bed it will be just right. Each fork needs to break out 2 central tines. You need to stick such supports under each peduncle. Natural materials are suitable to protect berries from rot, dirt, and insects: straw, sawdust, peat. They are scattered (layed out) under strawberry bushes.
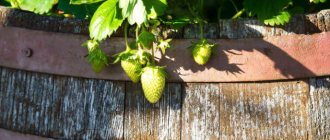
The berries do not touch the ground, so they remain clean, are not damaged by insects, and are less susceptible to fungus.
To protect berries, you can purchase industrial materials in the store:
- mesh;
- black film;
- black non-woven fabric;
- plastic structures.
Advantages of installing supports under the stalks
Like every method of agricultural technology, the use of supports for the stalks has its positive and negative sides. The gardener’s task is to take advantage of and minimize the disadvantages of agricultural technology.
- the use of supports protects strawberries from contamination;
- berries are less affected by rot and disease;
- berries raised high above the ground are inaccessible to slugs and crawling insects;
- making supports yourself takes a little time;
- low price of materials used;
- Highly raised berries contribute to better ventilation of the bushes.
- installing supports takes up spring time, the method is very difficult to apply on large strawberry plantations;
- a large number of supports requires a lot of storage space;
- making a large number of devices takes a lot of time;
- Berries raised on supports attract birds.
Preparing for work
Film and black non-woven material are used for drip irrigation systems. These are multifunctional options. On the one hand, they prevent moisture evaporation and save water. On the other hand, they protect berries and bushes from dirt, slugs, and other insects.
Working with these materials is easy. They are durable. Can last for several years. Covering material (film) should be laid in the spring. First, draw a diagram of the location of the bushes on the canvas. Then make cross-shaped notches. Place the film on the bed and pull the bushes out through the notches.
See also
Why do strawberry leaves curl and what to do to treat the bushesRead
Fine mesh is used similarly to film. You also need to make holes in it for the bushes. If the cells are large, this is not necessary. While the stems are small, you can simply tuck them into the hole. When the strawberry bushes grow, the net needs to be raised above the ground, tying it to pegs.
Wire can be used in several ways:
- stick pegs along the row of strawberries and stretch the wire between them;
- cut into pieces, make holders in the shape of the letter “M”, install several pieces at each bush, put flower stalks on them.
Finished plastic structures look aesthetically pleasing. Place holders under each bush. They come in different sizes. Easy to assemble. They have legs. The bushes are not damaged, since the product has latches. The holder is first placed under the bush, then given the desired shape and secured with latches.
Video
Strawberries are one of the berry crops often grown in summer cottages. As a rule, beds are set aside for this plant, but the berries tend to deteriorate when they come into contact with wet soil. To preserve their marketable appearance, gardeners began to use special supports for strawberries.
The stand and bush holders for strawberries serve to support the peduncle so that it does not lean towards the ground when the fruits begin to ripen and gain weight, since wet soil has a negative impact on the quality of the berries. A layer of sawdust or hay used as mulch does not always provide adequate protection for fruits from gray rot spores that may be present in the soil layer. The spores make the fruit flabby, fluff appears on it, and the taste and characteristic color disappear.
Strawberry bushes also protect the device from snails and slugs, which appear in large numbers in the garden when the fruits ripen. At night, gastropods will happily feast on berries located in close proximity to the ground. If you do not use a strawberry holder that supports the fruit, you can lose more than half the harvest.
Important! The use of such supports may not play a big role for those gardeners who grow strawberry bushes for themselves, but if the crop is sold, then such losses promise a significant loss.
How to make strawberry stands with your own hands?
The simplest strawberry stand is made with your own hands from wire with a cross-section of 6-8 mm. The wire should be strong, but easy to bend. Tools and devices needed for work:
- a piece of pipe (metal, plastic) with a diameter of 15-20 cm;
- pliers;
- side cutters.
Step-by-step manufacturing algorithm:
- use side cutters to cut a piece 80 cm long;
- form a loop by wrapping one end around the pipe (1 turn);
- Use pliers to bend the loop 90°.
Three simple operations, and a convenient support for a strawberry bush is ready. It's easy to use. The pin is stuck into the ground next to the plant. The ring is smoothly placed under the leaves and flower stalks. It keeps the fruits and stems away from the ground.
Making a stand for strawberries from 1.5 liter plastic bottles is no less simple. It's better if the plastic is brown. During the winter you need to accumulate as many of them as possible. The only tools you need are a sharp knife and side cutters, and additional materials are thin wire (2-2.5 mm) and tape.
Bottles need to have their bottoms cut off. Assemble them into a pipe by sticking the top of one bottle into the bottom of the other. The length of the structure depends on the length of the ridge. For ease of transportation at home, you can make short sections and finally assemble them on site. Secure the pipe joints with tape.
Cut pieces of wire and bend U-shaped brackets. Place 2 tube stands along the row of strawberries. Secure with staples on both sides. Gardeners using this design note the following advantages:
- the berries ripen earlier;
- a favorable climate is created around the bushes, there are no drafts, the air cools less at night;
- leaves, flowers, berries do not come into contact with the ground;
- dirt and water do not linger on the plastic surface;
- insects do not live under bottles.
See also
List of the best strawberry varieties for 2021 and how to choose, pros and consRead
About strawberries, plastic bottles and how I came to this - answers to questions
Today I want to take a little break from the topics that have been exciting many of the residents of the Masters Fair lately and talk about strawberries and my techniques for growing this crop.
After I showed off my daffodils a little, many people paid attention to the bottles scattered around the beds. This aroused interest and questions in private - why and for what.
That’s why I want to answer everyone at once - to reduce the time for individual answers and explanations. This is my personal experience gained over many years.
A long time ago, more than 15 years (or a little more) ago, when there was no time at all to work in the garden - the main work was at the blood transfusion station + violet exhibitions in Moscow 4-5 times a year, for which we also had to prepare in advance.
It was then that the thought came that too many movements in the garden have little effect on obtaining a decent harvest and for the most part it is a waste of precious time, which is already not enough for anything. It was then that I stopped digging the ground and removing all the “plant debris” from the site. After all, what comes out of the earth must return to it!
Some time passed and the opportunity arose to find answers to many of my questions, guesses and assumptions. It turned out that I’m not the only one who lives and gardens according to these principles! It turns out that a lot of people not only in Russia, but all over the world work on the earth with the same attitude towards it and thoughts about the cycle of life in nature! This movement is called organic or natural farming (there are some differences in the names, but the meaning is almost the same).
Based on the principles of organic farming and the experience of many, many people, in relation to my specific plot, the tactics and strategy of my life on the earth were developed - as in the main profession of a doctor, and my attitude towards the earth as a summer resident - do no harm!
Well, now the answer to a specific question - why are there bottles scattered throughout the strawberries?
Natural history in primary school - the topic of the water cycle in nature - let's remember... why does dew fall?
Physics course in the school curriculum - the topic is osmosis - why is the ground always wet under a pebble, why is the ground always wet under a pile of branches or grass?
- Biology - the topic is annelids - why are there always a lot of them under a stack or a pile of grass, where it is humid, and the ground is loose and black?
Have you answered these questions for yourself? I have long ago received their answer in the form of decent harvests with minimal expenditure of physical effort and time.
In addition to the fact that plastic bottles (and they are 3/4 filled with water and are never removed from the garden) draw water from the ground and air, they also serve as thermal batteries - during the day they gradually heat up, and at night they give off this heat to the earth and growing nearby strawberry bushes, and during the day - cooled bottles of water take some of the hot air onto themselves and thus in the garden - on the ground and in the atmosphere around the strawberry bushes the temperature changes are not so sharp. In addition, in autumn and spring, and in winter too (and the last winters in our region are very strange), these heat accumulators work in the same way, collecting all the sun's rays. As a result, after winter, strawberries come out with minimal losses and quickly gains leaf mass.
Everyone knows that the second name for strawberries (maybe you will correct me now - they say they are not strawberries, but wild strawberries, but the meaning does not change) is straw berry. In England, all the soil on strawberries is covered with straw. I don’t have straw, but there are many different herbs growing around that I use for mulching. In this photo there are very young bushes
I really love nettles and... celandine, and also forget-me-nots - these herbs grow a large mass of leaves by the time the beds are mulched. I don’t remove the roots, but lay all the mulching plants like tiles - with the roots facing up - so they don’t sprout, but dry up and very soon go to feed the worms, which turn all this green mass into real humus with a high content of humus. Thus, several problems disappear at once - no need to water, no need to loosen, no need to feed - all these three procedures are done by earthworms.
The neighboring bed that I mulched the day before - the grass has dried up and you can add one more layer
aka + second layer of mulch
The next day, or a little later, depending on the temperature, all this mulch will dry out and it will be possible to lay the third layer. The berries will lie clean on dry mulch and will not be afraid of any rain...
In June we are going on vacation and for 10 days all the plants will be left to their own devices - I am absolutely calm for them, although no one will water them (the same applies to other garden crops)
I hope I answered all the questions asked in detail. If someone doesn’t quite understand something, write to us and we’ll discuss it. I hope that there are still people at YaM who are interested in the principles of natural (organic) farming.
These are certainly not strawberries, but... also the result of my labors - no digging, no weeding, no watering + mulching and as a result..
open ground Tula region
Subsequent planting and care of strawberries
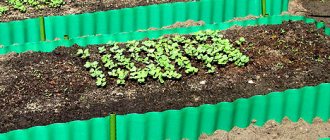
Every year you need to plant a new bed of strawberries, then there will be a harvest every year. In one place the berry bears fruit for 5 years. Therefore, at your dacha you need to have several strawberry plots:
- first year of life;
- a 2-year-old bed that produces a small harvest;
- 3-year productive;
- 4-year productive;
- 5 year old aging.
For propagation, first-order rosettes are taken from healthy, productive bushes. The planting pattern is chosen 35 x 80 cm or 50 x 80 cm. The choice depends on the size of the adult bushes. The more powerful they are, the greater the distance between the holes.
To protect strawberries from rot during fruiting, you can cover the ridges with straw and place holders under each bush. After prolonged rains, it is necessary to treat the bushes with biological products:
- “Trichofite” (200 ml per 10 liters of water);
- “Gaupsin” (200 ml per 10 liters of water);
- "Rosconcentrate" (20 ml per 10 liters of water).
Spraying protects the berries from gray rot and insects.
Additional recommendations
Strawberries can be grown not only on the ground. A bed made of PVC pipe will look original. You can place it anywhere in the garden: hang it on a fence, place it on vertical supports.
You will need 2 pipes:
- one of small diameter (40 mm) for watering, you need to drill holes in it, you can take a garden hose;
- the second is of large diameter (main).
In the main pipe, holes with a diameter of 10-15 cm need to be cut every 15 cm. After this, proceed to filling:
- pour small pebbles, this will be drainage;
- insert a hose with holes for irrigation, pre-wrap it with covering material, the holes will not become clogged with soil;
- add nutrient substrate.
Strawberry bushes are planted in the holes of the pipe. The berries in such a tube bed are always clean; they do not need additional support. They are easy to care for. Liquid fertilizers can be added to water for irrigation.
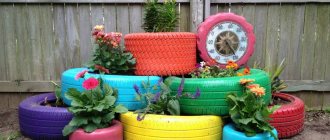
There are many options for original beds for strawberries. They build beds from used car tires. They are made from plastic bottles. The vertical bed-barrel for strawberries is very popular. During flowering and fruiting, wooden pyramid ridges become a decoration of the garden.
