Is it possible to grow an adult tree from an apricot kernel?
Buying apricot seedlings is not a problem. Moreover, now there are many varieties specially adapted to local climatic conditions. But many gardeners prefer to grow their own apricot tree from a seed. There are several reasons for this:
- the high cost of ready-made seedlings (after all, for planting you will have to buy 2-3 pieces for cross-pollination to occur);
- inability to achieve high-quality fruiting from varietal seedlings;
- the desire to experiment and obtain an exclusive variety of culture.
This desire is also caused by a number of advantages of growing apricots from seeds:
- obtaining a plant better adapted to the local climate and soil characteristics;
- the grown plant is more resistant to adverse weather factors;
- minimal financial costs;
- the ability to choose a seed from any apricot variety you like.
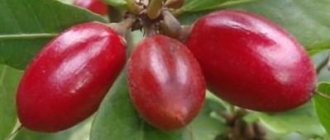
The Khabarovsk variety has very large and tasty fruits.
It is recommended to select seeds from zoned varieties with high frost resistance. These include:
- Red-cheeked;
- Lel;
- Iceberg;
- Michurinets;
- Alyosha;
- Honey Bullfinch;
- Triumph Northern.
It is not recommended to take foreign varieties for planting; there is a high probability of growing a wild tree. And from the proposed options, fully fruit-bearing crops are obtained, subject to compliance with the rules of care. The first apricots appear in the fifth year after planting.
It is preferable to plant the seed directly in open ground so that the plant undergoes natural hardening. A seedling grown at home and then transplanted into the garden may not survive the first winter. Just don’t count on 100% germination of planting material - only the strongest seedlings germinate after winter. And if planting is done in early autumn, most of the seeds will be carried away by rodents. Therefore, it is better to start the process shortly before the first cold snap or in the spring.
Which apricot kernels are suitable for planting?
How to grow mangoes from seeds at home
Not all seeds are suitable for propagation; it is best to take the starting material from a tree that is grown in the same region where you plan to plant it. Moreover, it must be an overripe fruit of the first harvest.
If you do not follow this rule, the tree may not bear fruit, that is, it will grow for decorative purposes.
Before planting, the seeds must be germinated, this will speed up germination.
Apricot care at home
Apricot tree can be grown as a houseplant
In this case, special attention is paid to caring for it:
- Watering. Water the tree as the soil dries. In summer, on average, 3-4 waterings per week will be needed. In winter, the soil is moistened once a week. For irrigation use water at room temperature. The soil is moistened in the morning or evening, when the sun is inactive.
- Spraying. Apricots are sprayed every two days with warm water from a spray bottle.
- Loosening. The soil in the pot is loosened at least 1-2 times a week. This is necessary to destroy the earthen crust, which interferes with normal root air exchange and causes fluid stagnation.
- Temperature. During the growing season, the optimal temperature for growing an apricot tree is +24…+26°C. At the end of autumn and winter, when the plant sheds its leaves, it is moved to a room with a temperature of 0 ... + 2 ° C, for example, to a glazed balcony or to a cellar.
- Lighting. In summer, if the tree grows on a south-facing window sill or balcony, it does not require additional lighting. In winter, too, if the tree is in the cold, additional light is not needed. If there is a phytolamp at home, it is used in early spring and autumn.
- Feeding. In the first year of cultivation, the apricot tree is not fed. This negatively affects his development. From the second year they begin to apply fertilizing. The tree is fed first in the spring, when the buds swell, then in the summer (July) and autumn. Alternate mineral (superphosphate, potassium sulfate and ammonium nitrate) and organic (mullein or chicken manure solution) fertilizers.
- Formation. The apricot tree needs shaping. At home, the main stem is pinched when its height reaches 15-25 cm. The branches of the first order are pinched when their length reaches 20 cm. The 3-4 most developed and strong branches are left at one level, and the weak ones are removed. This is done with all shoots of the following orders. When the crown is formed, maintenance pruning and trimming are carried out to give the desired shape. The cut areas must be treated with garden varnish.
- Sanitary pruning. It is held at the end of each season. Remove old, weak, damaged branches. If there are areas on the trunk with cracked bark, they are covered with garden varnish.
- Bloom. When the tree blooms, it will need artificial pollination (if it is in the house at that time). To do this, pollen is transferred between flowers using a soft brush. To increase the chances of fruiting, it is advisable to have two apricot trees.
- Fruiting. In the first year, most of the ovaries are removed, leaving no more than two fruits on the plant. Then their number can be increased.
- Transfer. The tree is replanted as its root system fills the pot. It is transferred to a new container along with a lump of earth, removing only the drainage and the top layer. The missing volume is filled with new soil. In the first year, three transplants will be needed, then the pot is moved to a new container once a year. The formed plant is not replanted, but only the top layer of soil is replaced.
In the warm season, it is recommended to take the apricot out to the balcony, loggia or garden, in a well-lit but protected from the wind place.
Step-by-step instructions for vaccination
The effectiveness of vaccination work depends on the correctness of its implementation. It is necessary to take into account all the nuances.
Required materials and tools
To carry out grafting work you will not need many tools:
- pruning shears for cutting green shoots;
- hacksaw for preparing scion;
- a sharp garden or painting knife to give the cut areas the desired shape;
- electrical tape or special garden tape to secure the connection point;
- film or bag;
- garden pitch or other means for processing cuttings;
- sandpaper for cleaning cuts of the rootstock;
- a flat-head screwdriver for creating a hole when grafting into a cleft.
Different methods of vaccination
There are five main methods of vaccination. Each of them has its own nuances. The choice depends on the preference of the gardener.
Into the cleft
Many gardeners believe that it is easiest to graft an apricot into a split. This method is suitable even if the diameter of the rootstock is significantly larger than the scion.
Split technique:
- The lower end of the cutting is cut on both sides to a height of 2-5 cm so that a thin wedge is obtained.
- A split is made in the rootstock, the depth of which is equal to or slightly greater than the wedge on the scion. Depending on the thickness of the rootstock, use a knife, hatchet or screwdriver.
- Cuttings are inserted into the split so that the bark and its layers on the scion and rootstock coincide on at least one side. If the scion has a large diameter, then several cuttings can be inserted into it.
- The junction is tightly wrapped with garden tape or electrical tape and treated with garden varnish.
For the bark
Apricot is grafted onto the bark if the cuttings are much thinner than the rootstock.
The technique is as follows:
- The lower part of several cuttings is cut with a transverse wedge. The thicker the rootstock, the more scions are taken.
- A transverse cut is made on the bark no deeper than 5 cm.
- The shutters of the incision are moved apart. The cuttings are inserted into the resulting pocket so that the place where they are cut fits tightly to the bark.
- The resulting structure is wrapped with electrical tape. Garden pitch is used for coating.
Budding
Summer budding involves the use of a bud. Usually the procedure is carried out at the end of the summer period.
Summer budding instructions:
- A bud is selected from the central part of an annual green branch. Leaves are plucked off it. Then they cut it off along with a 1.5-2 cm section of bark. While preparing the scion, the eye is wrapped in gauze.
- A T-shaped incision is made on the bark of the rootstock (preferably in the area with the bud).
- The bark is carefully pulled apart. A kidney is inserted under it.
- The bark flaps are closed so that only the bud remains outside.
- The junction of the scion and the rootstock is wrapped with electrical tape so that the bud remains uncovered.
Copulation
Copulation is used if the rootstock and scion have the same diameter.
The copying instructions are as follows:
- The lower part of the scion and the cut of the rootstock are cut at an oblique angle. The length of the sections is 3-4 cm. The dimensions of both sections must completely match.
- The cutting is applied to the cut of the rootstock so that they completely coincide and fit tightly to each other.
- The junction is tightly wrapped. The upper cut is covered with garden varnish.
Bridge
The method is used to save trees whose bark has been damaged due to frost or animals.
Bridge grafting is especially suitable for trees whose bark has been removed in a circle.
Bridge grafting:
- Choose a place where there is not enough bark ring. The edges of the bark on both sides are trimmed evenly. The exposed area is wiped with a clean cloth. Vertical cuts are made on the upper part of the bark according to the number of cuttings. Opposite the upper cuts, the bark is cut in the lower part.
- The cuttings are sharpened with a wedge on both sides. One side of the cutting is inserted into the lower cut on the bark and secured with electrical tape. The cuttings are bent into a bridge and their second cut is inserted into the upper cut in the bark.
- The grafting area is treated with garden varnish.
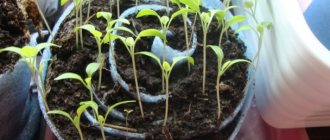
Caring for young apricot seedlings
Watering mode
Regular watering is usually carried out once or twice a week (especially in May - June), if the tree trunk circle is not mulched and the days are hot and dry. In moderate weather and the presence of mulch (for example, from peat, leaf humus or sawdust), seedlings can be watered two to three times a month. After the fifteenth - twentieth of July, watering the seedlings is completely stopped so that the wood on the shoots has time to ripen before the arrival of winter cold.
It is important to find a middle ground in the volume of irrigation water, since excess moisture is undesirable for apricots, and too little is dangerous. Favorable time for water treatments is from 7 to 10 am or from 7 to 9 pm in the evening
Pest protection
Competent and timely care is the key to a strong and strong plant, and in the future – a guarantee of a generous and high-quality harvest. That is why it is necessary to care for seedlings from the moment they appear on the surface of the soil.
Young and tender crops attract the attention of rodents, birds and many other pests. It is worth protecting plants from them using a simple structure made from a plastic bottle with a cut off neck and bottom (made of transparent material)
This will allow the seedlings to gain strength and grow in a calm environment.
Although apricot seedlings are rarely affected by pests, codling moths, aphids, leaf rollers or caterpillars may occasionally appear. These pests can be controlled in various ways, but when the fruits ripen, using chemicals is dangerous to health. It is better to use proven folk recipes. For example, spray with tobacco infusion with the addition of liquid laundry soap.
At the initial stage of seedling development, aphids can be gotten rid of by ash spraying or treatment with Actellik, and codling moths can be gotten rid of by treating the trunk and branches with a lime solution with copper sulfate. You can destroy caterpillars that lay eggs and eat most of the leaf mass with Chlorophos, but only in the spring or after harvesting.
Fertilizer application
Fertilizers are applied only from the second year of the plant’s life - in spring or summer. Saltpeter, urea, peat, ash, eggshell powder, sawdust and sand in equal parts are used as spring root feeding. The best summer fertilizers are herbal infusions with the addition of rotted manure or bird droppings. The interval between fertilizing is two weeks. You can alternate mineral and organic fertilizers.
Trimming and shaping
The first pruning is carried out in the second year of life in early spring, and then annually at the same time. After winter, plants need to be freed from damaged, dried, weakened, frozen branches - this is the first thing. A formative “haircut” involves removing the top (to create a low-standard form), as well as shortening very long, prominent branches and shoots that thicken the crown.
Apricot grafting methods
Popular methods of grafting apricots depend somewhat on the climate in the region. For example, in the Moscow region, apricots are grafted onto winter-hardy plum varieties; the grafting site is chosen higher up from the roots. In the south of Belarus and almost the entire territory of Ukraine, summer grafting of varietal eyes on seedlings of local varieties is often used. And in some areas of Siberia they even grow these trees in the stale form, they have their own tricks for performing grafting.
There are many methods for grafting fruit trees, but in the case of apricots only a few are used. Let's look at the most popular of them.
Copulation
Experienced gardeners advise their novice colleagues to choose a copulation method. This method is convenient for thin branches. By copulation, young rootstocks are most often grafted with cuttings of varietal apricots. The main condition is that you must match the rootstock to the scion in diameter. Ideally, they should coincide down to tenths of a millimeter.
For simple copulation, oblique cuts of the cuttings and rootstock are combined and tied tightly
The essence of the simple copulation method is the connection of the cutting and the rootstock, cut obliquely, followed by winding. Even in the simplest version of copulation, the survival rate of cuttings is close to 100%, but there is an improved option. For grafting, cuttings are used, the length of which is 10–15 cm; they should have 5–7 growth buds:
- A one-year or two-year-old apricot or plum seedling (or just a plum shoot, if it is chosen as a rootstock) is cut obliquely at a distance of 25–30 cm above the ground.
- The length of the cut should be about 3 cm.
- Similarly, make a cut on a prepared cutting of a varietal apricot.
- Both cuts are combined, the edges and top are covered with garden varnish, and then tightly wrapped with a suitable tape material.
- After 2-3 years, only a faint trace at the junction will remind you that these were pieces of two different trees.
In the method of improved copulation, a shallow longitudinal slot (“tongue”) is made in the middle of the oblique cut on the handle. Having tried it on carefully, they make the same tongue on the scion. They insert “tongue into tongue” and get a more durable connection.
With improved copulation, the presence of a tongue allows the cutting to hold tighter and accelerates its fusion with the rootstock
Improved apricot copulation with omega-shaped pruning shears
Technology is moving forward, and now you don’t have to think about how to correctly make oblique cuts and tongues when copulating so that the fit of the rootstock to the scion is tight. A sharp knife and skill can be replaced with a special device produced by industry. Apricot copulation, like any other fruit trees, can be done using the so-called omega-shaped pruning shears, which allows for perfectly tight contact between the two parts being connected.
Omega-shaped pruning shears ensure ideal tight contact between the rootstock and scion
Such a unique grafting tool appeared relatively recently. It is made reliably, from high quality steel and durable plastic. If a regular pruner often damages the cambial layers, the grafting pruner is designed so that this does not happen. The cuts are made quickly and cleanly, so the likelihood of bacterial or fungal infection of the tree due to the tight fit of the scion to the rootstock is also minimal. The rootstock diameter recommended by the manufacturer is up to 10 mm, the minimum diameter is 3–4 mm.
There is also a significant drawback - the high cost of the tool. The price of pruners from the best companies is under a hundred thousand rubles. But garage craftsmen are already beginning to appear who make inexpensive tools using the same principle.
Video: grafting a cutting using the improved copulation method
Apricot grafting into cleft
The most universal method of grafting is cleft grafting. It is used when the diameter of the rootstock is significantly larger than the diameter of the cutting, that is, there is no need to bother looking for a cutting or a grafting site for it, based on geometry. The grafting site can be either a standard (the trunk of a wild apricot or plum) or its thick, including skeletal, branch.
The vaccination algorithm is as follows:
- A trunk or branch of a tree is cut down perpendicular to its growth (trunk - horizontally, branch - depending on how it is positioned).
- A strong, sharp knife is placed along the diameter of the cut; they knock on it with a hand or a hammer so that a split 3–4 cm deep is obtained.
- At the lower end of the cutting, with an ideally sharp, clean knife, two cuts are made at an acute angle to each other, producing a wedge. This is the most critical stage: the cuts must be perfectly even.
- The resulting wedge is inserted into the split to its full depth so that the cambium and bark remaining on it coincides with the cambium and bark at the edge of the rootstock split. The cutting should fit tightly into the split and be well pressed by the trunk (branch) of the rootstock.
- The cut of the rootstock and the upper end of the cutting are covered with garden varnish. The cut is tightly wrapped around the perimeter with tape, then varnish is added to ensure that there are no open areas left.
When grafting into a cleft, the diameter of the rootstock is not the determining parameter; grafting with two cuttings at once is possible
Video: grafting a cutting into a cleft
Apricot grafting by bark
Grafting behind the bark differs significantly in nature from other methods: the wood of the rootstock is not affected at all; they only cut the bark along with the cambium. Convenient for mature rootstocks with a trunk thickness of several centimeters.
- The trunk is cut in the same way as in the previous case (split method).
- At the selected location, cut the bark along the trunk to a height of 4–5 cm.
- On the sides of the lower end of the cutting, two cuts are made at an obtuse angle to each other. The length of the cuts should correspond to the length of the cut in the rootstock bark. 2–4 buds are left on the cuttings.
- The bark of the rootstock is bent back a little and a cutting is inserted under it. It is important to do this so that the cambium layers of the rootstock and scion are at least slightly in contact.
- Then the bark is pressed and the grafting site is tightly wrapped. Cover with garden varnish.
Grafting a cutting by the bark is used when the rootstock is quite mature with a thick trunk
Some people cut the cutting differently: they make one oblique cut with a protrusion, placing the scion with the cut inward.
Video: method of grafting a cutting onto the bark
https://youtube.com/watch?v=wZjqsgHZzFE
Budding
In relation to apricots, budding is used less frequently than other methods, although it is a relatively simple and economical technique. True, in the hands of an inexperienced gardener it is less reliable than grafting with cuttings.
Fruit trees are always budding in the second half of summer. It represents the introduction of just one vegetative bud into a branch or stem of a rootstock. Buds (eyes) are taken from the ripened shoot of this year. Then proceed like this:
- The leaves from the shoot are carefully cut off, but the petioles are not touched.
- Using a sterile knife, the bud is cut off along with part of the bark (scutellum). The cut shield can be treated with a growth stimulator.
- A T-shaped cut of the bark is made on the trunk of the rootstock 30–40 cm from the ground.
- A shield with a scion bud is inserted into the resulting incision.
During budding, one vegetative bud of a cultivated apricot variety is introduced into a T-shaped incision in the bark of the rootstock.
- The bark flaps are closed, and the graft is tightly wrapped with tape, without affecting the buds.
- After 2–3 weeks, if the grafting is successful, the petiole should come off the leaf without the slightest effort.
- In the spring, a shoot of cultivated apricot will begin to grow from the grafted bud. Then it will be necessary to cut off the top of the wild tree.
If budding is successful in the spring, an apricot shoot will begin to grow from the grafted bud.
How to select and prepare seeds
Seeds should be taken from ripe and sweet fruits without signs of pest and disease damage. The pulp should be free of mold, and the bone itself should not be chipped and separate freely.
The seed for planting is taken from overripe fruits
Then proceed to the preparation procedure:
- The seeds are washed and the low-quality ones that float are immediately discarded. The rest are soaked in a manganese solution for 10–12 hours for disinfection.
- After this, they are immersed in ordinary water for 10 days. During this time, the water is regularly replaced.
- When sowing in spring, the seeds are first dropped into a container with damp sand or moss and placed in a cool place (where the temperature ranges from 0 to 2 °C) for 100 days. This serves as hardening. The seeds are periodically inspected and if moldy deposits are detected, they are treated with hydrogen peroxide.
If you plan to grow apricots at home, the seeds are hardened in a different way. After sowing them, the pots are wrapped in plastic and placed in the refrigerator for 4 days.
Transplantation into the ground
Next year in April, the seedlings can be transplanted outside. Apricot is a southern plant, so sunny areas, sheltered from the wind, are the best place. Soil requirement: light loam with a pH of 7 to 8 units, it is good if the groundwater lies at a depth of at least 2 m. How to plant:
- The soil is prepared three weeks before transplantation; a hole is dug to a depth of 0.5 m, with a diameter of 0.6–0.7 m.
- The soil removed from the pit is mixed with compost and 500 g of phosphorus-potassium fertilizer is added.
- A mixture of soil and fertilizer is poured into the middle of the hole and a small hill is formed. A plant with a lump of earth is placed in it.
- The rest of the soil is poured around the remaining space and compacted.
A roller is formed along the edges, 2 buckets of water, pre-heated in the sun, are poured into it.
Apricot - from preparing the seeds to planting in the ground
For planting, it is best to take seeds from apricots growing in your area. If you can’t get local fruits, you can order planting material from gardeners who live in the Far East or Siberia. Apricots growing in such harsh climatic conditions are highly viable, therefore, their descendants will take root well in any corner of Russia. As a last resort, you can use apricot pits purchased at the market. Just don’t take large fruits of imported varieties - it will be difficult to grow them.
It is not recommended to plant seeds in pots, because they require natural hardening. A seedling carefully grown at home will simply die at the first frost, as soon as it is transplanted outside. However, do not expect that all the crops will sprout in the apricot bed in the garden: after a harsh winter, only the strongest shoots will survive. And if you plant the seeds in the ground in early autumn, then rodents will immediately take away a good part of them. Therefore, planting should be done in mid-autumn, before the ground freezes, or in mid-spring.
Before autumn planting, it is enough to place apricot kernels in water for a day in order to immediately discard those that float. The remaining seeds are planted in trenches to a depth of 6 cm, every ten centimeters. For better results, you can make the trenches a little deeper and line the bottom with a mixture of grass, sand, earth and humus. It is also advisable to sprinkle the top of the bed with humus and grass. Over the winter, the apricot kernels will undergo natural hardening, and in the spring, tender sprouts will appear.
It is not recommended to plant seeds in pots, because they need natural hardening
If planting is postponed to spring, apricot pits will need to be stratified (as when growing cherries from pits). You can place the seeds in a box with sand and put them in the refrigerator for the whole winter, or you can take dry seeds in mid-March and put them in water for three days, remembering to change it every day. After soaking, the planting material is placed in wet sand and moved to the basement, and in April it is sown in open ground as soon as the weather permits.
When to plant apricot kernels: in spring or autumn
Before deciding on the method and timing of planting an apricot pit in the ground (in a pot or in a bed), it is worth knowing one simple truth (law): until the pit freezes, that is, undergoes stratification, it will not sprout.
If you decide to plant an apricot seed in the spring , then you should put it on stratification (artificial) already in January-February, so that by April-May the seedling will produce the first roots.
As for planting apricot kernels in the fall , for example, in the middle zone (Moscow region) they are planted directly in open ground in October-November, and they can be planted even in frost, it does not matter. They will still hatch only in the spring (after the snow melts), that is, after natural stratification.
By the way! According to the experience of some gardeners, it is believed that if you germinate seeds and plant them in the spring, they will give a higher growth than seeds simply thrown into open ground in the fall (for natural stratification).
Video: how to grow a new tree from an apricot seed
Growing an apricot tree from a seed at home
An apricot tree grown in favorable conditions and receiving proper care is distinguished by a high yield of incredibly tasty fruits, the pulp of which contains a sweet kernel rich in vitamins and microelements. But such a miracle can be grown simply from a seed if you follow little gardening tricks.
What type of apricot is best to choose for growing with stones?
For growing from seed, it is better to choose varieties that grow in climatic conditions close to the conditions where the seedling will be planted in the future. Imported seeds from apricots purchased at the market or in a store are very unlikely to germinate.
Apricot trees are southerners by nature and love warmth and sun. But in our time, quite a lot of varieties have been bred that are distinguished by frost resistance and increased viability. Such species take root well in northern regions and can withstand frost of 30 degrees. In terms of taste, these varieties are in no way inferior to heat-loving southerners.
Pros of growing from seed
The easiest way is to buy and plant a ready-made seedling, but gardeners prefer the long and difficult path of growing apricots from seeds, and here’s why:
- such trees produce a higher and more stable fruit yield
- there is a possibility of choosing strong seedlings when sowing many seeds
- possibility of introducing a new variety
- the method does not require material costs
- You can grow an exclusive indoor plant.
How to select the right material for planting?
You should choose seeds suitable for sowing with full responsibility. Complete nucleoli are the key to good germination and growth. You should opt for slightly overripe, sweet and high-quality fruits, with well-separable pulp and a sweet-tasting kernel.
There should be no mold, rot, worms, etc. inside the fruit. Place the selected seeds in a container of water; some of them may float. These are empty bones that can be safely thrown away. Immersed in water, they are dried and stored in a dark place for a month.
After this period, they are again tested in a similar way to identify shrunken nucleoli that are unsuitable for planting.
Preparing apricot kernels for planting
You need to prepare a slightly larger number of seeds for planting than required, since not all of them will sprout. Planting material that has passed the soaking test is disinfected with a weak solution of manganese for about 14 hours, followed by ten days of soaking in warm water. Water needs daily change.
Next, the seeds are subjected to a cold hardening process, the so-called stratification, carried out before and after sowing.
Pre-sowing stratification involves placing the seeds in a plastic container and sprinkling them with moistened sand or sawdust or moss. The finished container is placed for 100 days in a cold place with a temperature of 0.+2 degrees.
This could be a basement, a refrigerator, etc. The bones need to be inspected periodically. If mold appears, treat with peroxide.
If stratification is not completely successful, they resort to emergency hardening, which consists of soaking the planting material in daily changing, ice-cold water for 4 days. Then the bones are moved into sand that is repeatedly frozen. Store the material at a temperature of about +4 degrees until planting. Thanks to this technique, it is possible to select the most viable seeds.
How to plant apricot kernels correctly?
To grow apricots in a pot, lay a layer of drainage on the bottom, then a soil mixture. Seeds are planted to a depth of 5 cm and watered regularly. Before sprouting, the pot can be covered with film with periodic ventilation. The flowerpot is kept in a bright and warm place, and in the summer it is placed outside. After a year, the seedling is ready for planting in open ground.
To harden the seeds naturally, they are planted in open ground in the fall. The seating area should be open, but without drafts. The seeds can be planted both in autumn and spring, in a garden bed, followed by replanting in a permanent place, or directly in a permanent place.
In the first year of life, the tree must be protected from rodents, who like to feast on the young thin bark of the tree, regularly and abundantly watered, fertilized, etc.
Grown seedlings from the first harvest of such trees produce an even stronger and more resilient generation, famous for its longevity. Apricot seeds bear fruit abundantly even in infertile soil. In spring, the tree blooms profusely and beautifully, after which it produces a lot of juicy and tasty fruits.
Growing several trees at once provides better pollination.
What to choose as a rootstock
The choice of rootstock is a decisive moment, since it is responsible for the further life of the seedling. Both wild and cultivated plants are chosen as a rootstock; the main thing here is the compatibility between the trees.
Rules for choosing a rootstock
The rootstock must be adapted to the climatic conditions of the area and have a developed root system: a weak root is not able to provide the scion with sufficient nutrition. You also need to know that a tree older than 7 years is no longer suitable as a rootstock, since the tissues become loose and lose their former elasticity, which interferes with survival. A dark brown, black tint of the woody composition indicates freezing, which is also not suitable for a rootstock.
Grafting apricot onto apricot (apricot)
Grafting apricot onto apricot is considered suitable, which is enhanced when similar varieties are combined. Ideally, they should be the same. This accelerates fruiting by 2-3 years: a grafted tree bears fruit already in 2-3 years, while a fresh seedling will bear fruit in 4-5 years.
You can also graft an apricot onto a seedling grown from the seed, since the seed propagation method does not provide for the transfer of maternal varietal qualities to a new plant. Grafting will give a young apricot the properties of any variety and improve its taste.
Grafting an apricot onto a plum
Tinting apricots for plums provides several advantages. The main one is an increase in frost resistance, which is important for the northern regions. The second positive aspect of such grafting is the acceleration of fruiting: grafted trees produce fruit within 2-3 years, while ungrafted trees produce fruit within 4-5 years. Plum and apricot are quite compatible, although worse than apricot and apricot.
Apricot grafting onto sloe
Blackthorn is often used as a rootstock, as it is hardy and quickly adapts to any climatic conditions. Another ability of the thorn is to absorb necessary substances from any, even poor soil. There are also disadvantages: the rapid development of roots impairs the access of nutrition to fresh sprouts, and subsequently to the fruits.
Grafting an apricot onto a peach
This option will only be effective in southern areas, since peaches are afraid of even slight drops in temperature. In warm climates, the budding method will allow you to achieve juicy fruits, but apricots on peach dry out quickly.
Are cherry plums and cherries suitable as rootstocks?
Cherry plum is suitable as a rootstock: the resulting tree will soon produce tasty, sweet and juicy fruits. In addition, the cherry plum will transfer its frost-resistant characteristics, and the new plant will be strong and hardy.
Some gardeners try to graft apricot onto cherry and immediately encounter certain difficulties. Not all cherry varieties are suitable as a rootstock, and professional skill is required to achieve this. If the outcome is favorable, cherries will greatly increase the yield of apricots, impart frost-resistant and drought-resistant qualities, and the fruits will be sweet and juicy. Beginning gardeners can be advised to take a plum grafted onto a cherry as a rootstock.
Apricot grafting onto dwarf rootstocks
Grafting an apricot using dwarf rootstocks results in a medium-sized tree, up to three meters. Popular dwarf rootstocks: Persimida, Eureka 99, Druzhba.
Which trees are not suitable for apricot grafting?
There are a number of trees that, despite numerous attempts by innovative breeders, have not yielded any results as a rootstock.
These are trees such as:
- Apple tree;
- pear;
- irga;
- cherries;
- Rowan.
Apple and pear are not suitable, as they are pome trees, while apricot is a stone fruit. Experiments with irga are also useless: despite its frost resistance, it is suitable for apple and pear trees, but not apricot. Rowan belongs to the plum family, but this fact does not in any way affect the success, and all grafting attempts remain unsuccessful. In rare cases of successful experiments, the apricot tree either dies over time or remains infertile.
Thus, having studied all the characteristics of potential rootstocks, we can conclude that plum, cherry plum and sloe will be suitable for this role. These trees are frost-resistant - this is the main thing to consider, given the climate of central Russia. These scions speed up fruiting, increase productivity and allow you to grow tasty, juicy fruits.
What can be grafted onto an apricot?
In turn, on an apricot seedling, in addition to other apricot varieties, you can successfully graft peach and plum.
Artificial stratification
This method is used in April. Initially, in January, the seeds are placed in boxes or pots with river sand. There must be drainage holes in the bottom. Experienced gardeners recommend digging such containers into frozen ground so that the seeds undergo natural stratification. An alternative option is a basement or refrigerator.
The main thing is that the temperature there is no higher than 2 degrees Celsius. Until April, it is necessary to control the moisture content of the sand and water it from time to time. In the spring, you can safely transplant the seedlings into trenches (depth 60 cm, step 3-4 meters) at the dacha. After each tree is in its place, it must be well filled with water - 10-15 liters for each seedling.
Objectively assessing the situation, the most reliable way to naturally select fruit-bearing trees is natural stratification.
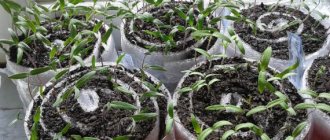
Sprouting seeds at home
Apricot seedlings obtained in greenhouse conditions sometimes do not survive after being moved to open areas. But if necessary, you can get a full-fledged tree at home.
The process of preparing seeds for planting in this case is no different from the standard version. You should also select high-quality specimens by soaking them in liquid, disinfecting them in potassium permanganate and keeping them in the cold for 3 months in containers with sand. During this time, small sprouts will emerge from the seeds. Then you can start planting the prepared specimens in pots.
Apricots need to choose deep containers because the plant has a tap root. You can take plastic bottles or other suitable containers. A thin layer of drainage is placed at the bottom of the pot, and the remaining space is filled with a mixture of humus and fertile soil.
For rapid growth, you cannot completely bury the seed in the ground. Only the hatched shoots need to be deepened, leaving the root collar at soil level. The plantings are slightly moistened with warm water and covered with glass. The mini-greenhouse is placed in a well-lit space. From time to time the glass is removed to provide a rush of fresh air.
When a full-fledged strong sprout appears, the glass is removed. The pot with the seedling is placed on the south side to ensure high-quality lighting and an air temperature of +25 degrees. You can transplant a grown specimen to the dacha after it reaches a height of 30 cm. You should first harden it by placing it on your face for a short time for several days.
Transplanting a seedling into the ground
Moving a home-grown specimen to a selected location is carried out in the usual way. This is done in the spring after warm weather has finally set in. To make it easier to remove the seedling from the pot, first moisten it well. After planting, the young tree is shaded for several days to facilitate its adaptation to the new site.
Be sure to install a bird fence in the form of a mesh.
Caring for small plants consists of timely watering. Fertilizing is carried out periodically in the form of small portions of humus and other organic fertilizers. At the beginning of their development, apricots often produce low side branches. They need to be cut off in time so that the crop is formed in the form of a tree and not a bush.
If you plant an apricot seed, will the tree bear fruit?
Fruiting apricot tree planted from a seed
In the summer, take seeds from tasty and large apricot varieties that bear fruit well in the area, wash them, dry them, and plant them in the fall at the end of October, beginning of November, after soaking them in water for about 20 minutes.
So, after all, if you plant an apricot seed, will the tree bear fruit? Here are some tips to help your tree grow beautifully:
- The seeds should be planted shallowly – from 1 to 5 cm.
- It is necessary to take several seeds, in case not all of them sprout, or the seedlings do not survive the winter in the second and subsequent winters.
- There is also a danger that the seeds will be carried away by rooks in the spring.
- Young seedlings should not be left out of sight, because they are very small. They can be broken by the wind or damaged by someone while cultivating the land. Fence the trees so that it is clear that a young seedling is growing in this place.
- It is best to plant the seed immediately in the place where the apricot tree is planned to grow, so that when transplanting to a new place you do not injure it again.
Experienced gardeners believe that a tree grown from a seed on its own becomes more unpretentious, gets sick less often and bears fruit longer. He develops immunity in a given climate zone.
It often happens that an excellent variety of tree produces fruits that do not retain the qualities of that variety. But a tree with larger and sweeter fruits can also grow if the seeds are not taken from wild animals.
A wild apricot will grow into a tree, most likely with small fruits. Therefore, harvest apricot kernels from fruits of good varieties, harvest and plant seedlings for yourself or for sale.
Good luck!
Is it possible to grow an apricot from a seed?
Apricot tree seedlings can be bought without problems in nurseries or ordered online. Manufacturers offer a variety of varieties, including those that are adapted to the average climatic zone and have suitable characteristics. But you can go the other way and try to grow a fruit-bearing tree from a small seed. However, it should be understood that this growing method has not only advantages, but also disadvantages.
Advantages of growing apricots from pits:
- The growing process is not expensive. You can plant a large number of seeds, choose the strongest and strongest seedlings;
- you can experiment in creating your own variety;
- the resulting seedlings will be unpretentious and adapted to local climatic conditions.
Disadvantages of growing apricots from seeds:
- trees grown in this way are susceptible to damage to the bark: cracks, burns, ring lesions;
- the resulting seedlings do not always inherit the qualities of the parent varieties, because the kernel retains the varietal characteristics of many generations in memory.
Parental qualities when planting an apricot kernel are rarely inherited, but unlike apple trees grown from seeds, the risk of getting a wild one is much lower
We can definitely say that the grown tree will be special, almost unique. Perhaps it will surpass the parent in taste and size of the fruit, and it may turn out to be wild. But this will only be known in a few years, when the apricot grown from the seed produces its first harvest.
Planting an apricot seed
Apricot orchards are now grown not only in the southern regions. They can be found in the Central and Ural regions, Khakassia and Eastern Siberia. It is trees grown from seeds that survive and bear fruit well in difficult weather conditions and withstand severe frosts and heat.
An important condition is the use of seeds from the first harvest of the zoned variety. Only they can produce the most adapted and adapted offspring.
Preparation of planting material
Apricot seeds - pits - must be prepared for planting. Preparation is organized as follows:
- Select a slightly overripe fruit of a zoned variety with easily separated pulp and remove the stone from it.
- The seed is washed, dried in the shade and left in a dry, ventilated place until frost sets in. It is at this time that the seed needs to be planted. In winter, while in the ground, the apricot seed will undergo natural stratification.
For planting, apricot kernels should be taken from well-ripened fruits with easily separated pulp.
If the seed is not planted in the ground at the very beginning of the onset of cold weather, then stratification can be done differently:
- Wet sand is poured into a container with drainage holes.
- Apricot seeds are placed in the prepared grooves. Sprinkle them with soil.
- The container is placed in a room with a temperature of about +2 °C. This could be a basement or cellar. It is necessary to ensure that the sand is constantly moist. The container can also be left outside by placing it in a small trench and covering it with snow.
Stratification of apricot seeds can be done at home by placing a container with seeds in the refrigerator or cellar
If you got apricot seeds at the very beginning of spring, then they need to be soaked in melt water for three days. The floating seeds are thrown away. The water needs to be changed periodically to prevent it from souring.
A mixture of sawdust and river sand is poured into the container, into which the soaked seeds are placed. The box is kept on the bottom shelf of the refrigerator, placed in the freezer for a short time every day to freeze.
Video: stratification of apricots and other stone fruits in the refrigerator
Planting apricot seeds
Autumn planting is carried out during the first frost. Earlier planting is dangerous because apricot kernels are loved by rodents, so they will take the seeds from the garden or damage them. The planting site should be open with sufficient sunlight. Apricot seeds are planted as follows:
- Dig a shallow trench (about the size of a spade bayonet).
- It is filled with a soil mixture, which includes humus, straw, fertile soil and a little sand. Such soil will provide the plantings with good breathability and nutritional value.
- The crops are thickened because some of the seeds will not sprout, will die, and will be eaten by rodents and birds.
- The seeds are sprinkled with the same mixture on top.
When planting apricot seeds in open ground, the crops should be thickened, as some of the seeds will die, will not sprout, and will be eaten by birds
There are several opinions regarding the depth of planting seeds. Traditionally, it is proposed to deepen them by 5–6 cm. According to other gardeners, only surface planting creates comfortable conditions for the seeds, so the layer of powder should be no more than 1 cm. Such planting will create additional stressful situations for the seeds:
- they will be more susceptible to frost;
- may suffer from provocative thaws;
- It is easier for mice and birds to reach shallowly planted seeds.
When planted shallowly, natural selection occurs - weak seeds die. But the survivors will produce seedlings that are not afraid of severe cold weather and temperature changes, and will be strong and strong.
Apricot seedlings do not like transplanting. They slow down their development and delay the start of fruiting by at least a year.
Given this feature, it is recommended to plant the apricot pit immediately in a permanent place:
- The hole for planting should be shallow and round in shape.
- It is filled with nutritious soil mixture, as when planting in furrows.
- Several seeds are laid out along the edges and covered with soil.
- In the next season, the strongest shoots are selected from the sprouted shoots, and the rest are removed or replanted.
How to graft an apricot correctly
In order for the grafting to be successful, in addition to the scion, rootstock and desire, you also need the right tools. Usually the gardener has everything for this, and it is not at all necessary to purchase any specialized knives. But what is already there must work properly and be well sharpened. Yes, it is more convenient to work with a special grafting tool, but an ordinary pocket knife with a blade length of 5–6 cm in skillful hands will do the job just as well. And even in the case of budding, you can get by with them, although it is more convenient and faster to graft with a special budding knife. But if you are good at using a sharpening wheel, then it is not difficult to make something like a grafting knife from any knife: to do this, the blade must be made almost straight, and the sharpening must be done only on one side (it is easier to make even cuts on branches with such sharpening).
Grafting knives differ from ordinary penknives; they are more convenient to use, but this is an optional accessory
To cut cuttings and prepare the rootstock, you need a regular garden pruner, which must be prepared in advance for the season: cleaned, sharpened, and lubricated. We will also need garden pitch and what we will use to wrap the grafting site. Nowadays even special vaccination tapes are produced. But you can also use any plastic film cut into tape. In amateur gardens, ordinary electrical tape is often used to wrap grafts. You just need to use it with the adhesive side out so that it doesn’t stick to the branches and tear off the skin from them.
To cut cuttings and prepare the rootstock you will need a grafting knife, garden pruning shears, grafting tape, and garden pitch.
If the seedling is not tall, apricots are planted close to the soil surface - about 30 cm. For older trees, the distance is greater - up to a meter. Unlike other fruit trees, apricot cannot be grafted close to the soil. The higher the remaining section of the frost-resistant rootstock, the higher the guarantee that it will not allow the apricot scion to freeze in the harsh winter, which often comes after thaws that are so unpleasant for apricots.
Performing vaccinations is a simple process, but if you have never done it, you first need to study at least the most accessible literature on this issue. And then practice on unnecessary growth. Two or three spoiled cuttings - and it will start to work!
When and what is better to graft an apricot: with autumn or freshly cut cuttings
Apricot grafting in spring is the most reliable. In spring, juices flow through the trees especially quickly, which allows the scion to grow well with the rootstock. For apricots in most regions, the deadline for vaccinations begins in early April and lasts two to three weeks. Of course, the timing depends on both the local climate and the weather of a particular year: after vaccination, severe frosts should no longer return.
You need to prepare for spring grafting in the fall: late autumn is the best time to prepare cuttings. They are cut from healthy shoots of the current year, the correct color for the variety, with good elasticity, with well-developed buds. The shoots must have a thickness of at least 5 mm. In the fall you need to cut them with a reserve: 25–30 cm long, in the spring we will cut off the excess. All winter, the cuttings are stored in a cold, damp place (cellar, basement, refrigerator), preferably in damp sand, peat or sawdust.
One-year apricot shoots with well-developed buds are taken for cuttings, cutting them off in late autumn
If you didn’t have time to get vaccinated in the spring, it doesn’t matter. There is still about a month, that is, you need to wait until the flower petals fall on the apricot from which you decided to take cuttings, the vegetative (leaf) buds bloom and new shoots begin to grow. Apricot grafting with fresh cuttings is carried out from late May to mid-June:
- Choose strong new shoots: ultimately, cuttings with 3-4 buds will be needed.
- Selected shoots are cut off with pruning shears so as to capture a small part of last year's woody growth.
- The apical bud is simply removed, and if the tip is weak and was cut off with pruning shears, the cut of the cutting is covered with garden varnish.
- Some experienced gardeners temporarily wrap the cuttings in a damp cloth soaked in agave juice: it is believed that it contains growth stimulants.
Further technology depends on the chosen grafting method. Apricots can be grafted with fresh cuttings only where the summer is long so that the grafting has time to take root.
Video: preparing cuttings for spring grafting
How to plant an apricot seed correctly
Before planting an apricot pit in the soil, it must be hardened at low temperatures. This process of stratification of planting material is combined with germination of seeds, as a result of which they are ready for planting in the ground in 3–3.5 months.
Did you know? Humanity has been enjoying apricots, using not only its gastronomic qualities, but also its medicinal ones, for at least 4 thousand years.
Seed stratification
To prepare for planting, use the freshest seeds possible, just removed from the pulp. After checking with water, the bones that have sunk to the bottom are removed and stratified in one of 2 ways:
- Place them in a thick paper bag or in a plastic container with ventilation holes, sprinkle with damp sand and keep at a temperature not exceeding +3°C. The planting material is periodically inspected and if fungal microflora appears on it, it is treated with hydrogen peroxide.
- The second method is to place the seed material under a 5-centimeter layer of sand, located in a container wrapped in plastic film, in which small ventilation holes are made. The optimal stratification temperature is +2°C.
It is better not to bury sprouted apricot pits in the ground, so as not to provoke further rotting of the root collar
Landing in the ground
Stratified and germinated seeds are planted in the substrate as follows:
- The container is filled with substrate so that after compaction there remains 2 cm to the edges.
- The sprouted seeds are placed on the surface of the substrate with the root down. In this case, only the root is covered with earth to avoid rotting of the root collar.
- The substrate is moistened, and the container with the seedling is covered with film to create a greenhouse effect and placed in a shaded place.
- The film is periodically lifted to remove condensation from it and for ventilation.
- When the first sprouts appear, the film is removed, and the containers with them are placed in a warm place under bright light.
- The optimal temperature for the growth of apricot sprouts is +23…+26°C.
- Water them as the top layer of the substrate dries.
Care after planting a seedling
Regardless of the culture, replanting is a considerable stress for the plant. That is why you should pay considerable attention to the seedlings, ensure timely watering, adding nutrients, and pruning. Inspect the trees regularly, checking for pests - insects can destroy young plants.
Protection from pests and diseases
The easiest way to protect plants is to take preventive measures in a timely manner. Regularly remove dry, damaged or diseased branches and collect insects. It is imperative to carry out preventive spraying of seedlings with Bordeaux mixture and copper sulfate. It is recommended not to forget about whitewashing with slaked lime.
Loosen the soil at least once a month; weeds take a lot of useful substances from the soil, which will immediately affect the growth and development of the crop.
Formation of trees
Like most fruit crops, apricot requires crown formation. It is recommended to start pruning 1-2 years after planting in a permanent place. The main trunk is usually shortened, the distance from the ground surface to the cut point is 75-80 cm.
After the crown is formed, the skeletal shoots are pruned. Leave the central branch, shortening it by about a third. Also regularly remove shoots growing from one point - it is recommended to leave only 1-2 branches.
Fertilizer
At first, the apricot needs enough nutritional components that are added during planting. If the soil mixture has not been used, it is recommended to apply mulch (mix compost with superphosphate and potash fertilizers). To improve flowering and more active fruiting, it is recommended to spray with a nitrogen composition in the fall. Prepare the solution at the rate of 100 g of nitrogen fertilizers per 10 liters of water.
See also
When and how to use devices for picking apricots from a tall tree with your own handsRead
Watering
Water apricots in dry weather, but not too often - the trees are afraid of waterlogging. The norm per seedling is up to 10 liters of liquid. It is recommended to loosen the soil first, this will allow moisture to penetrate to a greater depth.
Particular attention should be paid to watering three times - at the time of flowering, when the ovary appears, two weeks before the apricots ripen. Use only warm liquid, kept for several hours under the sun.
Apricot care in winter
The apricot root system can withstand even severe frosts, but it is better to insulate young trees for the winter. This is easy to do - build a small hut of branches around the trunk, wrap it in film, and put spruce branches. It is easier to protect older trees from frost - just wrap the main trunk with burlap or straw. Cover the tree trunk area with a thick layer of mulch and cover it with snow in winter.
Important Tips
It is useless to buy material for removing seeds at the supermarket. It is advisable to pick ripe apricots from the tree and buy them at the farmers market. The fruit must be beautiful, ripe, and free from external defects. If the apricot is rotten or cracked, it is no longer suitable for planting. The pit should easily come away from the pulp.
When planting, it is better to choose several seeds from different varieties. There is always a risk that the seed will not germinate, and the time for subsequent planting will be missed. Seeds have the highest germination rate in the first year after harvest, then the chance of germination decreases sharply. It is impossible to germinate three-year-old planting material. The plants retain minimal maternal qualities, so they are grafted. Even a novice gardener can cope with seed germination.
Previous ApricotHow to prune an apricot correctly and when Next ApricotApricot cultivation and care in open ground
Specifics of growing in open ground
It is difficult to grow a fruit tree from seeds in open ground. Frosts, lack of moisture, rodents will reduce all efforts to zero. Initially, prepare the soil and dig a hole up to fifteen centimeters deep. Place rotted manure, ash and 1 tablespoon of urea. After planting, the area is covered with fallen leaves.
At the dacha, planting is carried out in the same order. Between the holes leave a distance of up to half a meter. If shoots appear in the spring, then everything went well. This is followed by careful care of the young plant.
Soil and site preparation
In the fall, the soil is fertilized and fertilizing is applied. Check the area for acidity. Add mineral and organic fertilizers. Prepare a hole with a depth of ten to fifteen centimeters.
Expert opinion
Stanislav Pavlovich
Gardener with 17 years of experience and our expert
Ask a Question
Important! The planting location can be anywhere, as it will be possible to transplant the seedling.
In the soil, the plant will have to withstand the upcoming cold and frost. Therefore, it is important to carry out this stage correctly. The place is covered with fallen leaves. During frosts, it is permissible to cover with plastic wrap.
Timing and patterns for planting seeds
The seeds are selected before planting. They are placed in water for twenty-four hours. You can plant those that did not float. The seeds are buried in prepared trenches at a distance of fifty centimeters.
See also: Grafting apricot with green cuttings onto plum and cherry
It is permissible to plant in wooden boxes with further transplantation into the ground. But in open soil, the future apricot hardens. In adulthood, the plant will be more resistant. It can be planted in autumn, spring and even winter at the end of January. In the middle zone, preference is given to autumn planting.
Transplanting a young seedling to a new place
Choose an unshaded area. In the shade, the fruits will not be able to ripen, the yield will suffer, and the growth of the tree will be poor. Prepare a hole into which black soil, humus, and organic matter are poured. In the first year, pruning is required. The soil around the trunk is mulched.
Tree care
Watering
Remember that apricot loves air, and excess moisture will interfere with its flow to the roots. Do not water the tree too often or abundantly.
There are certain watering times:
- the first - before or during flowering;
- the second - during the period of shoot growth in May;
- the third - in early July before the fruits ripen;
- fourth - autumn watering before wintering, 6 buckets of water per square meter of tree trunk circle.
Fertilizers
After the fruits appear on the tree, you can add organic fertilizers when watering, for example, bird droppings in a ratio of 1:10. Four years after planting, add two buckets of manure and increase the dose by one bucket each year.
Crown formation
Already from the first year in March, it is necessary to remove frozen branches and shoots that are too long and developed. The crown of the tree should not be too thick. Treat the cut area with garden varnish or drying oil. Around the fifth year, the tree will begin to bear fruit, and the load on the branches will increase. To avoid their fractures, supports are placed under each branch.
Depending on the type of tree you want to shape, choose one of two types of crown pruning:
- cup-shaped;
- without tier.
The cup-shaped crown will form a compact tree with short branches
Apricot is a very powerful and branchy tree; do not be afraid to overdo it when forming its crown. Remember that the fruits are set on shoots up to 25 cm long, located on the side branches, which means that for an annual abundant harvest it is necessary to carry out a strong increase in the branches of the crown, and trim the growth branches as much as possible.
Tiered crown: the tree becomes spreading, the load on the branches increases, supports are needed during fruiting
In spring and autumn, from the first year, whitewash the trunk and main branches, use lime with the addition of copper sulfate. Carefully treat cracks in the tree with garden varnish or kuzbaslak.
Winter care
Before wintering, immediately after fruiting, be sure to whitewash all trees, this will help avoid damage from pests.
Build a frame from wooden slats, cover it with plastic film, and cover the bottom edge with earth. Remove the structure at the end of March. If the tree is already large, then wrap the trunk with burlap and sprinkle the area near the trunk with snow.
Growing an apricot from a seed is a labor-intensive process and requires constant attention to the plant, especially in the first years of its life. But, having received a rich harvest and ripe, tasty fruits, you will understand that your labors were not in vain.
Is it necessary to graft such an apricot?
Special trees are distinguished by the fact that they do not take on maternal qualities. So, from a sweet large-fruited apricot a tree can grow that produces other fruits. A fruit tree can be grafted with another variety. If several varieties are grafted into the crown, the yield will increase sharply.
Expert opinion
Stanislav Pavlovich
Gardener with 17 years of experience and our expert
Ask a Question
Important! You should remember about the load on the branches; during fruiting, you should not allow them to droop too much.
For grafting, local varieties are selected that are liked by taste, aroma, and consumer qualities. It is advisable to give preference to self-pollinating crops. It is important to provide the grafted plant with preventive treatment and timely feeding.
Rules for planting apricots using pits
In order to grow strong seedlings, it is necessary to follow all the rules at every stage of planting - from preparing the initial planting material to caring for the grown tree.
Timing for planting seeds:
- Seeds need to be planted within a certain period of time. The best time for sowing is April in spring or October in autumn;
- It is better to plant in the middle of the sowing season. This is necessary so that the earth has time to warm up a little after winter;
- Sometimes the seeds are planted during the period of fruit ripening. But many gardeners have reason to claim that such experiments are almost immediately doomed to failure. If you plant in the middle of summer, then there will be too little time left for the formation of seedlings and their preparation for the upcoming cold snap.
Preparation of planting material
In order to grow an apricot tree from a seed, you need to choose the sweetest and sometimes even slightly overripe fruits. You need to remove the seeds from them. The main rule is that the pulp should be well separated from the stone. This will indicate that the planting material is ready;
You should try to collect as many seeds as possible. Usually, not all of them will be able to germinate and produce high-quality seedlings;
Immediately before planting, it is necessary to prepare the material. To do this, the bones are washed and filled with water. Those that subsequently float can be thrown away, as they will not sprout;
Those seeds that remain at the bottom of the container must be disinfected by placing them in a weak solution of potassium permanganate. This is done in order to save future sprouts from having to fight infections;
After the procedures, it is necessary to harden the seeds at low temperatures. To do this, they are wrapped in paper or cotton cloth and placed in the refrigerator or basement for up to three months. This step will allow the seeds to quickly adapt to soil temperatures in the spring.
This technology for preparing planting material allows you to sort out the strongest seeds. They will be able to sprout well and subsequently grow into large apricot trees.
Features of planting apricot kernels
In order to successfully grow apricot trees from seeds, several basic rules have been developed - these are:
For natural hardening, prepared seeds are best planted in the fall directly into open ground. There is no need to create seed at home; seeds do not require pots or greenhouse conditions to ensure germination. Those seedlings that many gardeners grow in apartments, after transplanting into open ground, encounter so many obstacles that they simply cannot cope and die in the first year of life;
It is important to choose the right place for planting. This should be a well-lit area, but at the same time it is better if it is hidden from wind and drafts; The seeds must be planted in shallow trenches;
The seeds must be planted in shallow trenches;
The soil should be light, it is best if it contains sand and humus;
When the seedlings appear in the spring, they need to be watered;
Later, the grown seedlings are transplanted to a permanent place, where they will grow for the rest of their lives and turn into large beautiful trees.
Variety selection
The ideal result of growing apricots from stones is obtained if the stone comes from local fruit varieties. If you take planting material from apricot varieties grown to the south, the result is most often disastrous. It is preferable for middle latitudes to use frost-resistant zoned apricot varieties bred for cultivation in the Urals, Southern Siberia and the Far East. They are guaranteed to grow successfully and produce a good harvest in the middle zone.
The varieties that are best suited for this are:
- Kichiginsky;
- Peach;
- Northern Triumph;
- Chelyabinsk early;
- Manchurian;
- Lel;
- Khabarovsky.
Important! You should not try to grow an apricot tree from seeds obtained from large and juicy imported fruits. Growing seedlings from them in our area will require a lot of effort, which in most cases will end in failure.