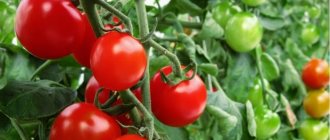
Climatic features of the region
In order to harvest good harvests every year, the agroclimatic conditions of the Urals should be taken into account. They vary greatly in different parts of the region. The southern regions are characterized by relatively warm (about 20 °C), long (4-5 months) summers, and the absence of arctic wind. The latter, subject to the irrigation regime, makes it possible to grow fruit-bearing plants even in the open air.
In the northern part of the region, summer is much shorter (no more than 60 days). The average daily temperature in the warm season rarely rises above 15-16 °C, and in the polar regions the maximum level that the mercury reaches is 8 °C. In such conditions, it is difficult to cultivate pepper even in protected soil due to a lack of lighting.
The best pepper varieties for Siberia and the Urals
When choosing seed material for vegetable crops, preference is given to cold-resistant, shade-tolerant selection achievements with a short period of fruit ripening. In the agroclimatic conditions of Siberia and the Urals, vegetable growers value perthenocarpic varieties that do not require the participation of bees in pollination. This is due to the predominance of cloudy weather, during which insect activity is minimal.
For greenhouses
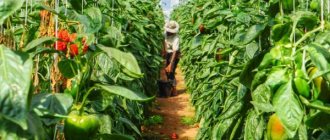
If a vegetable grower plans to grow peppers indoors, you should choose varieties designed for this purpose. They have higher yields and genetic immunity to diseases common in greenhouse conditions. At the same time, in the open air, plants bred for protected soil may not produce a harvest at all.
"Yellow Bull F1"
Large-fruited hybrid of the first generation. On medium-sized plants, glossy fruits ripen on the 110-120th day after emergence. During the development period they are green, but when they reach biological ripeness they acquire a characteristic golden hue. The pulp is juicy and thick – the walls are up to 10 mm. The vegetable has the shape of a truncated cone with three to four clearly defined edges and a depressed stalk.
For your information!
The fruits are valued for their long shelf life, during which they do not lose their juiciness, taste and marketability.
"Cockatoo F1"
It is recommended to plant seedlings of mid-season hybrids in glazed structures. If agrotechnical requirements are met, fruits begin to be harvested 130 days after the sprouts appear. The harvest ripens on the shoots of tall plants with medium foliage. During biological ripeness, the pods acquire an elongated shape and a bright red color. Universal application.
"Casablanca F1"
An early-ripening hybrid that reaches technical ripeness 95-100 days from germination. Recommended for growing in film and polycarbonate greenhouses. Bell pepper is part of the “Northern Spain” variety series, distinguished by its large fruit, rich color and taste. The return of the pods from Casablanca is friendly. The cube-shaped fruits have juicy pulp. Wall thickness – 6-8 mm.
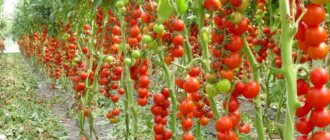
Varieties for unprotected soil
In the southern regions of the region, it is permissible to plant pepper seedlings in open ground. Despite the slower development and not so high yield, the plants are stress-resistant and have excellent immunity to fungal and viral diseases. In addition, fruits ripened in the sun in the garden without additional shelter have a richer taste and aroma.
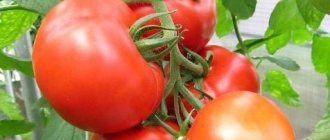
"Novosibirsk"
The regionalization of the variety is due to its creation. It was bred at the West Siberian Vegetable Experimental Station as a representative of the nightshade crop, tolerant to adverse factors. Novosibirsk pepper produces prism-shaped fruits on short, compact bushes, which when biologically ripe acquire a red color. The weight of the commercial pod is 120-150 g.
"Veselinka"
Another domestic variety of Siberian selection, which is represented by semi-spreading bushes of medium height. The yellow fruits are covered with a thin skin, which gives them a glossy hue. Wall thickness – 6-7 mm. The marketable fruit weighs no more than 85 g, which determines the low yield of the variety - 3 kg/m2. Universal purpose: good both fresh and for preservation as a whole.
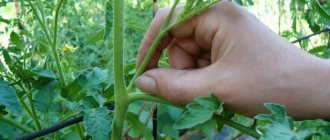
Forming pepper bushes
Formation is very important when growing medium-sized and tall pepper plants, because the harvest itself will depend on this. After cutting off a few leaves on the trunk of the plant, approximately 3 side shoots will sprout. From these, two strong shoots should be selected, which will be the skeleton of the plant, and weak shoots should be pinched onto one leaf.
After the shoots begin to branch, you need to choose the strongest shoot, and it will be the main shoot. Weaker shoots should be pinched behind the first leaf, leaving one fruit.
Moreover, every couple of days it is necessary to cut off the leaves, side shoots and fruitless shoots that are located below the branching of the main stem. It is extremely important to carefully tie each branch of medium- and tall-growing plants, because they are fragile and break easily.
Although growing peppers entails many difficulties, the results are worth it. After all, today there are many dishes that use pepper, which will add variety to your table. It can be used fresh, canned or frozen. Grow peppers using this technology and get an excellent harvest.
Cultivation rules
The harsh climate of the Urals is not a reason to abandon the cultivation of pepper. To harvest a rich harvest, experienced vegetable growers follow the following agrotechnical rules:
- In short summer conditions, seed material of early ripening or mid-early varieties is purchased.
- Vegetable crops are cultivated using seedlings.
- The timing of sowing seeds and planting pepper seedlings in the Urals is observed.
- Driven and strong seedlings are initially planted in protected soil, from where, after acclimatization, they are transplanted into beds (if cultivation in open ground is planned).
When purchasing seeds, in addition to the short ripening period, the cold resistance and shade tolerance of the variety are taken into account, since the Urals are characterized by low night temperatures to critical values (2-5 °C). On hybrid plants, the ovary is formed more intensively, which also shortens the period of reaching technical ripeness. For rapid germination and growth of green mass, the seed material is treated with growth stimulants before insertion into the ground.
Growing rules
To prevent plants cultivated on Ural soil from dying, it is necessary to follow basic agrotechnical rules. They are:
- To sow bell pepper in the Urals, it is correct to take early-ripening or mid-ripening hybrid varieties. This is due to the fact that they are frost-resistant. Ovaries are most actively formed on hybrids.
- The crop can grow only if it is planted with seedlings.
- It is important to observe the timing of planting pepper crops on seedling material.
- The finished seedling material must be planted in a greenhouse. This guarantees comfort for cultivating crops in any weather.
Note!
Experienced gardeners treat with growth and development stimulants.
Growing seedlings and preparing seeds
Planting bell peppers in the Urals begins with the preparation of full-fledged seedling material. The timing of sowing seeds depends on which varietal species the vegetable grower chose for planting. The growing season lasts more than 100 days. Seedlings in the Urals should be sown after February 15th.
Experts advise sowing only hybrid peppers on seedlings in the Urals. Mid-season varieties of peppers are also perfect:
- Atlant.
- Bogatyr.
- Alesha Popovich.
- Player.
Such varieties do not require treatment to protect against infection. Before sowing, purchased seeds must be soaked in stimulating compounds. The following drugs performed quite well:
- Mival Agro.
- Ecogel.
- Emistim.
This will increase the degree of emergence of sprouts and speed up the process of forming a full-fledged rhizome.
Soil for seedlings and temperature
Bell peppers do not like replanting. To reduce the stress of moving to a new place, you need to sow seedlings in light and loose soil. A special hydrogel must be added to the selected substrate. This way the pepper will be protected from excess or deficiency of moisture.
Throughout the entire period of seed germination, it is necessary to maintain a temperature of 24-26°C. The first shoots will sprout after ten days. If the indicator is at 20-24°C, then the sprouts will hatch no earlier than in 2 weeks. When it is not possible to maintain the temperature in the house at the required level, it is better to build a small greenhouse.
First shoots and transplantation
After the seeds are planted and the sprouts have sprouted, the temperature during the day is maintained at 24°C. At night 16-18°C is suitable. Sprouts require full lighting. Daylight should last 12-14 hours. To do this, the room must be equipped with additional lamps.
When 3 true leaves appear on the sprouts, the peppers need to be replanted. To do this, it is important to prepare separate pots for each sprout. Plant seedlings must be planted in fertile soil. You can treat it with hydrogel.
On a note!
The hydrogel must be soaked in a solution of mineral fertilizers.
Watering and fertilizers
Water the seedlings in the morning or evening with exceptionally warm water, the temperature of which is approximately the same as the ground. You cannot irrigate plants on the foliage and stem part, only under the rhizome. When the peppers ripen, watering is reduced, once every 3-4 days. In general, you need to watch the seedlings; if the foliage begins to fade, then there is not enough water.
After transplanting the seedlings, it is important to feed the plants:
- The crop is fed for the first time a week and a half after the dive.
- The break between fertilizers is 7 days.
For feeding at this time, it is correct to use store-bought complex formulations. They contain all macro- and microelements. Experienced gardeners recommend Kemira Lux.
The process of acclimating seedlings to natural growing conditions begins after the 15th of March. Before planting in a permanent place, you should take the pots with sprouts out onto a glazed balcony.
Preparing warm beds
It is necessary to grow in warm beds. For feeding, slurry is used together with straw and leaves, tops, and other organic parts of plants. You need to work step by step:
- The beds are covered with PE. This accelerates the process of soil warming.
- Organic fertilizers are scattered over the beds and watered generously with a warm urea solution. It is made at the rate of 1 tbsp. l. with a slide of dry fertilizer on a bucket of water.
- The beds are again covered with PE and left for 5-7 days.
Soil enriched with minerals and ash is poured on top of the organic matter. Soil layer – 100 mm.
They begin to transfer seedlings to the greenhouse in the last ten days of May. At this time, buds have already formed on the sprouts. The seedlings need to be watered heavily. Then carefully remove from the pot and plant in the prepared holes. You can't deepen the seedlings.
When planting seedlings in a permanent place, it is important to follow the planting scheme:
- Tall plants are planted at an interval of 450 mm from each other.
- The distance between rows is 700 mm.
- Low-growing hybrid varieties are planted at intervals of 350-400 mm.
- Between rows maintain 700 mm.
Growing seedlings and caring for seedlings
Since pepper seeds germinate slowly, sowing begins at the end of winter. A shallow box or peat pots are used as a container for seedlings. In the first case, after the seedlings have formed 3-4 true leaves, they are picked. The containers are filled with fertile, light soil, which is prepared from peat, compost and vermiculite in a ratio of 2: 2: 1. For disinfection, the substrate is spilled with a manganese solution.
Seed material is prepared for planting by undergoing stratification. First, the seeds are soaked in a slightly salted solution of warm water to discard non-germinating specimens that will remain floating on the surface. Then they are washed and sent for disinfection in a working fluid with the addition of manganese. Next, the seeds are placed in the refrigerator in the vegetable compartment - stratified. To ensure rapid emergence of seedlings, seeds are germinated in damp cloth before sowing. After swelling, they are dried and embedded in the soil to a depth of 1 cm. The crops are placed on the windowsill and covered with glass, systematically removing it for ventilation and moistening.
When the seedlings appear, the protection is removed. To prevent them from stretching out, additional illumination is provided using phyto- or fluorescent lamps. The first feeding is carried out after picking the seedlings, and when grown in peat pots - two weeks before planting in the beds. A urea solution is used, which is applied using a spray bottle, spraying the crops. As the substrate dries, the seedlings are watered with warm, settled water.
For your information!
To prevent the development of blackleg or other fungal disease caused by stagnation of moisture in the roots, a drainage layer and holes are arranged in the seedling container.
Planting pepper seedlings
Soil preparation
To plant sweet pepper seedlings, you need to prepare the correct soil mixture. It should be airy, light, nutritious, not sour, with pH 6-6.5.
See also: Planting apple trees in the fall in 2021 according to the lunar calendar: favorable days
You can purchase universal soil in the store; it will contain everything you need for the growth of healthy seedlings. In addition, such soil has already been treated against diseases and pests.
However, some gardeners do not trust store-bought mixtures and prefer to make their own “ideal” soil. Why not? Try it too. Here are some recipes for effective soil mixtures for growing pepper seedlings:
Composition No. 1:
- 3 hours - peat;
- 2 hours - humus;
- 1 hour - turf land;
- 1 hour - sand.
Composition No. 2:
- 1 hour - leaf soil;
- 1 hour - peat;
- 1 hour - sand.
Composition No. 3:
- 2 hours - humus;
- 2 hours - peat;
- 1 hour - sand.
Having mixed all the necessary components, you should carry out some manipulations to disinfect and enrich them. Nothing complicated:
- The finished soil mixture is steamed (70-80°C), calcined (70-90°C) or frozen (at 15-20 degrees below zero) to destroy pests and their eggs.
- Spray with an antifungal drug (Fitosporin-M, Maxim, dark pink solution of potassium permanganate 0.5%, copper sulfate solution).
- Add fertilizer: 10 liters. bucket of mixture - 1 cup (250 ml) wood ash, 1 tbsp. l. superphosphate, 1 tsp. urea, 2-3 glasses of vermicompost.
- To improve the quality of the soil, disintegrants (perlite, vermiculite) and hydrogel are added to it - it will retain moisture longer. The hydrogel is added already swollen.
Preparing pepper seeds for sowing seedlings
Seeds are sold coated and plain. Dried seeds do not require any preparation. They are covered with a capsule, which contains growth stimulants, microelements, and when soaked, the capsule dissolves.
All other seeds (especially those collected independently) require pre-sowing preparation, which includes several stages:
- seeds are sorted out, darkened, damaged, and empty ones are removed.
- soak the seeds in a 3% salt solution, mix and wait 7-10 minutes. Those that float are removed, and the heavy ones that settle to the bottom are washed and dried.
- treat the seeds with a fungicide (Fitosporin, Fitolavin, Maxim, etc.) or soak them in a 1% solution of potassium permanganate for 20 minutes. Then they are washed and dried. This treatment will reduce the risk of fungal diseases occurring on seedlings.
- It is useful to soak the seeds in a growth stimulator (Epin - 1-2 drops per 100 ml of water, Zircon - 1 drop per 300 ml of water) for 4-8 hours. Good results are obtained by soaking in a solution of aloe juice for 20 minutes. (100 ml water and 0.5 tsp aloe juice).
For faster germination, prepared seeds are germinated in a damp cloth in a warm place, not allowing them to dry out. On days 5-14, the seeds hatch. It is important not to miss this moment, since the root of peppers is very delicate and fragile and easily breaks with any manipulation.
Although this pre-germination stage is not necessary. You can immediately plant sweet pepper seeds as seedlings in the ground, as with regular sowing.
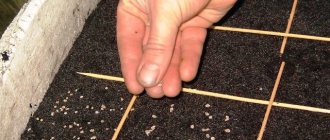
Sowing pepper seeds
Pepper seedlings take a very long and painful time to recover after picking, so it is advisable to sow the seeds in a separate container. Cups, small pots with a diameter of 10 cm, and plastic cassettes are suitable for this. As a last resort, use spacious boxes 6-8 cm deep, so that later it is easier to dive the sprouts into separate glasses with a large lump of earth.
Before sowing, all containers are washed and pickled with a dark pink solution of potassium permanganate.
1. Planting pepper seedlings in separate glasses and cassettes
The containers are filled with nutritious soil, lightly compacted, a depression of 0.5-1 cm is made and 2 seeds are placed there (when germinated, a stronger plant is left), sprinkled with soil, and watered.
2. Sowing in boxes
A drainage layer of 1-2 cm is placed at the bottom. The box is filled with soil mixture, not filling 2 cm to the edge (so that water does not spill when watering). Tamp down a little. Then grooves are made every 4-5 cm, 0.5-1 cm deep. The pepper seeds are laid out with tweezers at a distance of 2-3 cm, sprinkled with soil, compacted and carefully watered.
See also: Planting boxwood in 2021 according to the lunar calendar: favorable days
Sowing seeds in boxes is the least preferred option. Picking with such sowing is the most traumatic
3. Peat tablets
A good option for seedling “containers”, it is very convenient to sow peppers in them for seedlings at home, since the stage of traumatic picking is eliminated.
For sowing, the tablets are laid out in a tray, filled with water to swell, and excess water is drained. Seeds are placed in the hole in the middle of the tablet, sprinkled with soil and covered with film or a lid. They set it for germination. When the seedlings have 2-4 leaves and the roots have completely grown through the mesh, they are transplanted into separate pots. To do this, transfer the tablet into a cup and add soil.
All containers (glasses, cassettes, boxes) are covered with transparent film or glass and placed in a warm place for germination. Germination temperature 25-30°C.
The germination time depends on the temperature:
- t 28-32°C - shoots on about 4-7 days,
- t 26-28°C - shoots on the 14th day,
- t 21-22°C - shoots on 20-21 days.
At lower temperatures and above 40°C, the pepper will not sprout at all.
After the first shoots appear, the film is removed and the seedlings are placed in a bright place, avoiding direct sunlight. During the first week, t is reduced to 15-17°C for the formation of the root system. Then warming is necessary again: during the day - 22-25 °C, at night - 18-20 °C.
Preparing warm beds
The area for peppers is prepared in advance. In the garden, select a sunny area, protected from cold winds, where legumes, cruciferous or pumpkin crops previously grew. Nightshades are bad predecessors for peppers. In the greenhouse, the soil is enriched with complex mineral fertilizers, laying them in granular form during digging.
Both in open and protected ground in the Urals, warm beds with a width of 70 cm are prepared in the fall, using rotted manure as “biofuel”. Row spacing – 80 cm. Basic steps:
- Remove a half-meter layer of soil.
- A 20 cm layer of drainage material is placed at the bottom, which is covered with manure (thickness - 30-40 cm).
- The removed soil is returned from above.
Disembarkation nuances
To get a good pepper harvest in the Urals, they systematically care for the seedlings and determine planting dates, following the rules. The suitable period depends not only on the growing conditions (protected or open ground), but also on the stage of development of the seedlings and their hardening. Picking too early can lead to the death of planted plants, and picking too late can lead to a lack of harvest due to lack of time for the formation and ripening of fruits.
Planting seedlings in a greenhouse
Digging into an unheated greenhouse begins when the soil reaches 15 °C. And the surrounding air will warm up to 20 °C. When planting, the lower stepsons of the planting material are removed before the first branching, leaving no more than 8 leaves per specimen. The holes are prepared with dimensions corresponding to the root system with an earthen ball or peat pot (if the seedling grows in it).
Transplantation into open soil
The signal to begin planting seedlings in open beds is not only the temperature of the soil, but also the arrival of consistently warm weather without night frosts. If the risk of cold weather remains, it is better to organize a temporary shelter by installing metal arcs over the beds and covering them with film. As a rule, the optimal timing is in late spring and early summer.
Transplantation into open ground
The bed for growing peppers is arranged in a well-lit place, protected from the cold wind. At the same time, the rules of crop rotation are taken into account. You cannot grow peppers where nightshade crops used to grow. The best predecessors for vegetables will be legumes, melons, onions, and garlic.
May be interesting How to plant potatoes correctly to get a good harvest? Do-it-yourself hydroponics at home Treatment of fruit trees in early spring from diseases and pests
Work on preparing the beds begins in the fall and is carried out in several stages:
- dig up the area well, adding complex fertilizers containing potassium and phosphorus;
- in the spring, re-digging is carried out, adding ammonium nitrate;
- A few days before transplanting, water the bed with a solution of copper sulfate for disinfection.
In the Urals, it is recommended to plant peppers in warm beds. To do this, the selected place is covered with dark polyethylene to speed up the warming of the soil. Then lay the humus and pour it with a hot solution of urea from 10 liters of water and 1 tbsp. l. fertilizers Cover the bed with film again for several days. Before planting plants, lay a layer of fertile soil fertilized with wood ash, more than 10 cm thick.
Bush care
In the risky farming zone, a good harvest is obtained only if the rules for agricultural cultivation are observed. The latter includes organizational and economic activities, planting and comprehensive care. If the planted seedlings do not receive the required amount of moisture or adequate nutrition, it will not be possible to harvest high-quality fruits.
Watering
If there is a lack of precipitation, the plantings are moistened regularly, monitoring the condition of the soil in the tree trunk circle. Drying of the surface layer signals the bush's need for a new portion of water. The latter should be warm and settled. Hypothermia of the roots provokes the development of fungal diseases. As a rule, the frequency of watering is every 2-3 days.
For your information!
During hot periods, the tree trunk circles are moistened daily early in the morning or in the evening.
Loosening and weeding
After watering, to prevent the formation of an airtight crust, the soil is loosened. The event provides free access of oxygen to the roots, activating the growth of bushes and the formation of ovaries. The row spacing is systematically weeded, removing emerging weeds. Mulching is also important, which in the northern regions not only allows you to increase the period between soil cultivation activities, but also protects the roots of the crop from cold weather.
Top dressing
Plants need a balanced diet to grow properly. It is provided with the help of complex and regular fertilizing:
- 10 days after transplanting the young specimens into the beds, they are watered with a mullein-based fertilizer solution in a ratio of 1:10.
- Subsequently, at two-week intervals, the bushes are fed with complex mineral agrochemicals in liquid form (30 g of nitroammophoska per 10 liters of water).
Bush formation
Low-growing varieties do not need the procedure, since they do not form many lateral processes. But tall plants are tied to a support, and then the lower stepsons are removed until the first branching. As they grow, you can trim off the side shoots that grow inward, but do not be zealous, as such actions can greatly weaken the plants and have a detrimental effect on the yield.
Further care
After planting the plants, you need to organize proper care of the crop.
See also: What and how to feed pepper seedlings for growth
Watering and pollination
Insufficient watering may result in the pepper not producing a high yield. Along with this, excess moisture can become a trigger for the development of diseases of fungal origin.
Peppers should be watered sparingly. For full growth of the crop, three waterings per week are carried out. If there is a dry summer outside, the soil is moistened daily.
When growing peppers, special attention is paid to pollination. This measure is necessary to obtain a high yield. The crop is self-pollinating, but experienced gardeners recommend not neglecting the services of bees or bumblebees, if any. On a private plot of land, any insects can carry out pollination. In production conditions, they often resort to the help of bumblebees, which is a more effective method.
If during the period of active development the plants do not receive the necessary pollination, the fruits will grow deformed.
At home, the pollination process can also be done manually. For this procedure, you will need a regular school eraser or ear cleaning stick. A triangle is cut from the stationery into which you need to stick a sewing needle. This homemade device will allow you to transfer pollen from one plant to another.
To attract insects capable of pollinating the crop, parsley or coriander is planted between the rows of peppers. It is also a great idea to place banana and apple skins on the ground.
Formation of bushes
Most of the species listed above do not require the formation of bushes. If pinching occurs actively, then you can get rid of the lower shoots. However, it is important to know when to stop and not damage the culture.
Diseases and pests
Branched shoots of pepper are susceptible to spider mite attacks. If the humidity is high, insect infestation is unlikely. However, many pathogenic organisms develop under such conditions. Upon careful examination, the bushes show signs of the development of powdery mildew, downy mildew, and fusarium. Fungicidal drugs will help cope with it.
During the fruiting period, it is unsafe to use pesticides, since there is a high risk of pesticide residue remaining in the cultivated fruits. If there is an urgent need, spray the bushes with a fungicide solution based on a quickly excreted active substance. If the intensity of the disease is low, it is better to use a biological product or folk remedy.
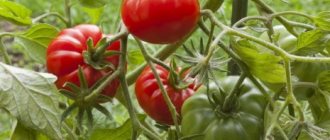
Harvest and storage
Fruit harvesting begins after they have reached technical ripeness, since in northern climates they may not ripen to biological ripeness. Moreover, harvesting at these times allows you to increase productivity: with timely removal, a new ovary is formed more intensively. The collected fruits are placed in boxes where they gradually ripen.
For your information!
Harvesting is carried out in the morning or evening, using sharp, pre-disinfected scissors.
The fruits are stored in a wooden container, disinfected with a manganese solution and well dried. The top of the fruit is covered with newspaper. If there are only a few of them, place them in the refrigerator in the vegetable compartment. Peppers that have reached technical ripeness retain their taste and commercial qualities for about 2 months. However, for its use in winter, the fruits are canned.
Sweet peppers: planting and initial care of seedlings in the Urals and Siberia
Seedlings are planted after hardening, when stable heat sets in. In the conditions of Siberia and the Urals, even when planted in greenhouses, peppers are covered with non-woven material. The soil should warm up to +16ºC.
Maintain distances between holes:
- for medium-sized peppers – 20-30 cm;
- for large-fruited indeterminate species – 40-60 cm.
You may be interested in:
Bell pepper seeds are the best varieties for open ground. Today, the market for garden crops amazes with its diversity. Pepper alone has about 2000 varieties,...Read more...
Small and compact plants can be planted tightly, leaving a distance of up to 10-15 cm between the bushes. The plants are not buried, they are planted at the same depth at which the seedlings grew in pots or cups.
Planting - only in the evening or on a cloudy day, with mandatory soil irrigation and subsequent mulching. Since the roots of the crop do not tolerate replanting even with a clod of soil, the plants are shaded from the sun during the first days. In a greenhouse, arcs with additional shelter are often installed, but on the hot days of June such protection must be removed.
Cultivation care
Further care includes basic agricultural techniques:
- irrigation;
- feeding;
- loosening and mulching;
- shaping the bushes (depending on the variety);
- preventive treatments of plantings.
The culture loves moist soil, but does not tolerate excess moisture. It is especially important to maintain soil moisture in thick-walled peppers, otherwise the pericarp will be thin and rough. Periods when peppers need more moisture:
- after planting in a permanent place;
- before flowering;
- fruit formation.
Water frequently, in small portions, taking into account weather conditions. The region often experiences hot weeks, so it is necessary to maintain a regular watering schedule, preventing the soil from drying out. During prolonged droughts, plants' flowers and ovaries fall off.
The water temperature during irrigation is at least +22ºC, with preliminary settling. You cannot water the plants in your garden directly from the well. Any water is settled, heated and only then used for irrigation. Good results are achieved by installing drip irrigation systems in garden beds and greenhouses.
After watering, the soil between the rows is loosened, trying not to touch the roots. In peppers, the roots are located in the surface layer; if damaged, they are poorly restored, thereby slowing down the growth of the bushes. It is advisable to mulch the soil immediately after replanting, thereby avoiding constant loosening of the beds.
Mulch:
- mown grass;
- humus;
- peat;
- green manure.
A layer of mulch is up to 10 cm. This will protect the soil from drying out and the appearance of weeds. The soil does not settle or float after watering, and a surface crust does not form. When mulched with green manure, which gradually rots, the plants additionally receive a portion of useful nutrients.
On a note!
In the absence of mulch, the plants must be hilled up, covering the exposed upper roots.
During the growing process, the crop is fed several times using organic matter and mineral complexes of fertilizers. The total number of feedings is 3-4 times per season, and it is advisable to alternate applying fertilizers at the root and treating the leaves with nutritional compounds.
Recommendations for applying fertilizers:
- The first feeding is 18-20 days after planting. Diluted poultry droppings (1:20), mullein (1:10), green infusion of fermented herbs (1:10) are suitable;
- after 10-12 days, feed the peppers with diluted superphosphate (3 tablespoons per bucket of water);
- Another feeding is superphosphate in the same proportion and potassium supplements (15-20 g).
They monitor the plants, and if there is a deficiency of some element, they quickly add it to the fertilizer.
Signs of starvation in peppers:
- pale color of leaves, slow growth - lack of nitrogen;
- yellowing of the upper tier of foliage, dying off of growth points - calcium deficiency;
- the appearance of a yellowish border on the leaf blades, browning of the leaves - the plants lack potassium;
- wrinkling of leaves, appearance of a bluish-violet color on the surface - phosphorus deficiency.
The lack of potassium and calcium is compensated for by the addition of wood ash, calcium nitrate, potassium magnesium; in case of phosphorus starvation, the addition of superphosphate is indicated.
In addition to fertilizing and irrigation, the crop needs to be tied to supports and the formation of bushes. Low-growing bushes do not shoot; varieties of large-fruited peppers are grown with obligatory tying to supports and the formation of shoots. For supports, stakes and trellises are used. In order to enhance branching, the growing points of peppers are pinched (approximately at the end of July or beginning of August). This contributes to the rapid ripening of set fruits, limiting new batches of ovaries that may not ripen.
During cultivation, shoots growing below the main fork of the plant are removed several times from tall bushes. Remove branches that thicken the crown of the bush.
Important!
To increase yield and improve fruit set, it is recommended to lightly shake the plants during the flowering period.
Plants bloom constantly, so closer to autumn it is recommended to remove some of the flowers that take away nutrition from the developing ovaries.
Harvesting
Fruit ripening depends on the characteristics of the variety. The pods are harvested at the stage of technical ripeness (green, whitish), as well as when fully ripened. Approximate dates are from the beginning of August, but the exact time is determined by growing conditions and weather.
The fruits are cut, removing them along with the stalk. Collection is regular, as it ripens, every 3-4 days. Unripe peppers “reach” the desired condition well at home.
Reviews
Olga, 45 years old:
“At the dacha I grow a small number of bushes for food. Since I don’t live there all the time, I grow the seedlings on the windowsill in my apartment in peat pots, which makes later replanting easier. I plant bushes only at the beginning of July - I select hybrids that are ultra-early, cold-resistant, and can easily withstand cold temperatures down to 2°C.”
Ivan, 36 years old:
“The most problematic aspect for me when cultivating peppers is related to planting. I plant seedlings in an unheated greenhouse, so cold snaps are just as dangerous for fragile young bushes as in open beds. Fumigation and the construction of additional shelter in the form of a greenhouse help.”
And in the harsh climate of the Urals, if you plant peppers correctly and care for them, you can get a good harvest. The quantity and quality of the latter largely depend on the efforts of the vegetable grower.