How to grow tomatoes correctly
Tomatoes can be grown in seedlings or without seedlings, and each case has its own growing rules.
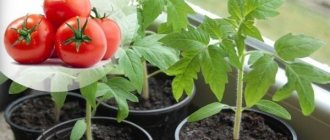
Through seedlings
You can sow seeds for planting in open ground from early March to early April (the period is adjusted according to the region).
Store-bought seeds most often do not require preparation. They are processed and ready for sowing.
Self-collected seeds must undergo calibration, disinfection, hardening and germination.
The seed is placed in a saline solution (a level teaspoon of salt per 0.5 liter of water) for 10 minutes. The floating seeds are caught and removed, and the settled ones are washed and transferred to a warm solution of potassium permanganate for disinfection for 20 minutes.
After this, they are poured into a gauze bag and placed in a growth stimulator solution for 1 hour. Then the seeds are sent to the refrigerator (lower shelf) for a day.
The hardened seed in a damp bag is placed on a saucer and sent to a warm place until hatching. After small roots appear, you can begin sowing the seeds.
The soil for planting seedlings must also be prepared. You can buy it ready-made or make it at home. It should consist of part turf, part rotted humus, part sand, part peat or coconut substrate.
- The mixture is mixed and poured with a hot solution of potassium permanganate. The earth is scattered into prepared containers (about 10 centimeters deep) and lightly compacted.
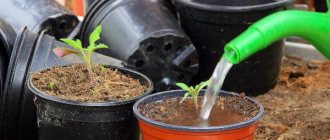
- An hour before planting, it is spilled with warm, settled water.
- After the moisture has drained, grooves 0.5-1 centimeter deep are made in the soil. The row spacing is 3-4 centimeters.
The seeds are evenly distributed at a distance of 1.5-3 centimeters, sprinkled with a thin layer of soil mixture or sand. 2 seeds are planted in a separate container. The crops are sprayed with warm water from a spray bottle, covered with glass (film) and sent to a warm place.
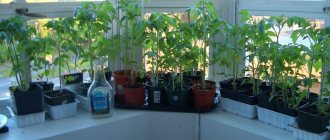
At a temperature of 25-27 degrees, friendly shoots appear within a week. After seed germination, the shelter is removed, and the plants are placed on a bright windowsill on the south, southeast side.
The air temperature for plant growth should be 20-22 degrees during the day, 14+16 degrees at night.
After 2-4 true leaves appear (in dense crops) the seedlings begin to dive. Plants are planted in separate pots or cups.
Watering the seedlings is carried out every 5 days, after the top layer of soil has dried.
If there is a lack of light, the plants are illuminated with a phytolamp or fluorescent lamp in the morning and evening.
Plants are fertilized once every 15 days, using mineral and organic fertilizers, which alternate.
From the moment of sowing, seedlings grow for about 50-60 days. Its planting occurs in mid-May - mid-June.
1.5 weeks before transplanting into the ground, the seedlings are taken to a closed veranda or balcony for 2-3 hours for hardening. The hardening time increases daily until it reaches a full day.
Watering stops 5 days before transplanting plants to the main place, this allows the earthen ball to gain a foothold on the roots. Just before planting, the seedlings are watered and the cotyledon leaves are removed.
Plants are planted in prepared holes spilled with a hot potassium permanganate solution, 15 centimeters deep and 30 centimeters wide. The row spacing is 50 centimeters. The width of the beds and row spacing may vary depending on the varietal characteristics of the tomato.
Seedlings in peat pots are buried along with them. Seedlings from another container are planted using the transshipment method, along with soil on the roots.
The sprinkled soil around the plants is lightly pressed and watered with settled warm water.
After planting, the plants are provided with the necessary care, on which future productivity depends.
Without seedlings
Tomatoes without seedlings can be grown even in northern regions. An early variety of tomatoes planted directly in the beds can produce a harvest in a short period of time. At the same time, tomatoes develop better and faster, avoiding picking and transplanting.
In the first half of the season, the sown seedlings are covered with non-woven material, later a film is stretched over the arches.
Before installing the arcs, the beds are carefully dug up, ash and mineral fertilizers are added. To insulate the beds, wooden sides are created along the edges. The ground is lined with compost or humus that has not completely rotted, and covered with a layer of earth (20 centimeters) so as not to burn the roots of the plants.
Sowing of tomato seeds is carried out from the last ten days of April to mid-May.
The area for disinfection is watered with a hot solution of potassium permanganate. Sowing is carried out in 2 rows with a distance of 0.5 meters. The holes are formed in a checkerboard pattern, every 30 centimeters. For determinate varieties, denser planting is possible.
Up to 5 seeds are sown in one well-diluted hole with a hot solution of potassium permanganate. They are sprinkled with a thin layer of earth and watered with warm water. Each hole with seeds is covered with a jar or cut-off bottle. From above, the cans are covered with film. The film is stretched over the arcs.
The bed does not open until germination. The opening of the film is adjusted according to the weather. If the weather is warm outside, the shelter can be removed completely.
The seedlings are thinned out. Excess plants are replanted. The strongest seedling remains. The holes are mulched with compost.
After 2 weeks, the stepsons are pinched to maintain their single-stem shape. After the formation of 3-4 clusters, the growing points are removed for better ripening of the tomatoes.
Tomato bushes should be watered in dry, hot weather in the evening or morning. Such plants have a very deep root system and easily feed on groundwater. Watering is carried out once every 6 days.
Fruiting with this cultivation is delayed by 2 weeks, but lasts longer.
Preparation of planting material
In order for the grains to germinate well, they need to be heated for 2 days at a temperature of +300C. Then keep for three days at temperatures not higher than + 500C. After this, all the grains will need to be placed in a container and filled with a weak solution of potassium permanganate. Keep it in this condition for 10 minutes, and then rinse thoroughly under running water and dry at room temperature.
Soil selection
It is best to use universal substrates. They can be bought either in a specialized store or prepared at home. To do this, you need to combine peat and sand in equal parts. The grain also germinates well in sawdust with peat and turf soil. Some experts use humus, mullein, sawdust and peat for growing. Any of these mixtures should be thoroughly disinfected before use. It is best to calcine the soil in the oven or microwave. The freezing method is also effective. To do this, you need to take the soil outside at the beginning of winter and leave it until the beginning of spring. Then put it in the house. As soon as the soil in the room has warmed up well, you can start planting the seeds.
Important! For some varieties, the stratification method is used.
Growing container: selection rules
It is best to use boxes that do not exceed 15 cm in height for these purposes. It would also be good to use peat tablets. You need to put no more than 3 grains in each of them. If you place 4 or more seeds, the plants will need to be picked. It is not recommended to deepen the planting material too much. Sprinkle the seeds with substrate on top. Its thickness should be from 0.3 to 0.4 cm. Then water the soil generously with warm water and cover the top with polyethylene. This mini-greenhouse will help the grains grow faster.
Important! Planting grains is best done in vessels made of natural wood. Such containers allow air to pass through well and do not emit dangerous vapors that can affect both the human condition and the development of seedlings.
Features of growing tomatoes
Growing tomatoes has its own characteristics depending on the region. Each climate zone has its own varieties that easily adapt to the characteristics of the terrain and weather.
In outskirts of Moscow
This region is characterized by cold weather at the end of summer, which often causes mass late blight disease, while late varieties do not have time to ripen. Therefore, for the Moscow region, it is better to choose tomatoes from early or mid-season varieties that are resistant to late blight.
Tomato seedlings are planted in the Moscow region in mid-May. After planting, the plants are covered with non-woven material for the first time. After the plants have rooted and the air temperature has normalized, the shelter is removed.
- Plantings should not be thickened; air should penetrate freely to all parts of the plant.
- Stepping is carried out in a timely manner, once a week.
- We must not forget about fertilizing, this helps accelerate fruiting and ripening of tomatoes. Plants require nitrogen at the beginning of growth and phosphorus before flowering.
- With frequent rains and cold weather, plants are treated with chemicals and folk remedies to prevent late blight and other diseases.
- In cold weather, tomatoes are covered with film.
In the Urals
Tomato varieties for the Urals are divided into 3 main groups:
- early ripening (ripening 80-115 days)
- mid-season (100-105 days)
- tall (105-140 days).
Different varieties are planted according to their varietal characteristics. Thickening is not allowed.
To better warm up the plants, they are tied to supports and trellises.
Tomatoes ripen until the end of August, when late blight and cold weather are likely to appear.
Tomato seeds are sown in mid-March. Ready seedlings are planted from mid-May to early June. At first, she covers herself with film.
Tomatoes are harvested at the initial stage of ripening, this speeds up fruiting, which allows you to collect more fruit before the cold snap.
In Siberia
Early ripening tomato varieties are best suited for Siberia. Seedlings are planted in a permanent location in early June.
The beds are prepared in advance. Tomatoes are planted in a checkerboard pattern in 2 rows. The distance between plants is 40 centimeters, between rows - 45-50 centimeters. Low varieties are planted with 6-8 plants per square meter. There is no need to tie them up.
The bed, after planting, is covered with a layer of vegetable mulch. As the plants grow, they lie down on the litter and are protected from pests and temperature influences.
Low-growing varieties do not need shaping. The stepsons are removed up to the first flower cluster.
Tomatoes are harvested while still unripe in the second half of August, before the onset of cold and damp weather.
Selecting a location and preparing the soil for planting seedlings
In order for the transplanted seedlings to take root and grow well, you need to select a site for planting and prepare it in advance.
See also
Feeding tomato seedlings with wood ash and rules for using fertilizer
Read
Site selection
It is known that tomatoes are light-loving vegetables and therefore it is better to plant them in well-lit places. Experienced gardeners advise choosing areas for replanting located on southern slopes. They are reliably protected from cold gusts of wind.
You should not plant seedlings in shaded areas with high humidity and high groundwater. In such conditions, seedlings will grow slowly. Also, when choosing a suitable location, pay attention to the acidity of the soil. It is recommended to choose areas that have a pH level of 6 or 7.
In addition, the choice of site depends on what vegetables were previously grown on it. Tomatoes grow best after legumes or potatoes.
Soil preparation
The soil in which vegetables are grown affects the yield, and therefore it is necessary to seriously prepare it. Experts advise fertilizing the area with fertilizers before planting. It is recommended to treat the soil with a solution made from copper sulfate. One and a half liters of liquid are consumed per square meter of garden. Also, to saturate the soil with nutrients, the soil is fertilized with sawdust, peat, humus and potassium sulfate.
How to grow good tomatoes in open ground
A good and tasty tomato crop can only be grown by choosing the right seeds and observing all the conditions for caring for them.
Early
To get an early harvest, you need to choose early and early varieties of tomatoes, such as: Riddle, Anastasia, Raspberry Giant, Camellia and others. They ripen in 85-100 days after sowing the seeds and produce an excellent harvest.
Plants need to be planted in a bright, elevated place. At first, the plantings are covered with film, this promotes better acclimatization. Watering and fertilizing should be carried out regularly. You can’t neglect pinching and shaping the bush. Tomato bushes are formed into 1-2 stems. In August, the tops of the plants are pinched, this stops growth and accelerates the ripening of fruits. The leaves below fall off gradually.
Early ripening varieties can be grown without seedlings. In this case, fruiting will be delayed by half a month, but the fruits will be more tasty.
Sweet
The sweetness of a tomato depends on the varietal characteristics, proper planting and care of the plants.
The most delicious sweet varieties can be called: Pink honey, Roma, Tsar Bell, Velmozha, Honey Drop and others.
The distance between the bushes is chosen taking into account the fact that each leaf must receive a lot of light for the formation of sugars. Early ripening tomatoes are planted at a distance of 40 centimeters between the bushes, late ones - 50 centimeters.
Tomato care is standard. Plants need to be watered and fertilized regularly. Watering during tomato ripening should be reduced, since with excess moisture the fruits become watery and less sweet.
Tall
The best tall varieties: De Barao, Cardinal, Mikado pink, Wild rose, Tarasenko and others. Seedlings of such varieties should be planted no more than 3 per square meter. The row spacing should be 70-90 centimeters.
Plants are tied to a support immediately after planting. For tall varieties, pinching and bush shaping are mandatory.
- Indeterminate varieties are formed into 1-2 stems,
- determinant - in 2-3,
- bush - 3-4 stems.
Excess stepsons need to be removed once a week, as they reach 3-5 centimeters.
Tomatoes need to be fed during the flowering phase and at the beginning of fruit formation. Watering is carried out once every 5-6 days. The plant uses 5 liters of water, and during flowering 12 liters.
Large
To obtain large-sized fruits, when purchasing seeds, you need to choose low- and medium-sized varieties.
The best large-fruited varieties are Pink Elephant, Bull's Heart, Miracle of the Earth, Alsou, Delicious, King of Siberia and others.
The size of the fruit directly depends on the number of clusters; the fewer there are, the larger the fruit. So pinching is the main requirement when growing plants. The first brush with the ovary can also be removed.
Seedlings need to be watered at least 2 times a week. 1.5-2 liters of water are poured into each hole. When the fruits ripen, watering stops, otherwise the fruits will begin to crack.
The first feeding is carried out 4 days after transplanting to the main place. The second time - after the start of flowering, and the third time after the first fruits begin to ripen. For feeding, mineral and organic fertilizers containing phosphorus, potassium and nitrogen are used.
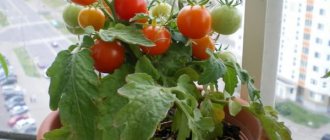
Cherry
For planting cherry tomatoes in open ground, the following varieties are selected: Salyut, Minibel, Arctic, Pygmy, Arbat, Bonsai, Balcony Miracle, Red Cherry, F1 Cherry Kira, F1 Sweet Cherry, Dessert, Zlato and others.
Cherry tomatoes are grown in seedlings. The method of growing them is no different from others.
Cherry tomato seedlings require more space when planting than conventional varieties. The distance between plants should be at least 50 centimeters. Plants are tied to supports.
2 weeks after planting, you can fertilize with complex fertilizers with a lower nitrogen content.
Stepchildren are removed as they appear.
Cherry tomatoes are collected from the garden beds at the fully ripened stage. If unripe tomatoes are picked and then ripened, their sweetness decreases. Overripe fruits fall off.
Purchasing and sorting seeds
Every person who plans to plant tomatoes in their garden should become familiar with the specifics of purchasing and sorting seed.
Purchase
When purchasing tomato seeds, several factors are taken into account:
- Plant height. It is no secret that tomato varieties differ in the height of the bushes, and therefore, when purchasing seed, this factor should be taken into account. To collect more ripe fruits, it is recommended to buy tall vegetables.
- Fruit sizes. Another factor that people pay attention to when purchasing is the size of the tomatoes. In this case, the choice depends on the purpose of growing the vegetable. For example, if tomatoes are grown for canning, then it is better to choose varieties with small fruits weighing 100-150 grams.
- Frost resistance. Since the tomatoes will be grown outside, you need to choose seeds that can withstand frost. Information about frost resistance is indicated on the packaging in which the seed is sold.
See also
When to sow tomatoes using Tatyana’s productive garden technology and how to grow them
Read
Sorting
Before planting, you need to start culling and sorting purchased seeds in order to select seed material for sowing in the garden. Experts advise selecting only large tomato seeds, as they contain many nutritional components. Most often, large and powerful bushes grow from such seeds.
To select high-quality seeds, a special saline solution is used.
To prepare it, add 30-35 grams of salt to a glass of water, after which the liquid is stirred. Pour the seeds into the prepared mixture and leave them to soak for half an hour. During this time, some of the seeds float to the surface. All floating seeds are removed from the glass and thrown away, as they will not germinate. For planting, leave the seed that remains at the bottom of the glass.
Caring for tomatoes in open ground
After planting tomato seedlings, they must be provided with good care, which determines not only the yield, but also the taste of the fruit.
Caring for tomatoes includes: watering, fertilizing, loosening the soil, gartering tall varieties, hilling, protection from diseases and harmful insects.
Watering
Tomatoes do not like excessive dampness, as well as drought. They need to be watered as the soil dries out, on average once every 5-6 days. In rainy weather, watering is reduced, and in hot weather it becomes more frequent up to 2 times a week.
If the tomato does not have enough moisture during the ovary period, the ovaries will crumble and the surviving fruits will turn out small.
Excess water when the fruits are mature causes them to crack. Watering should be plentiful, but not frequent.
You need to loosen the soil every time after watering. At the same time, weeds are removed.
It is necessary to hill up plants 2-3 times per season. This promotes root growth and increases yield.
Feeding
Tomatoes need to be fed at least three times per season.
It is best to fertilize 2 times a month. For this purpose, mineral and organic fertilizers are used. They alternate once a month.
Fertilizers should contain less nitrogen than potassium and phosphorus. For feeding you can take: 50 grams of superphosphate, 30 grams of potassium chloride, 15 grams of ammonium nitrate per bucket of water. A solution of bird droppings or slurry is taken as organic matter.
From microfertilizers, tomatoes require magnesium (constantly), boron (during flowering). For feeding, take 10 grams of boric acid per bucket of water. The solution is sprayed onto the greens in the evening.
Stepsoning
Removing stepsons, as well as forming bushes, is necessary for plants for a good harvest.
Not all varieties are formed and grown. Some low-growing varieties do not need pinching. Some varieties grow 1 main stem and do not need to remove excess shoots.
Varieties with powerful, strong stems, medium-sized and numerous fruits are formed into 2-4 stems. Large-fruited and tall plants are most often formed into 1 stem.
If you need 1 stem, remove all the stepsons formed in the axils of the leaves that have reached 3-5 centimeters in length. First of all, the stepsons under the hands are removed.
If the bush is formed into 2 stems, a side shoot remains that appears near the first brush. When forming into 3 stems, in addition to the lateral one, the strongest stepson remains, which appears under the 2nd stem.
Before pinching and shaping, the plants are not fed or watered, so they will more easily withstand mechanical damage.
The stepsons should not be pulled out, but broken out; if they have grown more than 5 centimeters, it is better to cut them off with a sharp knife.
Stumps cannot be left when planting
You need to plant tomatoes once a week, regardless of the number of stems.
During the period of intense summer heat, it is better to avoid pinching and removing leaves for a while; bushes at high air temperatures are painfully susceptible to injury.
During prolonged rains with cold weather, the bushes are not only pinched, but also parts of the shoots and lower leaves are removed, this helps to warm the plants and provide better ventilation.
For a better harvest, in mid-August the tops of the fruiting shoots are pinched and the flower clusters on which the tomatoes did not have time to set are removed. At the same time, the set fruits fill and ripen faster.
Technology for growing tomato seedlings: picking
When growing tomato seedlings, after the second true leaf is formed, the seedlings need to be picked into boxes 12 cm deep. The seedlings are watered abundantly, picked and transplanted into seedling cups or pots, covered with soil up to the cotyledon leaves.
It is important to take only well-developed plants for picking, without deformed, ugly leaves or signs of other abnormalities. All spoiled plants can be thrown away; it is impossible to get a decent harvest from them. After picking, out of 12 plants, 8-10 remain.
Picking tomato seedlings
When growing tomato seedlings, the seedlings need to be watered well before planting. Pour soil into jars or cups, compact lightly, tapping the bottom on the table. Using a special round stick with a diameter of 17-20 mm, slightly pointed at the end, you need to make a depression in the center of the glass almost to the very bottom. Throw one grain of superphosphate onto the bottom. Carefully pry up the tomato plant with a fork and, holding it by the cotyledon leaves, carefully remove it from the box. The plant must be brought into this state: the cotyledons and the first two true leaves must be removed. To do this, you can put the sprout on your left palm and carefully cut it all off with scissors. Lightly shake off the lumps of earth on the roots of the plant so that they freely pass into the hole in the ground. Then the plant being picked is lowered into the prepared cup. The hole is filled by tapping the sides of the cup. Then they compact the earth a little more by also tapping the cup on the table. After this, water the plant at the root with a solution of sodium humate (1 g per 2 liters of water). No more than 30 ml.
Next, according to the technology for growing tomato seedlings, after watering, you need to add a little soil into the glass and lightly dust everything with ash. Immediately after transplanting, the plants must be removed from a sunny place. After two days, we return the seedlings to the windowsill, continuing to illuminate them with fluorescent lamps.
After about a week, the tomato seedlings take root, produce additional roots and begin to grow.
Approximately 10 days after picking, a new root system is formed and the plants noticeably increase in growth. A little earth is poured under them. If ready-made soils for seedlings are used, then the seedlings do not need to be fed additionally. But usually when growing seedlings, 2 feedings are done: the first 10 days after picking (5 g of urea, 35 g of superphosphate, 15 g of potassium sulfate per 10 liters of water); the second feeding is done after 2 weeks (10 g of urea, 60 g of superphosphate, 20 g of potassium sulfate). There are special fertilizers for feeding vegetable seedlings.
Disease Prevention
The best prevention of any disease is:
- Disinfection and hardening of seeds before sowing;
- Soil disinfection when sowing seeds and planting seedlings in the ground;
- Maintaining crop rotation in the garden;
- Elimination of dense plantings;
- Using temporary shelter on plants after planting;
- Timely watering and fertilizing of plants;
- Regular preventive spraying of plants against diseases and pests;
- Tying up bushes;
- Loosening the soil;
- Using mulch around plants;
- Pinching, pinching, shaping with disinfected tools and wearing gloves treated with potassium permanganate.
It is also necessary to eliminate emerging pests in a timely manner, since many of them carry diseases.
Diseases such as late blight, mosaic, brown spot, gray rot, root rot and other viral and bacterial diseases are easier to prevent by carefully removing tomato plant debris from the area and observing preventive measures.
Pest and disease control
The incidence of diseases in tomatoes in open ground is often preceded by worsening weather conditions - rain, lower temperatures. Dampness and coolness contribute to the active development of fungi.
The most dangerous of them is late blight. The sooner signs of disease are noticed, the greater the chance of successful treatment.
When wet and dry brown spots or mycelium appear on the leaves, it is necessary to treat the bushes with a fungicide solution. The following drugs have proven themselves to be effective: Quadris, Tatu, Aga-25, Fitosporin, Fundazol. The working solution is prepared in strict accordance with the instructions.
Bacterial diseases are transmitted by tomatoes through contaminated seed material and spread by pests. That is why pre-sowing treatment of seeds, careful care of the crop, and preventive treatment of seedlings before and after planting with Bordeaux mixture or copper oxychloride are necessary.
Viral diseases of tomato, which include mosaic, aspermia, stolbur, do not have effective treatment. Diseased plant specimens must be dug up and burned as quickly as possible to prevent the spread of the disease.
Among the pests that plague tomatoes are aphids, whiteflies, spider mites, mole crickets, root-knot nematodes, and wireworms. After an insect attack occurs, insecticides must be applied immediately. Pests are destroyed by Fitoverm, Aktara Karbofos, Agravertin, Phosfamide, Iskra and others.
Useful tips
- The air temperature when planting tomato seedlings should be 20-22 degrees, and the soil should warm up to 15 degrees. In case of sudden changes in temperature, plants need to be covered with temporary shelter in the form of non-woven materials, for example, film, spunbond.
- You should not constantly grow one variety, even if it has proven itself, from year to year. It is better to plant 3 or more varieties, this allows you to insure yourself with the harvest and gives you the opportunity to try new things.
- When choosing seeds, you need to take into account the characteristics of growth, maturation and place of cultivation (indoor or open ground). When planting seeds without taking these indicators into account, you may simply not have time to harvest.
- When planting overgrown seedlings, they are buried in a semi-lying state and immediately tied to a support.
- There is no need to neglect fertilizing, just as there is no need to apply a lot of fertilizers. Overfed plants begin to fatten and stop bearing fruit.
- Ripe tomatoes must be picked immediately, otherwise other fruits will take a long time to ripen and the yield will decrease. It is better to collect them at the browning stage, leaving them to ripen in boxes.
- You should not collect seeds from hybrid varieties, as they will not produce a good harvest.
Tomato seedlings need to be planted using a special method.
Statistics say that every eighth gardener annually plants tomatoes himself. If you have looked at this page, then you are one of this number and you are interested in the question of how to grow tomato seedlings at home.
In some regions, you can plant tomatoes directly in the ground. But the seedling method is used even in these areas, not to mention those that belong to areas of risky farming.
Why is this method so popular? As soon as the favorable time for planting arrives, you plant the ready-made plant in the ground, which allows you to speed up fruiting.
You can, of course, buy plants grown by someone else, but I know from experience that you don’t always get the variety of tomatoes you bought. Therefore, if possible, it is better to grow your own seedlings. You will learn how to get strong and healthy planting material from this article.
How to get your own tomato seeds
If you like the variety of tomatoes, you can prepare its seeds in order to grow exactly the same vegetables in the future.
It is important to know that this method is only suitable for varietal tomatoes; the properties of hybrids are not inherited through seeds. Hybrid plants are obtained by crossing several varieties at once; they completely degenerate in 1-2 years.
To independently harvest seeds, the fruits must be removed from healthy, strong bushes. It is necessary to remove tomatoes from the lowest branch, then there will be less risk of getting a cross-pollinated hybrid. The tomato must ripen completely on the branch. After this, the vegetable is cut into slices to gain access to the seed chambers.
The seeds along with the juice are removed with a spoon and placed in a glass bowl. There should be enough juice to completely cover the seeds. After this, the container is loosely covered with a lid. Then they wait about a day until the fermentation process is completed.
As soon as a film appears on the surface and air bubbles begin to form, the seeds are removed, washed in running water, and then dried thoroughly. Store the seed material at room temperature in a paper bag, on which you should write the name of the variety and the date of collection. The bag should be removed until spring in a dark, dry place.