Growing tomatoes is not a complicated process, but the mistakes that many gardeners make at the initial stage can later lead to difficult care of the planted plants and low yields.
It is very important not only to choose good seeds, but also to follow all the rules for preparing seedlings for planting in the ground. Many gardeners use proven methods of growing seedlings, but now a rather new, but well-proven method of planting seeds in a “snail” has appeared.
Description of the method
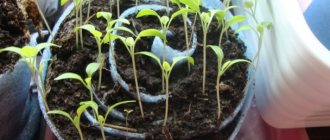
Snails for tomatoes are a modern and unusual way of growing seedlings. With the help of a cheap design that takes up very little space, you can place all the crops on one windowsill, and not clutter up the whole apartment or balcony with them.
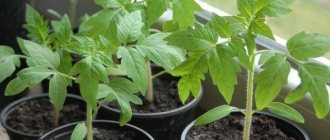
Planting tomatoes in a snail makes it possible to grow strong and healthy seedlings.
A snail can be made from scrap materials; it will save you space in your apartment and make it easier to plant seedlings in a greenhouse or garden.
The essence of the method is to roll up the soil and seeds, located on a substrate of foamed polyethylene, into a kind of roll.
Important! Each tomato variety must be planted in separate spirals.
Tomato seedlings can be germinated in a snail without soil, replacing the soil with toilet paper or napkins.
Advantages of the method
When using a “snail”, seeds for germination are placed in a small amount of fertile soil between several layers of flexible material. If you wish, you can do without soil altogether, replacing it with toilet paper. In this case, the growing method is called “in a diaper.”
Advantages of this method of seed germination:
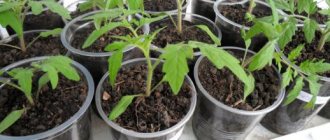
- Space saving. You can place a lot of seeds in a small area. In this case, there is no need to dive them into separate containers. In the “snail” the seedlings develop well until they are transplanted to a permanent place.
- Since the distance between individual seedlings is sufficient, all parts of the plant develop fully.
- There is no tendency to stretch because all specimens are illuminated equally. In this case, to change the position of the seedlings, simply turn the “snail”.
- It is easy to pick or replant plants by simply unrolling the package.
- After washing the substrate, it can be reused.
Read also:
Methods for growing tomato seedlings
There are as many vegetable growers as there are methods for growing tomato seedlings. If the vegetable grower is inquisitive, willing...
Advantages and disadvantages of growing seedlings in snails
At the moment, growing seedlings in evidence is considered a very popular method, as it has many advantages:
- the seedlings develop well and have strong roots;
- It is much easier to extract plants from a snail than from simple cups or pots;
- plant roots are not damaged during picking;
- seedlings in snails can be watered through the tray in which they stand;
- the ability to use the same strip of substrate several times;
- significant savings in space on the windowsill;
- excellent seed germination and growing strong seedlings;
- soil saving;
- Available and inexpensive materials are used to make snails;
- if you correctly calculate the time of planting plants in a greenhouse or open ground, you can grow seedlings without picking;
- the roots are not damaged during seedling growth;
- if the seeds are placed at the same distance from each other, the sprouts will be easy to replant in the future;
- Even novice gardeners can plant tomatoes using this method.
But this method of growing seedlings also has disadvantages:
- if seeds are planted too densely, the plants will receive insufficient light and nutrients;
- pulling seedlings and forming a weak root system.
Important! It is not recommended to sow seeds of vigorous, indeterminate tomatoes into snails. All plantings must be illuminated with fluorescent lamps.
Important Tricks
Planting tomatoes in a roll is a simple procedure, but there are several important nuances that need to be taken into account:
- The film that covers the package must be ventilated periodically. This will promote healthy plant growth.
- The container in which the roll is located should be slightly larger in size than the snail itself; its walls should support the structure.
- Watch where the seeds are closer to the surface in order to plant the bundle correctly - with the seeds facing up.
- Use only the backing because it is soft and retains moisture well.
Also read: Preparing suitable soil for tomatoes
Seeds planted in a roll can produce sprouts that will be differently developed, and in order to sort them, the roll is carefully unwound and strong tomatoes are removed for further purposes, and weak ones are rolled up again and allowed to get stronger.
Planting seeds this way is quite simple. There are entire clips in the form of master classes that explain step by step the creation of such a “house” for vegetable crops.
How to make a snail correctly
To make a snail you will need:
- a substrate made of foamed polyethylene about 2 mm thick and 1-1.5 m long. It is cheap, flexible, allows air to pass through well and holds its shape.
- stationery erasers or masking tape;
- scissors;
- a container with nutrient soil or multi-layer toilet paper (you can also use napkins).
All materials must be prepared in advance so that while twisting the snail you will not be distracted by searching for missing elements.
The snail is made according to the following principle:
- The polyethylene foam backing is cut into strips 10–15 cm wide, their length will depend on the number of seeds and is determined experimentally during the work process.
But you need to take into account that the snail should not be too thick, so the length of the strip should not exceed 1-1.5 meters.
- Place soil or toilet paper on the resulting strip and lay out the seeds.
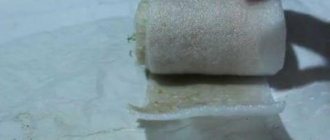
- The backing is rolled into a roll and secured with an elastic band. If the snail is thick, the edges can be secured with tape.
Sowing in a “snail”
To make a snail you will need the following materials:
- laminate backing;
- fertile soil;
- toilet paper;
- wide capacity;
- polyethylene bag;
- linen elastic.
A laminate substrate is laid out on the work table and a strip no more than 15 cm wide is cut from it. The length of the strip can be any and depends on the number of seeds. A little fertile soil is poured onto the edge of the resulting tape and leveled into a thin layer.
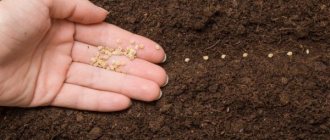
The soil is sprayed with warm water from a spray bottle and lightly pressed down. Having stepped back 2 cm from the top edge, they begin to lay out the prepared seed material, making an interval of 2-3 cm between individual seeds. While the tape is filling, add soil and continue working.
After filling the entire surface of the tape, it is rolled up. There is no need to tighten it tightly so that air can easily penetrate between the layers of the cochlea. To prevent the folded structure from falling apart, it is tied together with twine or an elastic band. For small snails, rubber bands for money are suitable.
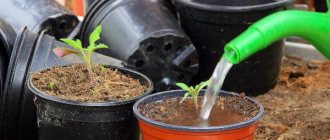
The resulting structure is installed in a wide container. You can add more soil on top if some of it spilled out when wrapping. Warm water is poured into the basin. The plantings are also irrigated from above the snail by spraying from a spray bottle. A polyethylene bag is pulled over the snail as a greenhouse.
Important! The container with the snail is placed on a well-lit windowsill in a warm room. Sometimes the bag is removed to ventilate the plants.
Caring for such seedlings involves watering once every 4 days. There is no need to moisten the soil too much. Otherwise, dangerous diseases develop. It is better to water not through the pan, but by spraying from above. At the stage of growing seedlings, such tomatoes do not need fertilizing.
Sowing tomato seeds into a snail in different ways
You can sow tomato seeds in a snail either directly on the ground or without it, placing the planting material on toilet paper or napkins.
When planting seeds on the ground, tomato seedlings adapt remarkably well after picking or planting in a permanent place, since the root system of the plants was initially surrounded by a protective layer of soil and is less damaged. Seeds planted in the ground produce stronger shoots because the prepared soil contains the necessary nutrients.
When planting seeds without using land, it is imperative to plant the seedlings at a strictly prescribed time. It is important not to overexpose the plants in a poor nutrient medium, otherwise this will provoke stretching of the sprouts, and subsequently a long adaptation of the seedlings when planted in the ground and delayed fruiting.
Sowing tomatoes in a snail without soil
This sowing method involves placing the seeds on toilet paper or napkins. This method is considered simpler, but it is best used only for germinating sprouts with subsequent transplantation into a more nutritious medium.
Also, for the first time after seed germination, you can pour a little earth into the snail and only then put it in diapers.
To plant seeds in a snail using the soilless method you will need:
- toilet paper or napkins;
- foamed polyethylene backing;
- scissors;
- ruler;
- spray;
- planting material.
Sowing seeds into a snail without soil step by step:
- The substrate is cut into strips, having previously calculated the required dimensions of the seedlings (as a rule, the width of the strip does not exceed 10 cm).
- The strip is laid out on a table or other flat surface.
- A layer of toilet paper is placed on top of the backing, aligned with the top edge of the future bundle.
- The paper is well moistened with a spray bottle.
- Tomato seeds are distributed at a distance of 2-3 cm from each other, retreating approximately 1 cm from the top edge of the paper. Also retreating 5 cm from each end of the tape.
- The seeds are covered with another layer of toilet paper on top.
- The backing is rolled into a kind of roll, the top and bottom of the snail are secured with an elastic band or tape.
- The snail is placed in a tray and placed in a warm and dark place.
- It is important to maintain the moisture of the paper, so you should pour about 1 cm of warm water into the tray.
- The plantings are covered with plastic wrap or a plastic bag.
- When the first shoots appear, the shelter is removed and the snails are moved closer to natural light.
Sowing tomatoes in a snail with soil
To sow seeds into a snail using soil you will need:
- a substrate made of foamed polyethylene with a thickness of 2 mm and a length of at least 1-1.5 meters;
- spray bottle with water;
- scissors;
- tweezers;
- watering can;
- stationery erasers or masking tape;
- plastic bag;
- nutrient soil;
- seed;
- a transparent container for subsequent installation of ready-made snails.
Sowing seeds into a snail with soil step by step:
- The substrate is cut into strips 10-15 cm wide and laid out on the table with one end facing you.
- Along the entire width of the substrate, retreating 5 cm from the edge of the tape and about 2 cm from the top, pour a layer of earth approximately 1-2 cm thick, lightly compact it and lightly moisten it with water from a spray bottle.
- Having poured about 10 cm of soil onto the substrate, begin to lay out the seeds. You can use tweezers for this. The seeds are placed at a distance of at least 1–2 cm from each other.
- Then the piece of substrate filled with soil and seeds is rolled up.
- And so they sequentially fill the entire length of the tape until it is completely filled.
- The rolled snail is secured with an elastic band or tape to prevent it from unrolling.
- Place the snail so that the seeds are at the top of the package.
- Next, the snail is placed in a pre-prepared container and watered with water from a watering can.
- All snails are covered with plastic bags and placed in a dark, warm place.
- When the first shoots appear, the shelter is removed and the snails are moved closer to natural light.
Read more in the article: How to grow tomato seedlings at home
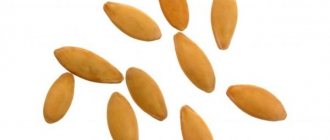
Seed preparation
The preparation of tomato planting material does not have any special requirements. The first stage is warming up (spread on warm radiators), sorting the seeds. It is better to remove spoiled ones immediately.
Sorting
Before planting, sort out the tomato seeds and remove any moldy or damaged seeds. If you have time, soak in warm water - spoiled grains will float to the surface.
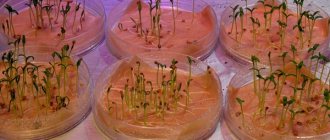
Germination
Pre-germination will speed up the growing of seedlings. It is better to do this in a damp cloth - plant the seeds in the snail only after the sprouts have pecked. Place the container in a warm place and moisten it regularly.
See also
Reasons why tomato seedlings die (fall) and what to do
Read
Hardening
Hardening off seedlings is a mandatory process. It is recommended to take tomatoes outside, starting in just a few hours. Completing hardening is simple - leave the plants overnight, but provided there is no frost.
Seedling care
Seedlings in snails are watered, fertilized and fed strictly according to schedule. While all the snails are covered with bags, do not water the soil. The plantings are ventilated once a day for 30 minutes. This is necessary in order to avoid the appearance of fungal diseases, which can destroy all seedlings.
When the first shoots emerge from the ground, the cover is removed. Water the snails by pouring water into the pan (to a height of about 1 cm). Water is used that is settled and warm.
When 2-3 true leaves appear on the seedlings, begin feeding with nitrophoska and complex fertilizers, having previously diluted them with water.
Proportion:
- 1 tsp. nitrophoska;
- 1 tsp. complex fertilizers;
- 1 liter of water.
Fertilize seedlings every 10-14 days.
Care
Caring for tomatoes in diapers consists of:
- Glaze. Watering is done once every 3-5 days, depending on the dryness of the earth clod. Young sprouts are watered from a syringe from above, grown and strong ones are produced through a tray.
- Feeding. The seedlings are fed for the first time two weeks after picking, then as needed. if the sprouts are lagging in growth, water with a full complex fertilizer, taking half the dose.
- Loosening. This is done with a toothpick, being careful not to touch the delicate and thin roots. It is a necessary action after watering, especially when grown in plastic bags. Without air access, the roots suffocate and begin to rot.
- Additional lighting. Growing in diapers entails insufficient illumination of young bushes and stretching of plants.
Attention!
To improve the ventilation of the bushes, first, the seven-lobed leaves are torn off one by one, and then the lower ones.
The process of picking tomato seedlings from snails into diapers
Diapers are plastic bags or pieces of film that are used instead of simple cups. It is necessary to immediately prepare a container in which you will place the finished diapers with plants.
Picking stages:
- Sprinkle a sufficient amount of pre-moistened soil onto the unfolded diaper so that it does not spill out when folded.
- For tomato sprouts, it is necessary to remove the cotyledon leaves and place them on the ground so that after twisting, almost the entire sprout is inside, up to the first true leaves.
- When folding the diaper, do not turn the edge inward - the bottom should remain open. When swaddling, try to compact the soil.
- The finished diaper with the sprout must be placed in a container with other similar bundles, pressing one tightly against the other. This must be done to prevent the diaper from unrolling.
- The harvested seedlings must be watered from above from a watering can, and then the water can be poured to the bottom of the container.
It is necessary to transplant snail seedlings immediately when the roots begin to peek out from under the bottom of the snail. If the seeds were germinated without using soil, they do not need to be separated from the paper, but simply torn off and planted in the soil along with it.
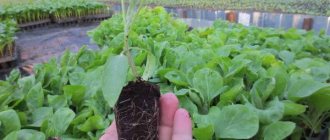
Necessary preparations before picking
When the seedlings planted using the snail method have become stronger, they are planted in the usual way for gardeners. Prepare peat pots or cups. You will also need tweezers and fresh soil.
Diving tanks
Peat pots have long been considered ideal containers for diving. Although plastic bags and glasses are also good for these purposes. To prevent the root system of tomatoes from rotting, each cup must have holes to remove excess moisture.
How to make holes?
Holes in the picking containers are punched with nails or ready-made glasses with a mesh are selected to remove excess water from below. Some gardeners advise making a small layer of drainage made of stones and sand in each glass for seedlings, but this is a very labor-intensive process.
soil mixture
Ready-made soils for tomato seedlings with humus are suitable only for certain varieties. The ideal soil is soil from the garden, to which fertilizer is added according to the instructions.
Advice! For tomato seedlings, do not take the land where this crop already existed, or where zucchini and other related crops grew. Maintain crop rotation.
Don’t forget to disinfect garden soil by heating it at 50 degrees. A solution of potassium permanganate with a weak consistency is also suitable for these purposes. It is best to take and sow seeds into the soil mixture a day after preparing the soil, so that the soil has time to re-saturated with oxygen.
Caring for tomato seedlings after picking
After the seedlings are picked, they need to be properly cared for:
- The diapers retain moisture very well, so the seedlings are not watered very often. It is enough to add 1-2 cm of water to the container where the diapers are located.
- Fertilize seedlings at least 1-2 times a week. It is better to use fertilizers based on humic acids as fertilizers. When preparing the solution, it is important to take into account that the dosage indicated on the package should be halved.
- To provide seedlings with an optimal level of illumination, it is necessary to organize additional illumination using fluorescent lamps.
- To prevent the soil in the diapers from becoming moldy, it is necessary to remove condensation from the surface of the diaper every day.
How to grow tomato seedlings in a snail without picking
If you sow tomato seeds in a snail, you can do without picking the grown seedlings, and instead of transplanting plants into separate containers, simply add soil into the same snail and make it taller.
Sequencing:
- from the substrate, cut out a ribbon of the same length as the snail, but 5-10 cm wider;
- the snail with the seedlings is untwisted, placed on a new layer of substrate;
- the protruding edge of the substrate must be placed at the bottom to ensure good root growth;
- a thick layer of new soil (about 5 cm) is poured on top of the old soil, after adding rotted sawdust of hardwood;
- the snail is rolled up and the edges are secured with tape;
- add the required amount of soil, evenly distributing it between the plants;
- the snail is installed in the pan;
- The seedlings are well watered from a watering can with a spout. In the future, you can pour water directly into the tray and the plants will absorb the required amount.
Seedlings that will be grown in snails before being transplanted into the greenhouse must be constantly monitored. If the plants begin to change color, this is a sure sign that they lack nutrients. In order to provide the seedlings with sufficient nutrition, it is very important to spin the snail from time to time and add fresh soil.
If a “black leg” appears on the seedlings, you need to unwrap the snail, add sand and vermiculite to the soil, and you can also add a little dry soil. Such actions will help prevent the development of the disease and save the plants from death.
Common Mistakes
The main problem when growing in this way is the soil sliding down. In this case, the snail is twisted too loosely. To solve the problem, you need to unwind it, level the ground and wrap it again, more tightly.
Sometimes, when planted in a diaper, the seeds do not sprout. This happens because the toilet paper swells too much. The structure needs to be unfolded and the paper replaced, and the seeds replanted. Subsequently, a little less water is added to the pan, and the structure is additionally sprayed from above with a spray bottle.
Read also:
Growing tomatoes in a shell
It would seem that the season has recently ended, but it’s time to think about growing tomato seedlings again. Many people live in winter...
When to plant snail and diaper seedlings in a greenhouse
Seedlings that were grown in snails or diapers are planted in a greenhouse at the same time as seedlings grown in ordinary cups or pots.
The time for planting tomato seedlings in a greenhouse depends on the ripening time of the tomatoes. Early ripening varieties are planted two to three weeks earlier than others. As a rule, this is early to mid-April. But in this case, the greenhouse must be well heated. If the greenhouse is not equipped with heating, then planting should be done no earlier than the first days of May.
Possible mistakes when growing tomato seedlings in snails
Not all gardeners manage to grow strong seedlings using the new snail method. But often this happens due to their own carelessness. In order not to regret the ruined seedlings, you need to try to avoid the most common mistakes.
Common mistakes:
- Untimely removal of shelter from plantings. If the tomatoes remain under the film for too long, they can become very stretched. The plastic bag must be removed immediately after the first shoots appear.
- Premature pick. If seedlings are planted ahead of schedule, they will slow down their growth and develop poorly. Tomatoes should be replanted only after roots are visible from the bottom edge of the snail. Then, when transplanted to a new location, a well-developed root system will provide the plant with the necessary amount of nutrients.
- The cochlea is not rolled up tightly enough. It is necessary to twist the snail very tightly so that the spirals do not unwind and the earth does not spill out. If the snail is folded incorrectly, it will greatly affect the germination of seeds, because the sprouts need energy to hatch to the surface.
If problems with seedlings do arise, it is important to immediately provide the plants with the necessary help.