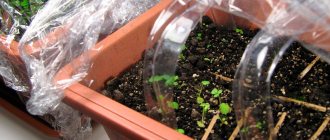
Tomatoes are heat-loving plants, so the rules for planting them in the ground and caring for them are important. I want to share my method of planting tomatoes in open ground with seedlings. An important and crucial moment is planting seedlings. However, before you start planting tomato seedlings in the ground, you need to be well prepared for this stage: from choosing the type of seeds, sowing them, caring for the seedlings, to preparing the soil. And if you follow all my recommendations, then when planting tomato seedlings in open ground, you will receive a rich harvest and the envy of experienced gardeners.
Why I decided to plant tomatoes in open ground with seedlings
I always grow tomato seedlings - both for the greenhouse and for open beds. Plants are not afraid of transplants - you can sow seeds in common boxes, and then “move” them into separate cups or pots.
Boxes will save space if you have a small apartment, but there are a lot of seedlings. But the grown seedlings will then have to be transplanted into separate containers. Planting each seed in a separate cup will take up more space, but then you won't have to waste time planting.
For many years I have been choosing mixed soil for tomato seedlings: peat and humus (about 2:1). Place a glass of sand on a bucket of substrate. Before planting seeds, I always fertilize the soil:
- ash – 1 glass;
- double superphosphate – 2 tbsp. spoons;
- urea – 1.5-2 tbsp. spoons;
- potassium sulfate – 1 tbsp. spoon.
This preparation is quite sufficient for tomato seedlings.
Is it possible to deepen stretched tomato seedlings?
Sometimes it happens that by the time of planting in open ground, tomato seedlings are slightly overgrown. Or, simply put, stretched out. Naturally, in this case, the gardener is worried about replanting the plants. After all, stretched seedlings can easily break from wind or heavy rain.
However, in this case there is one trick. The holes need to be made a little wider and deeper, and the seedlings should be placed in them almost horizontally (somewhere at an angle of 30 degrees). The soil should be added approximately to the first leaves.
ON A NOTE. If there are a lot of elongated seedlings, then they need to be laid in one direction.
How I chose seeds for seedlings: a review of popular varieties
There are a lot of varieties of tomatoes: more and more new ones appear every year. When choosing a bag of seeds, I first look at how suitable this species is for our climate zone. Let me introduce you to gardeners' favorites:
- Early maturing: Augustine, Red Rooster, Riddle, Abundant, Raja, Agatha, First-Grade, Family, Red Arrow, Aphrodite.
- Fruitful: Djinnah, Snow Leopard, Wonder of the World, Wild Rose, Astrakhan, Pudovik, Crimson Giant.
- For open ground (low-growing, but high-yielding): Eldorado, Golden Flow, Supermodel, Anastasia, Red Fang, Bobcat, Rio de Grande.
Before soaking, I discard misshapen, small seeds. Then I wrap them in a paper napkin envelope or gauze and place them in a bowl with water at room temperature.
tomato varieties
Fertilizer
The first fertilizing is carried out 2-3 days after the seedlings emerge and the row is thinned. The sprouts are fed with mullein, which is prepared in advance. It is necessary to pour 9-10 kg of manure with 20 liters of water in a plastic barrel and leave for 10 days. The resulting composition is diluted with water in a ratio of 1:10 (1 liter of mullein, 10 of water). Water the bush 1 liter per seedling.
Tomatoes are fed with ammonium nitrate. The chemical strengthens the plant’s immunity and promotes the formation of a healthy ovary and a good harvest. It is necessary to dilute 15 grams in 10 liters of water. mineral fertilizer, use as the first feeding.
The second planned feeding is carried out during the formation of the ovary. Potassium chloride and superphosphate are used. The preparations are diluted in water for irrigation in the following quantities (per 1 sq.m):
- 20 gr. superphosphate;
- 10 gr. potassium salt.
Preventive treatment of tomatoes against pests is carried out before flowering, during the ripening period, but no later than 3 weeks before harvest, so that the tomato has time to remove pesticides.
The correct choice of variety will ensure a consistently high yield of tomatoes. In the central and northern regions, you can plant tomatoes by seeds in the ground and reap good harvests every year. It is important to follow watering and feeding techniques, the procedure for pinching tall bushes and protection from pests.
Caring for tomato seedlings
To grow healthy and powerful seedlings, do not forget about these subtleties of care:
- Place containers with young plants on east or south windows. But in the northern and western regions, natural light is not enough for them - they cannot do without a phytolamp (the device is sold in gardening centers). Artificial lighting - at least 12 hours a day, according to the same schedule (for example, 7.00-19.00).
- Suitable temperature for tomato seedlings: 18-19 C. Usually it is warmer in apartments, so tomatoes quickly grow. Ventilate the room more often, turn on the air conditioner.
I’ll share my secret with you: I “pacify” elongated seedlings with ordinary superphosphate. I dilute 2 tbsp. spoons of fertilizer in a bucket (10 liters) of water, I water it with this mixture every week.
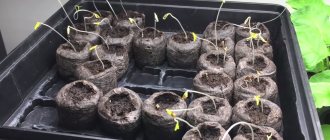
tomato seedlings before picking
The first picking method
The meaning of this procedure is that you pinch the main root, thereby giving the lateral roots the opportunity to actively develop. As a result, the tomato grows a more branched root system, which will actively absorb nutrients from the substrate. The more nutrition, the richer and tastier the harvest.
Picking is carried out after the appearance of the first pair of true leaves. I combine it with transplanting young tomatoes from a common box into separate glasses. I carefully dig up the plant, removing the lower part of the earthen root to find the central root. I cut it off by about a third, after which I transplant the tomato into a separate container.
The work is labor-intensive and requires caution. Therefore, I recommend that novice gardeners use separate cups at once. There is no need to pinch the spine here. The only thing is that when planting in open ground, do not forget to deepen the stem to the cotyledon leaves. This will contribute to the growth of lateral roots.
picking tomatoes
Second picking method
Let me introduce you to the “lazy” picking method. The plants do not need to be dug up or replanted - they remain in the boxes. By the way, this technique allows you to restrain their excessive stretching:
- Take a sharp utility knife.
- Use it to cut the soil in each box vertically and horizontally so that there is a seedling in the center of each resulting square.
- Side roots damaged by a knife will produce additional branches. This means they will absorb nutrients from the soil more actively.
During the entire period of growing seedlings, make 2 such “lazy” picks: when the second true leaf is formed, 4-7 days before planting in a permanent place.
Top dressing
About a week before transplanting, I feed the tomatoes in the morning or evening. I offer you two simple effective ways:
- Root. Choose a fertilizer based on liquid vermicompost (for example, Gumistar). Pour the mixture strictly under the root so that it burns the leaves. “Gumistar” can also be used for spraying greenery, but in this case its concentration is reduced by 2-3 times.
- Foliar. This is spraying the solution onto the leaves from a spray bottle. The seedlings are already able to absorb nutrients and microelements in this way. I use growth stimulants - for example, Epin (1 ml of the drug per 5 liters of water).
If the seedlings are too elongated, I advise you to remove the cotyledons and true lower leaves before fertilizing. I recommend doing the same for tall varieties.
Seed selection
The yield of tomatoes grown in garden beds is usually lower than those grown in greenhouses. However, if you choose the right variety, you can get a good harvest of tasty and beautiful fruits. It all depends on the budget, the size of the land plot and direct care.
Related article:
Tomato Golden Domes - description and characteristics of a mid-season variety
When choosing seeds you need to consider:
- manufacturer - according to most gardeners, the best seed supply companies are Aelita, Gavrish, Russian Ogorod-NK and SeDeK;
- variety and regionalization, i.e. adaptability to certain climatic conditions;
- ripening time.
- features of care.
Low-growing determinate fruits with an early ripening period, which are characterized by increased yield and resistance to diseases and pests, are best suited for growing in open ground. The following are worth considering:
- “Buyan” (“Fighter”) is an early ripening variety with a growing season of 95-100 days. Highly productive, unpretentious. Fruits weighing from 70 to 180 g have a good taste. Suitable for fresh consumption and preservation. Withstands transportation well over long distances.
- "Boni M" is an ultra-early ripening, low-growing determinate variety with a growing season of 80-85 days. The height of the bush is 50 cm, the weight of the fruit is from 60 to 70 g. It has a sweet and sour taste, dense and juicy pulp. Shows excellent productivity and is suitable for long-term storage and transportation.
- “Dubok” is an early ripening variety with a growing season of 85 days. The fruits have a round shape and weight 115-125 g. A universal species with excellent taste, suitable for both fresh consumption and canning. It has excellent keeping quality and transportability.
- "Danko" is a mid-early variety of large-fruited tomato with a growing season of 106-112 days. The length of the shoots is 55 cm, the weight of the fruit is 150-300 g. It has an incredible taste and excellent presentation, but does not withstand long-term transportation. Ideal for salads.
- "Mikado" is an early ripening variety with a growing season of 93 to 95 days. The size of the fruits resembles “Bull’s Heart” and weighs from 300 to 550 g (the record size was 900 g). They have a unique taste and are great for fresh consumption.
- “Pink Giant” is an indeterminate variety with increased yield and a growing season of 112 to 115 days. The weight of round, deep pink fruits ranges from 280 to 400 g. It has a unique, sweet taste and is great for salads, sauces and homemade juices.
Related article:
Tomato Black bunch F1 - description and characteristics of an early ripening variety
- “Emerald Apple” is a mid-season, indeterminate variety. Ripe fruits have a green tint and weigh from 200 to 350 g. Very sweet and juicy. The variety is drought-resistant and easy to care for. The bushes are powerful, reaching 1.5 m in length, so tying and pinching are required.
For other low-growing varieties of tomatoes for open ground, read the article
The following tomatoes are also suitable for growing in open ground:
- "Labrador";
- "Locomotive";
- "Sanka";
- "Lyana";
- "Orange";
- "Nikola"
- "Big Mama";
- "Voronezh miracle";
- "Karapuz";
- and many others.
When to plant seedlings
Be sure to pay attention to the appearance of your seedlings. Plants ready for transplanting:
- at least 25-30 cm in height from the root collars;
- 6-10 true leaves;
- there are the first buds.
When there are a lot of seedlings, I reject all non-standard plants: too small or elongated, damaged.
Spring
If you plan to grow seedlings for open ground, there is no need to soak the seeds for seedlings in late February-early March. These terms are good only for greenhouse plants. And for seedlings in an open garden bed, the seeds are soaked only towards the end of March or beginning of April.
I focus on the timing of the transplant. I plant the seeds approximately 50-60 days before the seedlings are expected to move into the garden.
Summer
I usually plant tomato seedlings in open ground in two stages to get both an early and late harvest:
- In the beginning of May. I definitely protect the plantings with covering material. Before transplanting, I warm up the future bed, covering it with black polyethylene.
- After June 10. By this time, the threat of frost has passed in central Russia - shelter is no longer needed for planting.
But these are still approximate dates. Depending on your region of residence, I recommend that you follow this schedule:
- Middle lane. Planting in open beds is possible from the beginning of May.
- Ural, Siberia, north-west of the country. Not earlier than the end of May or beginning of June.
- Southern regions. From the second half of April.
If you use a covering film, the planting dates can be set a week earlier. The main reference point is the soil temperature. You should not plant tomatoes if the soil has not warmed up to at least 8-10 C. The best soil temperature for tomatoes is 12 C. It should be not only on the surface, but also throughout the entire depth of the hole (approximately the bayonet of a shovel). Frost is the enemy for heat-loving tomatoes. If the soil temperature drops to 0-2 C, the plantings may die.
According to the lunar calendar
Important periods in 2021 for gardeners who follow the lunar calendar:
- Favorable days for sowing seeds will be: January 7, 8, 9, 16, 17, 21, 22, 26, 27;
- In February, favorable days will be: 6-8, 12, 14, 25. Unfavorable period: 5, 12, 18-19, 27.
- In March, lucky days are: 7, 10-12, 14-16, 19-20. As for unfavorable days, 3, 5-6, 14, 21-22, 31st.
- Several days in April are optimal for seedlings: 11-12, 17-18. Unlucky days will be 4-5, 13, 19-20.
- In May, gardeners expect many favorable days for planting vegetables: 2-3, 8-10, 15-18, 28. If we talk about unfavorable days, 5, 19-20, 27, 29-30 of the month
Hardening off seedlings before planting in open ground
I always harden off my seedlings - I start 2 weeks before transporting them to the garden. The procedure itself is simple:
- Take the cups or boxes with plants out onto the balcony. If you are planting seedlings at the dacha - in a heated greenhouse. Make sure that the room temperature does not fall below 8-10 C.
- On the first day, half an hour of hardening is enough for young tomatoes.
- In the following days, gradually increase the time the seedlings stay in the new conditions.
- By the end of the 2-week hardening, they should already spend a full day on the balcony.
In order not to harm young plants, prepare the hardening site: protect it from strong drafts and direct sunlight. To do this, open the balcony frame only to the micro ventilator, and place the tomatoes themselves in partial shade. You can use newspapers, not transparent curtains.
The day before transplanting, I always carry out pest control. This is the best time - by the time of harvest, all substances harmful to the human body have already been completely removed from the plant. I prefer to use “Antikhrushch”: it protects seedlings from several pests at once - whiteflies, wireworms, beetles, and mole crickets. For each glass of tomato – 30-50 ml of a weak concentration solution.
How to plant tomatoes for seedlings
In order to grow strong seedlings that are resistant to adverse conditions, it is very important to take into account the optimal timing of sowing seeds and properly prepare the substrate. It would also be useful to know the basic rules for caring for emerging plants, of course, in accordance with the requirements of the selected variety.
Deadlines
Early-ripening and mid-ripening varieties of tomatoes are usually sown for seedlings in early March, placing boxes of tomatoes in a warm room with temperatures not lower than +22–23 °C during the day and +17–18 °C at night. In the first week after sowing, it is advisable to organize round-the-clock lighting.
Transplantation into open ground is most often carried out at the beginning of June or, in extreme cases, at the end of May, as soon as the likelihood of return frosts has passed. However, in this matter it is very important to take into account the selected tomato variety.
Priming
Tomatoes love nutritious soil, so the substrate for sowing seeds must be appropriate. It is best to prepare the soil yourself by sifting humus through a sieve (the cells of the product should not exceed 4–6 mm), turf soil and peat, taken in equal proportions. For preventive purposes, it is advisable to pour the finished mixture with a solution of potassium permanganate or calcine it in the oven, which will help eliminate all pathogens and fungal spores.
Selection and preparation of a site for planting seedlings
I recommend starting to prepare tomato beds in the fall: add ash and humus to the soil, dig it up thoroughly. You can add river sand, peat, rotted mullein (manure in granules).
I have already tested in my own experience how planting winter green manure improves the nutritional value of the soil. But it’s not too late to plant the same oats in the future tomato bed in the spring. Before planting seedlings, green fertilizer is dug up.
Tomatoes love acid-neutral soil (no more than 6-7 pH). If the acidity is below 5-5.5 pH, it is increased using a deoxidizing agent. For example, dolomite flour.
If you started preparing your garden bed in the spring, I advise you to be careful when fertilizing the soil. The following scheme has never let me down:
- Before planting the seedling, I pour a tablespoon of ash into the hole.
- Second option: a handful of humus, 1 tbsp. spoon of superphosphate per well.
- Third option: liquid vermicompost.
Do not forget to thoroughly mix the fertilizer with the substrate. You can additionally disinfect the soil using Glyokladin or Trichocin (1 tablet per 1 seedling).
If you want to harvest an excellent harvest of tomatoes every year, you will have to either find a new place for the tomato bed every year, or completely remove the entire top layer of the substrate and replace it with fresh soil. When choosing where to plant tomatoes, pay attention to their predecessors:
- Successful: carrots, onions, cabbage, beets, legumes.
- Unsuccessful: nightshade relatives - tomatoes, eggplants, peppers, potatoes.
In place after the tomatoes themselves, it is recommended to plant:
- legumes;
- pumpkin;
- cabbage;
- roots;
- garlic and onion.
That is, those crops that enrich the substrate with nitrogen.
Growing process
The mechanism for growing tomato seedlings for planting in the ground is no different from the greenhouse method. It is necessary to prepare containers in advance. Boxes, containers, peat tablets, cassettes with a tray, cups and even cut plastic bottles will do.
Related article:
Why do tomatoes have white streaks inside?
Soil preparation
It is recommended to purchase a special soil mixture for tomatoes and bell peppers and seeds: the soil should consist of turf soil and humus in a 1 to 1 ratio, to which you should add a little peat and sawdust. A mixture of part garden soil, part sand and part black soil with vermiculite is suitable. The pH level of the finished soil should be between 5.5 and 6.0.
To get rid of fungi and larvae contained in any soil mixture, it is necessary to thoroughly treat the soil. To do this, you can use one of the following methods:
- treatment with potassium permanganate – 5 g (slightly less than 1 tsp) potassium permanganate per 10 liters of 70°C water. Mix the liquid thoroughly so that there are no undissolved crystals left in it. Spray the soil with a bright pink solution;
- calcination in the oven - place pre-sifted, slightly moistened soil on a baking sheet in a 5 cm layer and “bake” at a temperature of 180°C for 15 minutes (or calcine the soil in the microwave for 2 minutes);
- processing in hot water - place the bag with soil in water (from 65°C) and cover with a lid, wait until the liquid cools completely.
After treatment, the soil must be moistened and kept warm for 14 days to restore the bacterial flora and substances necessary for the growth and development of seedlings.
Related article:
Which pink tomatoes have high yields?
Seed treatment
Immediately before sowing, you need to select the most viable seeds. For this:
- Place the seeds in a saline solution - 1 tsp. salt for 1 tbsp. warm water.
- Stir the resulting mixture with a spoon and leave for 10 minutes.
- Get rid of floating particles, rinse the remaining seed thoroughly with clean water and dry.
Now you need to disinfect the seeds by soaking them in the solution:
- Fitosporin-M (1.5 g of the drug or half of 1 teaspoon diluted in 150 ml of water) 1-2 hours;
- 0.05% Chlorhexidine in a fabric bag for 30 minutes;
- brilliant greens (1 ml per 100 ml of water) 30 minutes;
- 3% hydrogen peroxide 20 minutes;
- potassium permanganate (dilute 1.5 mg of the substance in 1 cup of water and filter through gauze) for 20 minutes;
- garlic (stir 3 crushed cloves of garlic in 100 ml of water) 30 minutes;
- aloe (1 part freshly prepared aloe juice and 1 part water) 30 minutes.
If the seeds are old or there are certain concerns regarding their germination, then the bubbling method can be used. You will need an aquarium compressor or bubbler, as well as a container of water:
- Place the seeds in a fabric bag and immerse it in a container of water at 40°C.
- Insert the hose from the compressor into the vessel and turn on the device.
- After 12-16 hours, take them out and dry them thoroughly.
Related article:
3 feedings of tomatoes during fruiting period
Experience in growing tomatoes in open ground shows that special growth stimulants are well suited to accelerate plant development. Such preparations significantly improve germination and help the formation of healthy and strong seedlings with excellent immunity and disease resistance.
Soaking should be done immediately before sowing in seedling containers.
The treatment procedure with growth stimulants includes two stages:
- Place the seeds in a gauze bag.
- Spill it with a solution of “Zircon”, “Epina-Extra”, “NV-101” or “Energen” (instructions are on the package).
You can also use traditional methods to increase germination:
- honey solution - 1 tbsp. Dilute warm boiled water with 1 tsp. honey, soak for 5 hours;
- wood ash - dissolve 1 tbsp. l. ash in a glass of water, mix and leave for 2 days. Then mix again and leave the seed in the resulting solution for 6 hours.
After using any of the listed growth stimulants, the seeds do not need to be washed.
Immediately before sowing, the seed can be germinated according to the following scheme:
- Place cheesecloth on a plate.
- Place the seed on it and moisten it with a spray bottle with settled water.
- Wrap it in gauze and put the plate in the bag so that air remains inside.
- Place the plate in a warm room where the temperature is +25°C.
Instead of gauze, you can use cotton pads.
Sowing and cultivation
The mechanism for growing seedlings of ground tomatoes includes the following steps:
- Fill the container with moistened substrate and press the soil down a little.
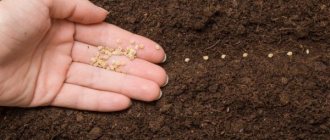
- Make grooves 1 cm deep at a distance of 4 cm.
- Place the seeds in the recesses in 1-2 cm increments.
- Level the soil and moisten it with a spray bottle.
- Cover the container with film or glass. The temperature should be +22-25°C.
- Ventilate seedlings daily and moisten as needed.
- After the first shoots appear, move the pots to a cooler room with a temperature of +15°C for 7 days to avoid stretching the stems.
- After a week, return the seedlings to warmth, but place them on the balcony at night.
- It is necessary to provide plants with 12-14 hours of lighting. Modern LED lamps are perfect for this. Continue watering and monitoring.
Related article:
Tomato Kiwi
- There is no need to feed the seedlings if the substrate is used. If the land is garden, then you can purchase complex fertilizers such as “Agromax” or “Agricola”, or prepare the fertilizer yourself. First recipe: dilute 10 g of urea, 0.5 tsp in 3 liters of water. potassium sulfate, 1.5 tsp. superphosphate. Second recipe: 1 tsp. ammonium nitrate, 1 tbsp. l. superphosphate and 1 tbsp. l. potassium sulfate per 5 liters of water. Feeding is carried out 4-5 days before picking.
- When the plants get stronger, 2-3 leaves form (i.e. after 15-20 days), it is necessary to pick and move the seedlings into separate large containers, or into a more spacious box (as a last resort).
Gardener's cheat sheet: How to pick tomatoes correctly
- Fill the cups with damp soil mixture and carefully remove each seedling so as not to damage the root system. The roots of each plant are shortened by a third and placed in pre-made holes in the substrate up to the cotyledon leaves. A little watering is carried out (you can add “Heteroauxin” or “Kornevin” to the liquid).
- Leave the transplanted plants in the shade for a couple of days. On the third day, transfer to light. You can place 12-15 pots per 1 m2.
Related article:
Little secrets of growing delicious tomatoes
- After transplanting, young plants need to be watered moderately (if you overdo it, there is a high risk of developing blackleg and seedling death), loosen, and make sure that the plants do not get sick and develop properly.
- A week after picking, you can carry out a second feeding with phosphorus-potassium fertilizers, and after another 5 days - with nitrogen. In the remaining time before transplanting to the garden bed, you should feed it a couple more times with NPK complexes.
- About 14 days before planting tomatoes in open ground, it is necessary to open the window and gradually increase the ventilation time; in warm weather, the plants should be taken out to the balcony. Watering stops in about a week. The night before transplanting, the seedlings should be on the balcony.
High-quality seedlings should have the following characteristics:
- have 7-8 full leaves (short) and 12-13 leaves (tall), green leaves below, no curled dark leaves;
- reach no more than 25 cm in height with a stem thickness of 1 cm.
Related article:
How to help seeds sprout faster and produce good seedlings
Transplantation into open ground
The land for growing tomatoes is prepared in the spring. At this time, weeding, digging to the depth of a shovel, fertilizer (50 g of superphosphate, 5 kg of compost and 50 g of potassium sulfate per 1 m2 of land) and disinfection with 3% Bordeaux mixture are carried out. If the soil is acidic, then additionally add 400 g of ground chalk per 1 m2 of land. The area should be windward and sufficiently illuminated, the temperature should be up to +15°C.
Tomatoes can be planted after beets, cabbage, onions, carrots and corn. Bad predecessors of this crop: potatoes, peppers, eggplants and physalis. It is not recommended to plant tomatoes in the same place for several years in a row.
The mechanism for creating a tomato plantation includes the following steps:
- Form beds 1 m wide and 20 cm high in the direction from east to west.
- Thoroughly loosen the ground and level the soil surface.
- Arrange the holes in 2 rows at a distance of 20-30 cm in the case of low-growing varieties and at 60 cm for tall ones.
- A few hours before planting, the seedlings need to be watered well.
- Immediately before planting, add 15 g of superphosphate, a handful of humus and sand to the holes, and, if necessary, granules for protection against pests such as Medvetox, Provotox and Rembek. Do not add fresh manure to holes when planting tomatoes in open ground, as this can lead to burns of the roots.
- Water the holes and plant the plants, deepening them to the cotyledons. In the case of overgrown seedlings, you need to tear off a couple of lower leaves and place the seedlings in the holes at an angle, with the tops facing south. In the latter case, about 20 cm of the stem should remain above the ground.
Related article:
What fertilizers do tomatoes lack?
- Lightly compact the finished beds, sprinkle with loose soil and level out.
- Water. During the day, cover the tomatoes with non-woven material to protect them from direct sunlight.
Step-by-step instructions for planting in open ground
I choose calm, cloudy weather for planting seedlings. If the day is sunny, I work only in the morning or in the second half of the day, or even late in the evening.
Tomatoes love high beds (25-35 cm) with an optimal width of 1-1.2 m. I make the holes “checkerboard”: 50-70 cm between rows, 30-40 cm between plants in one line. If the seedlings are large and tall, I increase these distances by another 20-25 cm.
I have prepared for you a step-by-step algorithm for planting tomato seedlings:
- Before transplanting, water the plant - this will make it easier to pull the soil ball out of the cup.
- To make it easier to remove the plant from the pot, lightly tap the bottom. I use plastic containers - their walls wrinkle, which allows the lump of earth to separate more easily.
- The base of the seedling should be lightly pinched between your index finger and thumb. With a quick and sharp movement, turn the pot with the plant over.
- If the earthen lump has not separated from the walls of the container, very carefully pull the base of the plant stem towards you, slightly rocking it from side to side. At this time, do not stop kneading the walls of the pot with the fingers of your other hand.
- When you cannot remove the seedling, do not pull it too hard. It is better to cut a plastic or cardboard cup with a knife or scissors.
- Place the earthen ball in the already prepared hole: fertilize the soil in advance with a special fertilizer.
- Deepen the stem approximately 10-15 cm below the previous level.
- Tilt the young tomato slightly to the side and water thoroughly. I do this in several stages: I wait until the water is completely absorbed into the substrate and again take up the watering can. Watering is the most important part of planting. The better the soil is moistened (but not swamped), the faster the root system adapts and begins to develop. For one hole, 3-4 liters of water (preferably warm) is enough.
- Leaving the seedling on its side, fill its hole with soil. Lightly compact the substrate, and then sprinkle with loose soil.
- After planting, there is no need to water the plant, otherwise a soil crust will form.
- If the tomato is tall, tie it to a stake. Low-growing tomatoes are not tied up, but the soil around them is mulched with straw or hay.
- Place arches and protect the beds with covering film.
For large tomatoes, mulching when planting is not necessary. The need for it appears after the seedlings have already taken root - they use forest litter. The next mulching is after removing the lower leaves.
Preparing the site for planting
All tomatoes love it when it’s warm and sunny. Therefore, the place for them should be open and well illuminated by the sun's rays, but not blown through, but protected from cold gusty winds. Swampy, low-lying and damp areas, as well as those where groundwater and spring water are close, are not suitable. Loose, permeable loams with very little or almost neutral acidity are best suited for planting tomatoes.
You should prepare a place for tomatoes in advance (preferably in the fall), but you can do this a couple of weeks before planting. The earth is deoxidized (if necessary) with dolomite flour or lime fluff. Heavy, dense and clayey soils are structured with sand and peat. Sandy loams that are too light and do not retain moisture are enriched with humus and peat-clay components.
The area is dug deep (as deep as a shovel), removing debris, stones and creeping roots of weedy perennials (sow thistle, bindweed, etc.). Along the way, you need to apply a number of fertilizers for digging (on average for each m2):
- double superphosphate/simple superphosphate - 20-25/40-50 g;
- humus - 5-7 kg;
- potassium sulfate - 30-35 g.
You can speed up the warming of the soil in the garden bed by covering it with any opaque dark material (preferably black). It is necessary to put a plastic film on top so that the moisture does not evaporate so quickly and intensely.
How to properly tie tomatoes
Let me introduce you to the main rules of garter:
- Use only disposable garter materials (to prevent fungal diseases).
- Before use, all supports are disinfected with a solution of potassium permanganate (0.02 g of the drug per 1 liter of water).
- Do not squeeze the stem with a bandage - this will disrupt the metabolism in its tissues.
- Tying is necessary at the stage when the bushes begin to bend to the ground under their weight.
I use hemp rope as a garter material. Wire, fishing line, ropes are not suitable for this. But old nylon tights work well. You can buy special clothespins and clips.
As for the support itself, there are several options:
- Individual. These are wooden stakes, iron rods, plastic tubes, which are placed next to each bush. The support should be approximately the same height as it. The device is not suitable for tall varieties.
- Horizontal trellises. Wooden stakes are driven between the rows at a distance of 1.5-2 meters. A wire or twine is stretched along their height at a distance of 30-40 cm. Tomatoes are already tied to it with scraps of fabric.
- Net. Between the rows, mesh sheets are installed, to the rods of which the tomatoes are attached with garter material or special clothespins.
There are also special store accessories: wire frames for each bush or pyramid caps.
garter pins
Soil preparation
The soil for tomatoes is prepared in advance, starting in the fall. At this time, the main filling of the soil is carried out, introducing organic matter and mineral fertilizers into it.
Rotted manure is most often used as organic matter, which is applied for digging in the amount of 4-5 kg per 1 m2. To saturate the soil with phosphorus and potassium, mineral components are also added during digging: superphosphate - 60-80 g/m2 and potassium sulfate - 20-25 g/m2.
Note!
The proportions of fertilizing and the fertilizers used can vary significantly. Some people prefer to use only organic matter for these purposes, others prefer more nutritious fertilizers with the addition of minerals. What will happen in your garden is up to you to decide!
In the spring, about 5 - 7 days before planting tomato seedlings in open ground, the ground is dug up again, all weeds and roots are removed.
2 days before planting, spill the soil with a hot solution of copper sulfate or potassium permanganate. This measure allows you to destroy fungal pathogens and some pests that may be in the soil.
Next, already during planting, one or more nutritional components are added to each hole:
- superphosphate (phosphorus) – 1 tsp;
- ash (potassium-phosphorus fertilizer) – 0.5-1 cup;
- crushed shells (calcium) - a handful;
- compost - a handful;
- vermicompost – 1 glass.
Note!
A common scheme for applying fertilizer to a hole is: superphosphate + ash.
Fertilizers are added to the planting hole
What problems may arise after transplantation?
As I noticed, the main cause of most tomato diseases, late blight, is high humidity. To avoid this problem, I recommend:
- Do not overwater the tomatoes or make the soil waterlogged.
- If you cover tomatoes, be sure to ventilate them.
- Trim off the lower leaves.
Tomatoes do not tolerate continuous shade or density. But they also feel bad under the scorching sun. Therefore, try to choose a “golden mean” for them - a moderately lit and humidified place.
How to care for tomatoes after transplanting
Proper care will help plants quickly adapt to a new place, and will also provide a generous and tasty harvest. As care after transplanting tomatoes into open ground, watering, loosening, weeding, fertilizing, pinching, pruning, tying, and pest and disease control should be performed.
Watering
It is not recommended to water after transplantation for about 7-10 days. And then it is necessary to water approximately once every 7 days. If it is hot and dry outside, then watering should be done more often!
When watering tomatoes, the following rules should be observed:
- The recommended watering rate is 3-5 liters of water for each bush.
- It is better to do this in the first half of the day, and if the weather is hot, then it is better in the morning.
- After each watering, it is recommended to remove weeds and loosen.
- To optimize soil moisture levels, cover the bed with mulch material (for example, sawdust, compost, straw).
- It is also a good idea to water between the rows, this way you can definitely avoid erosion of the roots.
Important! Watering can only be done at the root; drops should not be allowed to fall on the foliage of the plant! This crop cannot be irrigated, because various diseases can be provoked, and sprinkling can also cause leaf burns and tissue damage.
Feeding and fertilizing
Tomato fertilizers help achieve a more luxurious and abundant harvest. Root feeding of tomatoes is carried out in the following order:
- The first feeding should be done ten days after the event. As a fertilizer, you can use a solution of Nitrophoska (15 ml) and mullein (0.5 liters) , mixed with ten liters of water . Fertilizers should be applied in the following proportions - 500 milliliters per bush.
- The second feeding is carried out 20 days after the first application of fertilizers. For feeding, you can use a mixture containing the following ingredients - a teaspoon of potassium sulfate, a tablespoon of superphosphate, 400 grams of chicken manure , the components are mixed with ten liters of water . One liter of fertilizer is applied per plant.
- The third feeding is carried out two weeks after the 2nd feeding. To prepare the fertilizer, potassium humate (15 ml), nitrophoska (15 grams), 10 liters of water are , and when watering, 5 liters of the substance are added per square meter. Also, after 14 days, it is recommended to add a solution of superphosphate , which can be done like this - a tablespoon of the substance is mixed with 10 liters of water, one bucket is poured per square meter of bed.
Important! Before fertilizing, it is imperative to water the plants abundantly with plain, clean water. If you don't do this, you can burn the roots.
In addition to the root fertilizing described above, foliar fertilizing can also be done. During one harvest season, you can do about three to four fertilizing, but this can only be done in the evening and in dry weather. You can prepare fertilizer for such feeding as follows: one gram of potassium permanganate, 15 grams of urea, 10 liters of water.
Video: fertilizing option to increase yield.
Formation (stepping, pruning)
Stepchildren are unnecessary side shoots that form in the axils of the leaves. They do not perform any useful functions, they only take away the plant’s resources, because of this, the bush’s growth and fruiting slow down, and the plant becomes weaker. Stepsoning, accordingly, is the process of eliminating stepchildren.
The photo shows the stepson of a tomato:
It is recommended to plant tomatoes every week . If they appear, they need to be removed as soon as possible. Only your thumb and forefinger can be used for removal. When pinching, it is necessary to leave a stump about one centimeter in size (this will help prevent the appearance of a new useless shoot).
Trimming the lower leaves located close to the ground must be done so that the plant receives a normal supply of air and light from below and is well ventilated. Thanks to this, you can avoid unpleasant diseases. It is recommended to prune at the moment when the fruits begin to fill.
The procedure is carried out using pruning shears or a knife. You should also remove foliage no higher than the first bunch of tomatoes.
Garter
The garter has a number of significant advantages, for example, after it it becomes more convenient to water the plants, treat them against diseases and pests, plant them, and harvest them. In addition to convenience, it should be noted that thanks to the garter, the bushes are better ventilated, receive more sunlight, reduce the risk of developing diseases, and also reduce the load on the main stem of the trunk - damage to it due to heavy vegetables is eliminated.
Video: features of tomato garter.
Prevention and control of diseases and pests
Mostly, plant diseases occur due to high humidity. To avoid the development of diseases and pests, you should adhere to the following recommendations:
- It is necessary to carry out moderate watering, avoiding waterlogging;
- The greenhouse or greenhouse should be regularly ventilated;
- It is recommended to mulch the beds;
- It is necessary to promptly treat plants at the first signs of diseases and pests.
We can say that the hardest part is already behind us! There is very little left until the tasty and healthy fruits ripen. And you, dear gardeners and gardeners, need to provide the seedlings with proper and complete care and then the harvest will not disappoint you.
Caring for tomatoes in open ground
Subsequent care of plantings comes down to several mandatory procedures:
- Watering.
- Weeding.
- Mulching.
- Loosening (if there is mulch, optional).
- Depending on the variety - bush formation, pruning, pinching.
- Protection from pests and diseases.
At first, try to disturb the plants less to allow them to take root, but then weekly watering. For one bush: before flowering - 2-3 liters of water, after flowering - 5 liters. In hot, dry weather, the amount of watering is increased. The best time for water treatments is the morning or the first half of the day if the weather is cloudy. Please note: tomatoes are watered only at the root.
When tomatoes begin to ripen, it is important to maintain constant soil moisture. Mulch copes with this perfectly: compost, straw, humus, hay, sawdust, wood chips. If there is no such covering, do not forget to loosen the soil after each watering and remove weeds.
complex fertilizers for feeding tomatoes
Three feedings will be needed after transplantation:
- Nitrogen fertilizer. 2-3 weeks after planting in open ground. There are several effective options: nettle infusion (1 glass per 1 bush) or 1 tbsp. a spoonful of nitrophoska, 0.5 liters of mullein solution per bucket of water (0.5 liters of fertilizer per 1 bush). Another option: 2 tbsp. spoons of 10% ammonia per 10 liters of water (1 liter of solution per 1 bush).
- Potassium fertilizer. Fertilizing before the start of active flowering. Use either an ash mixture (a one-liter jar of ash per bucket of water) or potassium humate (20 ml of the drug per 10 liters of water).
- Potash fertilizer. The same fertilizers are applied during fruiting.
Before all fertilizing, be sure to water the plants - otherwise the products may burn the root system.
Another important job is stepsoning. But it is only necessary for tall, medium-sized bushes. It is most convenient to pluck stepchildren with the nails of the thumb and index finger. I always leave a small stump, otherwise a new branch will grow in place of the removed one. Low-growing plants do not need pinching (only the lower branches can be treated).
Do not forget to remove the lower leaves with scissors or pruning shears - this is an excellent prevention of phytospores. This work is carried out only after the start of fruiting.
That's all the secrets I would like to share with you. Tomatoes are not a capricious crop, but they still require care. Follow all my recommendations - and tomatoes will definitely thank you with a delicious and abundant harvest.
Planting seedlings in the ground
Let's look at how to properly plant tomatoes in the soil. Each tomato grower chooses a scheme for planting tomatoes in his garden based on the characteristics of the site (for example, the width of the ridges, the possibility of free access from different sides) and his preferences. Seedlings are planted either in one row or in several, as well as in a checkerboard pattern.
To plant, dig a hole or trench in the prepared bed, into which the tomatoes are planted. Water the soil before planting.
When planting tomatoes, tomato growers maintain the following distances:
| Type of landing | Gap between tomatoes in a row, cm | Gap between rows of tomatoes, cm |
| Low and medium-growing tomatoes | 40 | 50-60 |
| Tall tomatoes with one stem (determinate) | 30 | 45-50 |
When to plant tomatoes in open ground? Each year this may be different. Everything depends on weather conditions. It is important that before planting the seedlings, the soil is well warmed up and the average daily temperature is at least 13 degrees Celsius. There should be no threat of frost on the soil. , some tomato growers initially cover the tomatoes with film.
Advantages and disadvantages of the method
If you plant the seeds directly in open ground, you can get good results. After all, the seedless cultivation method has its positive aspects:
- Plants develop a strong root system. There is not enough space in the glass, so the roots are not so powerful. They also have healthier foliage.
- After the first shoots, seedlings adapt to ultraviolet rays.
- Tomatoes bypass the process of transplanting seedlings to a permanent place, so they do not succumb to additional stressful situations.
- When grown this way, the plants are not affected by blackleg.
- With good lighting, the crop quickly catches up with tomatoes planted in seedlings.
The advantages of the seedless method include its low cost, both material resources (no need to buy containers for seedlings, waste electricity on heating and additional lighting) and physical labor (picking, transporting seedlings to a permanent place).
Planting tomato seeds in open ground also has its disadvantages:
- Poor germination - can occur due to poor-quality seed, cold, or large amounts of moisture.
- Lost seedlings - this problem occurs due to improper care.
The disadvantage of the seedling method is that seed germination in field conditions is always lower than in an artificial climate. Therefore, it is necessary to increase the number of seeds sown in the soil by almost 2 times.
Tomatoes prefer a sunny, draft-free area. The best predecessors for them are legumes, early white cabbage, pumpkins, zucchini, and cucumbers. You can also plant after onions and late cabbage.
You should not cultivate tomatoes in an area where potatoes, eggplants, and peppers previously grew. After all, plants are affected by the same diseases, the pathogens of which remain in the ground for several years. For this reason, it is not necessary to grow in one place for up to 4 years. Potatoes are also a bad neighbor. It can infect tomatoes with late blight. And it won’t be difficult for the Colorado potato beetle to get to them.
How to prepare the soil
It is better to prepare the soil in the fall. To do this, after harvesting, add ash, manure or compost. The earth is dug up and left in this form until spring. Over the winter it will become saturated with useful substances. 2 weeks before planting, loosen the soil with a rake and water it abundantly. You can cover it with plastic wrap - this will help warm it up faster.
If it was not possible to prepare the bed in advance, then sowing tomatoes in open ground with seeds can be done in prepared holes. They are made in sod and filled with store-bought or leaf soil. If there is fertile soil under the top layer of soil, only this can be removed. To warm the soil, you can also cover the area with the holes with film.
Selecting a site, preparing soil and beds for planting tomatoes
So, based on the above, you were able to choose a suitable site. Next comes preparing the soil for future beds. It is best to prepare the soil in the fall, namely, dig up the soil, adding wood ash and humus to it. To improve the nutritional value of the soil, you can sow the area with oats for the winter. In the spring it will be much easier to dig it up a second time, remove the weeds and add fertilizer.
When the soil is ready, you need to form the beds. The following types of tomato beds are distinguished:
1. Warm beds in open ground . Tomatoes are very heat-loving plants, so many summer residents choose this type of garden bed. They work on the principle of a compost heap: organic matter rots and gives off its heat.
Such a bed is made as follows: a trench is dug a meter wide and half a meter deep, and wood chips, sawdust, dry grass, and shrubs are placed at its bottom. A layer of organic matter is placed on a layer of wood, on top of which manure is poured. Next, they begin to complete the top layer, consisting of last year's compost and soil. Tomatoes are planted in such beds a little earlier, as is harvesting.
High bed for tomatoes
2. High bed . This type of arrangement is very similar to a warm garden bed. A high bed is soil raised above the main level of the garden and framed with special sides. Tomatoes in such soil are easy to care for, since the appearance of weeds is hampered by the sides. Such beds are not destroyed during the winter and during unfavorable weather conditions.
3. Regular garden bed . Many gardeners are negligent in preparing their beds and make the usual dug beds. Unfortunately, they have many disadvantages: a large number of weeds, it is impossible to protect them from frost, wide beds complicate the care of plants. Therefore, such beds are more suitable for greenhouses.
Preparing tomato seedlings for planting, step-by-step tips
In 2021, as in previous years, tomatoes should be planted in open ground after the seedlings have grown to optimal levels. Focusing on external signs, the gardener must take care of the crop in advance. In 10-14 days, agronomists advise to accustom the bushes to a cool climate, gradually hardening them. Boxes with seedlings should be taken out into the open air, gradually increasing the time spent in the daytime. It’s better to start with 20 minutes, ending with a full day.
Important!
To prevent the seedlings from freezing, it is better to perform the technology when the air is warmed to 12-16 degrees Celsius. At lower rates, the bushes may lean to the side, become stressed, or even freeze, stopping their growing season for several weeks.
Helpful information!
Seedlings should be taken out to the balcony or street in time to prevent young plants from getting sunburn. If the air temperature and the amount of heat change sharply, and the tomatoes do not have time to get used to these changes, you will have to say goodbye to wasted efforts.
In order for tomato seedlings to be ready for planting, fertilizers must be added 5-8 days in advance to promote abundant growth and development of the root system. Irrigation with warm water with the addition of stimulants will allow young bushes to quickly get accustomed, and most importantly, to take root in a new place. You should apply ready-made nutrient mixtures for fruit crops or folk remedies that have stood the test of time. As an option, spray the seedlings with Epin.
To develop the root system, you can use alternative fertilizers that are in demand among gardeners. Gumistar has many positive reviews on the Internet. On forums dedicated to gardening, this product is often praised for its positive results and budget.
Before planting, 2-3 days before planting, it is necessary to tear off all yellow and cotyledon leaves. This will stop growth for one week, switching the flow of juice to building up the root system.
By the time of planting, tomato seedlings should stretch to 15-20 cm and grow to 8 full leaves. Overgrown and small sprouts will take root less well and may die from the influence of temperature changes and poorly warmed soil.
Important!
If the seedlings were grown with a reserve, the best tomatoes should be selected for planting. It is worth throwing aside sprouts that lag behind their peers or, conversely, that are overly elongated and tilted to the side.
To prevent diseases and pests, you can treat the seedlings before planting with a weak solution of potassium permanganate or soapy water based on laundry soap. An alternative would be complex preparations that protect the plant from wireworms and other insects that feed on the pulp of leaves and mature fruits.
If tomatoes are grown from seeds collected in your garden, it is recommended to treat not only the crown, but also the root part of the plant. For prevention, the roots are dipped into the solution for 30-40 minutes and then planted in open ground.
If the processing is done one or two weeks in advance, you don’t have to pull the sprouts out of the cups. It is enough to spill each tomato with a small amount of solution. However, after planting it should be done with a treated lump of earth where the roots will sprout.
