What to do to make dill sprout quickly
Preparation of planting material begins a week before planting. Treatment is carried out for rapid germination and disinfection to get rid of pathogens of viral and fungal diseases.
Let's look at what the seeds are soaked in before planting.
Water
Place a cotton cloth or gauze on the bottom of the plate, sprinkle seeds and fill with filtered water. The liquid temperature for heat-loving varieties should be 20–25 °C, for others - 15–20 °C.
The water must be changed every 4 hours. During soaking, the seeds should just swell. Once 1–1.5% of the seed material has hatched, the process is complete. Shoots from such seeds appear 2-3 days earlier than when sowing dry ones.
Growth stimulants
For soaking, products containing magnesium, iron, copper, boron, molybdenum, zinc and cobalt are used. Stimulants promote the growth process and awaken the embryos. Disinfected and heated seeds are soaked in a solution, then dried, but not washed, and planted.
The most commonly used growth stimulants:
- " Zircon " is a biological product with systemic action. Activates germination and germination of seed material, increases productivity.
- " Fitosporin " is a systemic fungicide. Suppresses the proliferation of fungi and bacteria.
- " Kornevin " is a biostimulating drug that contains indolylbutyric acid.
- " Epin " is a natural bioregulator, growth and development stimulator, containing epibrassinolide.
Vodka
40% vodka not only dissolves essential oils, which promotes rapid germination, but also disinfects seeds. To do this, planting material is placed in cotton cloth and dipped in vodka for 15 minutes, no more.
Wood ash
The action of the solution is based on the high content of microelements, in particular potassium and calcium. Before soaking, prepare a solution: 2 tbsp. l. ash is poured into 1 liter of water and left for 2 days, stirring occasionally. Dill seeds are placed in the strained solution in a fabric bag for 4-5 hours.
Herbal infusions
Pour 1 tsp into a cup. chamomile, pour boiling water (90–95 °C), cool to 50 °C and soak the seeds for half an hour. You can also use aloe juice: dilute with water 1:1 and place the planting material in the infusion for a day.
This is interesting:
Areas of application for dill umbrellas.
A tasty and healthy way to fight excess weight: dill for weight loss.
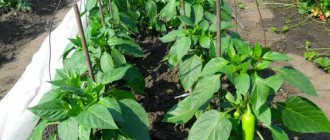
Dill neighbors in the garden
When planting vegetables in the garden, it is important to consider their compatibility. Properly chosen neighbors in the garden have a positive influence on each other. Crops with poor compatibility are inhibited in development and compete for nutrients. Where to plant dill next to and why? To prevent plants from interfering with each other, they must belong to different families. In this case, they do not have common diseases and pests that quickly spread throughout the beds and destroy the crop.
One of the rules is that high plantings should not obscure low ones. You should also take into account the need and possibility of nutrient consumption by crops. The best spice neighbors in the garden:
- cabbage;
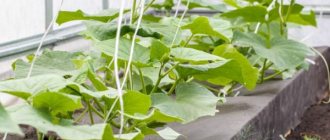
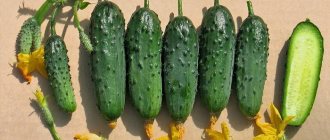
- cucumbers;
- beans;
- onion;
- strawberry;
- fennel.
Dill umbrellas attract insects to pollinate flowering vegetables, as well as ladybugs that destroy aphids. When planting greenery among strawberries, the aromatic grass repels slugs. Cucumbers in the diffused shade of narrow leaves will hide from the summer heat, and fennel will have an improved taste.
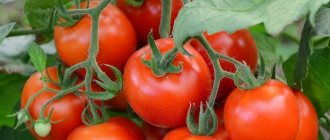
Can I plant next to tomatoes? No, such proximity should be avoided. Plants actively consume the same nutrients from the soil, and their productivity decreases. It is not advisable to place carrots and basil next to spicy crops.
After which you can plant dill
Gardeners sow annual crops every year. When choosing a location, you have to take into account the level of light and humidity. In addition, we must not forget about our predecessors. The chances of a good harvest increase with cucumbers, potatoes, cabbage, legumes and beets.
Advice. If there were a lot of aphids in the garden, plant onions. The vegetable repels the pest. Next year you can safely plant dill and other crops without fear of insects.
What to plant after dill
Crop rotation is an important part of farming; following recommendations for alternating garden crops will help prevent soil depletion and the spread of diseases. Fragrant dill is less demanding on the environment and is planted after most vegetables. The plant is content with a small amount of microelements, so the area does not require special restoration. What to plant after the greens next year?
Experienced gardeners have noticed that in place of herbs, melons and melons grow well - zucchini, pumpkins, and squash. Representatives of the nightshade family, tomatoes and eggplants also do well, taking the place of greens. It is recommended to place other vegetables:
- peas;
- pepper;
- potato.
Disinfection
After soaking, the seeds must be pickled:
- To prevent diseases, swollen seeds are placed in a bright pink infusion of potassium permanganate for 20–30 minutes.
- Hydrogen peroxide has bactericidal properties. The seeds are placed in a 3% peroxide solution for 5–10 minutes.
- Treating seeds with the universal fungicide “Fundazol” protects the crop from many diseases. The solution is prepared in accordance with the instructions.
After treatment with fungicides and stimulants, the seeds are washed and dried until they flow.
How to get dill seeds
Dill seeds in the photo
To obtain high-quality dill seeds in the middle zone, early ripening varieties are selected. You need to sow the seeds before winter, usually in early November. Crops are mulched with peat or humus. Next spring, these plants will bloom 10-12 days earlier, which is very important for seed ripening.
The umbrella inflorescences are harvested in August. When the leaves on the stems begin to dry out and turn yellow, and the seeds dry out, take on the appearance of brown flat disks and become easily separated from the umbrella, you can begin to collect them. Ripe inflorescences are cut off early in the morning along with the stem, they are tied into sheaves and left in a well-ventilated area to dry until completely dry. After drying, the umbrellas are threshed. Dill seeds remain viable for 3-4 years.
When will dill sprout after planting?
The first sprouts of dill, the seeds of which have been germinated, appear after 7-10 days.
Let's look at how to speed up germination. There are several factors influencing the process of seed germination:
- Warm . In warm weather, seeds germinate much faster than in early spring. At an air temperature of 20 °C, the first shoots may appear within 4 days.
- Regular watering . Lack of watering in dry weather delays the process.
- The planting depth should not be more than 2 cm.
- Another important factor is the composition and structure of the soil . Neutral, loose soil is considered the best option.
Choosing a location and landing rules
The herb came to Europe from the Mediterranean and Asia. The culture is unpretentious, cold-resistant, modern varieties have strong immunity. The plant must be planted in a well-lit area, away from flooded areas. The soil should be neutral and loose. Fertile land produces a rich harvest of greenery. The area for greenery is prepared in the fall. Autumn plowing (digging) and fertilization will be required. The best feeding will be compost and humus. Due to the slow germination of seeds, it is necessary to rid the bed of weeds that can clog the seedlings.
Information. Acidic soil slows down the germination of dill seeds and prevents the full absorption of nutrients.
The optimal time for planting aromatic grass is in April, but the seeds are sown during the summer for a regular harvest of greenery. Growing dill is possible in any conditions: open and closed ground, on a balcony or windowsill. Sowing begins before stable heat is established; the plant is able to withstand short-term frosts down to -3°C. In the spring, the soil is cultivated, and mineral fertilizers are applied during the same period.
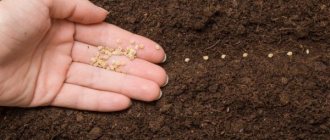
The seeds of umbrella plants have a high percentage of essential oils that impede germination. Soaking speeds up the natural processes of the plant. In the place where dill is planted, furrows are prepared 1.5-2 cm deep and up to 5 cm wide. The soil is watered abundantly. Planting scheme - a gap of 20 cm is left between the crop rows. Seeds are sown in the furrows in a zigzag pattern. Material consumption is 1-2 g per square meter. m. It is correct to sprinkle the sowing on top with loose soil mixed with humus. The bed is mulched to retain moisture and prevent the formation of a hard crust on the soil surface.
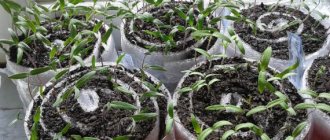
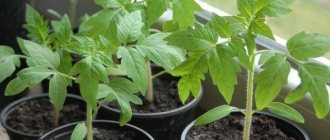
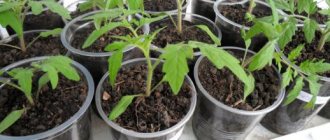
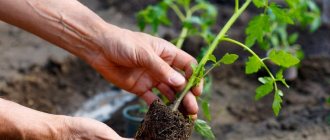
Information. Usually dill is planted with seeds, but late-ripening bush varieties in the northern regions do not have time to produce mature fruits. In this case, farmers plant the spice using seedlings, having previously grown seedlings at home or in a greenhouse.
Advice from experienced gardeners
To ensure that your garden has its own dill all summer, experienced gardeners recommend planting it in stages.
The first sowing can be done in April, after the snow has melted, on beds prepared in the fall (with added organic and mineral fertilizers). In the northern regions a little later, in May. These seeds do not need to be germinated; washing is sufficient. If seedlings emerge too early, they will suffer from spring frosts.
The second planting is carried out in August with seeds with preliminary soaking so that the dill has time to reach commercial ripeness.
Starting from the first spring planting, every 3 weeks a new batch of dill is sown with sprouted seeds. When one batch enters the flowering phase, the other begins to gain green mass, and so on until autumn.
In November, dill is planted before winter. Seeds for winter planting are not germinated or watered after planting. Winter dill produces its first harvest 1-2 weeks earlier than the first spring sowing.
Preparing seeds for rapid germination
To prepare seeds for rapid germination, it is necessary to take into account the required sowing time. They, in turn, may vary depending on the growing region, soil conditions and atmospheric conditions.
in autumn
At this time of year, sowing is carried out in order to obtain an early harvest. Already at the beginning of spring you will receive spicy herbs to your table. Seeds that have safely overwintered in the soil grow 2 weeks earlier than spring sowing. However, when sowing in autumn, there is a risk that the plants will freeze during late frosts.
In spring and summer
Dill can withstand temperatures down to -3°C, so the first sowing can be done immediately after the snow melts. If you are lucky with the weather conditions and the spring brings warm weather with a temperature of +10°C, then the harvest will be able to be harvested in April.
Algorithm of actions
How to prepare seeds so that sprouts appear faster?
The rapid germination of dill seeds is prevented by the essential oils contained on their surface. They not only give them flavor, but also interfere with germination. To speed up germination, you should saturate the seeds with moisture and clean them of oils.
But first of all, it is necessary to select good quality seeds:
- you should carefully examine and select the largest seeds that do not have damage or dark spots;
- prepare a solution at the rate of 1 tbsp. l. table salt per 1 glass of water;
- pour the seeds into the solution and mix;
- after 30-40 minutes, seeds unsuitable for planting will float to the surface;
- collect non-germinating seeds;
- drain the water, collect the seeds from the bottom, rinse with warm water.
Suitable seeds are then prepared for rapid germination. To do this, there are several ways to process the seed before planting for quick germination:
- Soaking seeds. To carry out this procedure you should:
- put the seeds in a container, fill with warm water;
- Before sowing, lightly dry the seeds on a cloth towel.
leave in a warm place for 6-8 hours, periodically changing the cooled water;
To increase immunity and reduce the risk of diseases, seed soaking can be combined with processing. To do this, you should soak the seeds for the specified period not in clean water, but in a solution of Kornevin or Fitosporin, prepared according to the instructions (or any other plant stimulant). Seeds treated in this way are much more resistant to diseases.
If you plan to germinate seeds, they should be placed on a damp cloth and kept in a warm place until germination.
- pour room temperature water into a liter jar;
- pour the seeds selected manually (without immersion in saline solution) into a thick fabric bag;
Soaking significantly reduces the resistance of seeds to temperature changes. Therefore, in regions characterized by spring frosts, dill should be planted dry in the soil.
How to sow correctly?
The best way to plant dill in the spring looks like this:
- Dig a furrow up to 20 cm deep, fill it with humus and fertilizers. Dig thoroughly.
- Make a groove 5 cm deep in the furrow to protect the seeds from the wind and better rooting of the sprouts.
- Fill the groove with warm water and place the seeds at a distance of 5 cm from each other.
- Sprinkle with soil mixed with humus 1:1 in a layer of no more than 1 cm.
Planting before winter differs from spring planting only in the sowing depth: the seed should be covered with soil 3-5 cm in the fall.
How to speed up germination after planting?
It is possible to speed up the emergence of seedlings if you create greenhouse conditions for the seeds. To do this, you need to cover the bed with non-woven material and do not remove it until stable shoots appear.
Dill planted on a windowsill can be covered with glass or film.
What to do if they are not there?
For continuous collection of greens, dill is usually planted several times per season with a break of 15-20 days. If all planting conditions are met, and seedlings have not appeared, you should speed up the second planting, but under no circumstances use the same seed.
Methods to accelerate germination
Dill seeds take a very long time to germinate, sometimes up to 25 days. This is due to the high concentration of essential oil inside the shell. It inhibits germination. To avoid this, there are several ways.
Shoots in a week
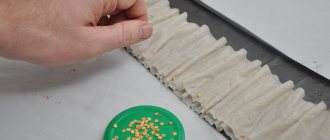
To make dill germinate faster, sprinkle the seeds in a thin layer on the bottom of the dish and fill with water at a temperature of 20–25 degrees so that it covers all the seeds. As soon as the fluid level drops, you need to add more. Thanks to this, the water is absorbed gradually and better.
The water must be changed every 4 hours, carefully mixing the seeds. This removes the oils extracted from the casing. Stop soaking when several pieces hatch. After this, they are dipped in a strong solution of potassium permanganate for two hours to disinfect, washed and dried.
Germination in 4–5 days
In order for the first shoots to appear in less than a week, dry dill seeds are poured into cotton cloth and buried in damp, unheated soil to a depth of 30 centimeters. This is done two weeks before sowing.
Before sowing, the fabric is taken out, laid out on paper, dried until crumbly and sown. The first greenery is visible after 4 days.
Not everyone soaks seeds before planting. Planting material that is not devoid of “protection” is much better adapted to difficult weather conditions. It’s better to let it sprout later than not at all.
Another method that allows you to reduce the germination time of dill to 5 days is to soak the seeds in vodka, because Essential oils dissolve well in alcohol solutions. They are poured with vodka for no more than 15 minutes so as not to burn. Then they are rinsed with cold water, dried to a free-flowing state and sown.
Pecking on 2–3 days
To harvest greens in 2 weeks, you can use this method. It just takes a little more care to avoid ruining the seeds.
The planting material is wrapped in cotton fabric. Prepare two containers, one with boiling water, the other with cold water. The seeds are dipped in boiling water for 2-3 seconds, then immediately into cold water. Repeat this 20 times. Boiling water destroys volatile compounds, weakening the protection of the shell from germination. Leave the wet bag for 2 days, constantly checking that it does not dry out.
Plant the seeds to a depth of 1 cm in grooves located 15-20 cm apart so that the plants are not crowded. Lightly press down the soil on top. The soil must be watered in advance.
First shoots
How long does it take for dill to sprout after planting? The average time for germination of the first shoots is two weeks. However, the specific timing depends on certain conditions:
- if you sow the seeds not soaked, but dry, they can sprout only after half a month;
- essential oils that prevent germination are washed off from the seeds if they are pre-soaked, and after planting, such seeds will germinate on about the 5th day;
- if the air temperature is about 5°, then seedlings will appear only after 2–3 weeks, and if the air is warmed up to 15–20°, then almost twice as fast.
Growing for seeds
To obtain high-quality dill seeds, early ripening varieties are selected and sown before winter, in mid-autumn. The crops are mulched with peat or humus. This preparation ensures that the plant blooms earlier - 2 weeks ahead of schedule. Thanks to this, the future seed has time to ripen.
Umbrella inflorescences are removed at the end of summer, when the seeds dry out, turn brown and are easily separated from the umbrella. Dry the inflorescences in a well-ventilated place “upside down”. The seed remains viable for 3-4 years.
Sowing seeds
Dill is not sown very deeply - no more than 2 cm deep. To make it convenient to care for it in the future, the row spacing should be about 20 cm. Lightly sprinkle the planted seeds on top with soil. Since sowing is done in moist soil, repeated watering after planting is not required.
On average, seeds germinate two and a half weeks after planting. It is recommended to thin out the first shoots to increase the yield of dill and then do this regularly so that the plantings do not thicken.
If the dill begins to turn yellow, it means it lacks moisture.
To stimulate the growth of side shoots, pinch the tops. The first greens can be cut within a month.
Harvesting and processing of dill
For freezing, young plants that have grown to 5-7 cm are used. Harvesting is carried out selectively, cutting off individual bushes or the entire dill at once. In the second case, the bed can be used for re-seeding. Dill is dried or frozen. Frozen greens contain more vitamins than dried greens.
Not a problem if you want to grow fresh herbs, but have no experience. The main thing is to choose the right variety and prepare the soil correctly. Dill Gribovsky, Umbrella, Amazon, Richelieu, Alligator received good reviews.
Errors when soaking
Typical mistakes when soaking seeds are:
- Placing seeds in the solution for too long. There is a risk that the dill will simply “suffocate”, which will reduce the germination of the seeds. You just need to keep an eye on the time, and it is better to use damp gauze rather than a bag if you plan to soak for longer than 1-2 hours.
- Using too concentrated a solution of chemicals will result in burns and damage to the shell, or even the embryo. You can avoid it by following the solution preparation technology.
- The solution is too hot when soaking, not when dipping into boiling water. You need to monitor the temperature and do not use liquid warmer than the human body. If a finger dipped into the solution feels warm, it is better to let the solution cool a little.
Harvest dill in 3 days - the secret is soaking before planting
Dill is grown not only on the plot of land, but also on windowsills. Despite the fact that the culture is considered unpretentious, not everyone grows well and quickly. The secret to rapid germination lies in preparing the planting material for planting. What to soak dill seeds in and how to do it correctly so that the greens are on the table early.
Sow dill before winter
Winter sowing is the easiest and most reliable way to obtain early greenery. First you need to choose a good place for the garden bed. It should be moderately illuminated by the sun in summer, and snow should linger on it in winter.
The soil must be dug deep enough (25 cm), humus or compost must be added to it.
Add at least ½ bucket of organic matter per 1 m² of bed. If the soil is acidic (pH < 5.5), add dolomite flour (350 to 500 g/m²), chalk (100 to 300 g/m²) or ash (200 g/m²). Important!
When sowing seeds before winter, do not soak them, sow them dry.
The prepared ridge is sown 2 weeks before the onset of frost. The package with seeds indicates the consumption rate per square meter; it is increased by at least 25%. The furrows are placed at intervals of 15 cm, and they are covered with a layer of 3-4 cm. If winters have little snow, the bed should be mulched.
As soon as the snow melts in the spring, the mulch is removed. After the soil warms up to 5 °C, the seeds begin to grow. Young shoots are not afraid of cold weather. The seeds undergo natural stratification in winter, so they germinate together.
Sprout care
It’s not enough to just plant the seeds and wait for the first shoots. To grow good dill in open ground, you need to know how to properly care for it.
- The emerging shoots must be thinned out so that the distance between them becomes at least 5 cm. If the shoots are located closer, they will stop growing.
- Soil moisture should be maintained. If it is constantly dry, the greens will turn yellow and will not be juicy. It is enough to water it once every 2-3 days, it is better to do this in the evening.
- Weeds must be removed promptly, otherwise they will choke out young plants.
- Growing and care must be timely. Greens should be hilled several times during the entire growth period. Loosening can be done when the seedlings have already grown noticeably. Subsequent loosening is carried out at intervals of 2–3 weeks after rain or watering.
- If there is a possibility of night frosts, then the seedlings should be covered with polyethylene, because it is impossible to grow dill under conditions of a sharp temperature change.
- If the greens turn yellow and begin to dry out, then this means that you are doing something wrong: either the soil is too acidic or contains insufficient nutrients, or the plants do not have enough moisture or light, or the dill is sown too thickly.
To grow the juiciest dill, planting and caring for seedlings must be done according to the rules described above.