The hybrid tomato Evpator is the result of the work of Russian specialists. They managed to develop a high-yielding tomato hybrid that has excellent taste, has universal use and does not require painstaking care.
| Height | Landing location | Ripening time | Fruit color | Fruit size | Origin | Fruit shape |
| Tall | Greenhouse | Mid-early | Reds | Average | Hybrid | Round |
Description and characteristics of the variety
Indeterminate bushes reach 140-180 cm in height, sometimes the Evpator tomato reaches a height of 2 m. There are many ovaries, the first inflorescences begin to appear above the 9th leaf. Then they are formed every 3 leaves. 6-8 ovaries develop in one hand. When the plant throws out 7-8 clusters, its growth slows down and fruit development begins.
Hybrid Evpator is mid-early, 100-110 days pass from seed germination to ripeness of the first fruits.
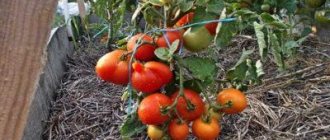
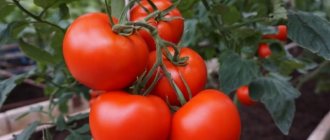
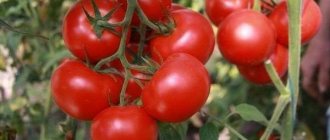
Tomatoes are compact in size, round, with slight ribbing, weighing 130-170 grams. The skin is smooth and shiny. Inside there are 4-6 chambers with seeds and about 4-6% dry matter. The taste of the pulp is sweet and sour, very juicy. The fruits are used for whole-fruit canning, processing into juice, making pastes and sauces, as well as for fresh consumption. According to tasters, their taste is 4.5 out of 5.
History of selection
Tomato Evpator F1 “Gavrish” was included in the State Register in 2002. The hybrid is created for greenhouse cultivation.
Advantages and disadvantages
Tomato Evpator is an excellent domestic hybrid. Among its advantages:
- productivity;
- beautiful lined tomatoes;
- mid-early fruiting;
- good taste;
- possibility of cultivation in extended rotation;
- resistance to a complex of diseases;
- gives harvest before frost;
- keeping quality;
- high marketability;
- transportability;
- can grow without soil, on peat or mineral substrates;
- universal purpose of fruits.
The main drawback of Evpator is the disappointment of gardeners who, without understanding it, expect a yield of 38-40 kg per square meter from a tomato.
Features of cultivation and storage
The Evpator hybrid is designed for greenhouses. It is not recommended to plant it in open ground - the yield will be significantly reduced.
Tall bushes require staking to a support. The plant is spreading and needs pinching. It is best to grow a bush with two stems.
Branches with fruits should also be tied up, otherwise they may break off under the weight of the tomatoes.
Of the fertilizers, the hybrid responds best to phosphorus and potassium.
The harvested crop is well stored and can be transported over long distances.
Tomatoes Evpator F1 on video
More than 1,600 varieties and hybrids of tomatoes with photos, descriptions and reviews from gardeners in our Tomato Catalog.
If you grew Evpator tomatoes, please write whether you liked them or not. What was the yield and taste of the fruits like under your climatic conditions? How do you rate the disease resistance of this hybrid? Briefly describe the advantages and disadvantages of this tomato in your opinion. If possible, attach to the comment a photo of the entire bush as a whole or individual fruits that you grew. Thank you!
Your reviews of the Evpator tomato and additions to the description will help many tomato lovers evaluate this hybrid more objectively and decide whether it is worth growing or not.
Tomato Evpator: growing seedlings
The Evpator tomato variety is unique in that it is capable of producing an excellent harvest even in the most unsuitable regions of our country for growing heat-loving crops. With the development of this variety, breeders have given the opportunity to grow tomatoes to gardeners in the Murmansk and Arkhangelsk regions, as well as other regions where summer is very short and the weather is unpredictable.
But in any region, everything always starts with planting seedlings. The seeds should be sown in the second half of March; after the appearance of the second true leaf, the seedlings should be planted in separate pots - at this stage everything is exactly the same as with other varieties of tomatoes. By the time of transplanting to a permanent location, the seedlings must be at least 45 days old. Analyze the climate in your area, think about when it is best to plant seedlings and, depending on this, perhaps shift the timing of sowing seeds. But, as a rule, transplantation into a greenhouse occurs at the end of spring; even in cold regions, by this time warm weather has set in and the earth is warming up. The height of the seedlings will be at least 15 cm (also very important - make sure that the seedlings do not stretch out too much, such plants will be fragile and weak), the bushes will take root quite quickly and begin to grow.
When growing tomatoes, great attention must be paid to the application of fertilizers. Plants have the greatest need for nitrogen, potassium and phosphorus. So be sure to fertilize with complex fertilizers three to four times during the growing season. After the plants bloom, the amount of nitrogen should be reduced, focusing on potassium and phosphorus. If flowering on tomatoes is not very abundant and few ovaries are formed, it may be due to a lack of boron; this problem can be solved by foliar feeding of tomatoes with a solution of boric acid.
Do not forget to install supports for tomatoes immediately at the time of transplantation, and the supports should be strong enough so that your bushes will not break under the weight of ripening tomatoes.
Care
A week and a half after planting the seedlings, complex fertilizer is applied. The second feeding is applied a week later. Chicken manure is used as fertilizer. General care requirements are as follows:
- moisten the soil as the top layer dries;
- after each watering procedure, it is necessary to loosen the soil mixture;
- when the inflorescences appear, the greenhouse will need to be ventilated regularly;
- The temperature in the room should be at least 24 degrees Celsius.
Fruiting of this tomato variety lasts until the first frost. Therefore, at the end of August it will be necessary to remove the tops of the shoots so that the bush stops growing foliage and directs all resources to the formation of fruits. Those inflorescences that appear at the end of summer will not form ovaries. As the bushes grow, they will need to be shaped - remove the lower and side shoots. You will also need to install supports for the plant.
This tomato variety is resistant to various diseases. Occasionally you may encounter fomoz, dry spotting. Among the pests, the plant is most often attacked by whiteflies and caterpillars.
How to grow?
To obtain a rich harvest, you should know some of the subtleties of the growing process and follow all the recommendations of the breeders who bred this variety. Seeds are planted in March - early April, depending on weather conditions. After 45 days, the seedlings are already transplanted into closed ground. It should be light and at room temperature. To provide the soil with lightness and a loose structure, you should mix equal parts of plain soil, turf soil, peat and humus.
It is recommended to keep the prepared soil for 1-2 weeks in a warm place for uniform heating. Before planting, you should treat it with a weak solution of potassium permanganate, pour boiling water over it or bake it in the oven. This will prevent pests from appearing. There is no need to additionally treat the seeds before planting.
Planting seeds
Prepared soil is poured into a box about 12 cm high. The seeds are placed in grooves made in advance, having a depth of 1 cm. A gap of 2-3 cm should be maintained between the seeds. The grooves must be sprinkled with earth. The gap between them should be about 3-4 cm. After planting, the box should be covered with film or glass and placed in a warm room. It is recommended to maintain a temperature of about 23 degrees.
Picking (transplanting into separate cups or pots) is carried out after two true leaves appear on the stems. At the same time, weak, sickly seedlings can be thrown away immediately; they will not produce a large harvest. The volume of the pots should be 200-400 g. This is quite enough for the root system of the crop.
Before transplanting plants into the greenhouse, young plants must be hardened off. To do this, they should be transferred to a greenhouse for a short time.
Planting in a greenhouse
It should be noted that it is not recommended to plant tomatoes in the same area where other crops from the nightshade family previously grew. This may contribute to the development of diseases. The seedlings should be transplanted into the greenhouse when the frosts have passed. Usually this is the end of May or the beginning of June. The optimal temperature for normal growth and ripening of fruits is 24–28 degrees.
The soil in the greenhouse must be dug up to a depth of about 20-30 cm. Plants should be planted at a distance of 25 cm from each other in moist soil. You need to leave 60 cm between the rows. Seedlings are planted in the dug holes and sprinkled with earth.
Care
Feeding is a mandatory procedure. 10 days after transplanting into the greenhouse, the plants can be fed with complex fertilizers or ammonium nitrate. The solution is prepared simply: 1 tablespoon of the drug is diluted in a bucket of water at room temperature. 700-1000 ml of the resulting solution is poured under the bush. The next feeding is carried out 10-12 days after the first. Tomatoes should be fed only on moist soil, so as not to injure the root system of the plant.
Watering should be done as needed. Watering should be plentiful, but care must be taken to ensure that the soil does not become waterlogged. Warm water is used for irrigation. During irrigation, moisture should not fall on the leaves. After watering, you need to thoroughly loosen the soil.
It is important to take into account that during flowering the greenhouse room must be ventilated. Tomatoes are self-pollinating; pollination can be carried out without the help of insects.
Flowers have both female and male reproductive organs. Air circulation helps them pollinate. You can also resort to manual pollination. Bushes need regular staking to a high support.
Seedlings must be taken care of. The greatest yield is obtained when growing 1 stem. It is recommended to remove excess stepsons in the morning. This way the plant will recover faster after a painful procedure. Stepchildren must be removed correctly (they must be unscrewed). It is advisable to do this in dry weather so that the resulting wounds heal faster.
Towards the end of summer, the small upper part of the stem can be broken off. After this, the plant will direct all its vital forces to ripening the fruits and will stop branching and stretching upward. Typically, these manipulations are carried out when 6 brushes are already tied on the bush. After this, the lower leaves also begin to be torn off. They need to be removed gradually, no more than two leaves a day, so as not to seriously injure the stem.
The first harvest ripens 100 days from the moment the plant germinates. By following all stages of the growing process and carrying out all the necessary measures in a timely manner, you will be able to collect up to 6 kg of delicious fruits from each bush.
Description of tomato
The variety is distinguished by its massive bush. But after the formation of the ovary on 7-8 peduncles, its growth practically stops. The leaves of the plant have a rich dark green color and a strongly dissected shape.
The Evpator variety bush needs timely pinching. When forming a bush, it is enough to leave only one central stem.
The tomato forms its first inflorescences after the appearance of 9-10 true leaves. Subsequently, flowers appear every 2-3 leaves. Each inflorescence can delight you with 8 fruits of a perfectly even, round shape. After full ripening, tomatoes acquire a rich red color. Their weight is no more than 150 g. Characteristics of the variety:
- high yield: 1 plant bush can produce a harvest of more than 6 kg;
- rapid ripening of fruits: 110 days pass from sowing seeds to harvesting;
- uniform ripening of the crop;
- excellent presentation: glossy surface, smooth and clear contours of the fruit will not leave anyone indifferent;
- perfectly transportable;
- fruits are resistant to cracking;
- resistance to rot formation.
Instructions for planting tomatoes
In order for the bushes to regularly bear large fruits, it is necessary to follow several planting rules. The seed material must be pre-processed, then favorable conditions for the development of seedlings must be created and transplantation into open soil must be carried out in a timely manner.
When to plant?
Sowing of seedlings is carried out from the second half to the end of March. Advance sowing is carried out so that the seeds have time to sprout by the time they are transferred to the greenhouse.
Seed selection and preparation
After purchasing seeds, it is recommended to visually inspect them in order to sort out damaged specimens. Selected seeds are treated in a solution of potassium permanganate, using 1 g of the substance per glass of liquid. It is enough to place them in a cloth bag and hold them in the solution for 15-20 minutes, then rinse with water. The material is processed to disinfect, prevent the development of diseases and saturate it with nutritional components.
Planting seeds
You need to pour fertile soil into the seedling container and place tomato seeds on the surface. The seeds are sprinkled on top with a layer of earth about 1 cm thick. For seedlings to emerge, the ambient temperature must be 25-30 degrees, so it is recommended to keep containers with seedlings near a heat source. Seedlings can be covered with plastic film or glass to create a greenhouse effect.
Growing seedlings
During the process of growing seedlings, it is necessary to regularly check the condition of the soil. If the soil dries out, you should spray it generously with a spray bottle. In case of excessive humidity, it is enough to remove the film and wait for it to dry naturally. If mold has formed on the soil with seedlings, you need to carefully remove the infected layer and treat it with an antifungal agent.
Transplantation into open ground
40-45 days after sowing, seedlings are transferred to open ground. To do this, dig shallow holes in the prepared area and place one sprout in each.
Diseases and pests
This variety is considered resistant to fungal and infectious diseases. However, with improper care and non-compliance with crop rotation, a tomato can be damaged by the following diseases and pests:
- Dry spotting.
- Fomoz.
- Whiteflies.
- Cutworm caterpillars.
Prevention against the appearance of various infectious and fungal diseases will be crop rotation and the correct location of the greenhouse on the site. Before planting, the soil should be watered with hot water, which will allow disinfection and destruction of existing pathogenic flora. For preventive purposes, you can spray plantings with insecticides and fungicides, which helps destroy insect pests and suppress emerging infectious pathogens.
Phoma can occur in tomatoes when there is excessive nitrogen fertilizer in the soil. The gardener will need to reduce the intensity of fertilization, reduce watering and promptly remove all damaged fruits and plants from the greenhouse.

