It’s hard to imagine modern cuisine without garlic. Moreover, the taste of homemade garlic is not comparable to store-bought. More often, store-bought is brought from China, where it is grown using completely different technologies. This kind of garlic quickly deteriorates and does not have the pungency and characteristic smell that homemade garlic has. Therefore, every self-respecting gardener always plants winter garlic before winter, and spring garlic in the spring. It is better to plant both varieties; if one of them does not produce a harvest, the other variety will help out. And it seems that its cultivation does not present any particular difficulties, however, for a good harvest you need to know some features. We'll tell you about them.
When to plant summer garlic
Spring varieties are planted in the soil in mid-April - early May. At this time, the soil is still quite moist, and frosts are no longer so severe. The crop does not like dry and warm soil, so it is more rational to plant it as soon as the snow melts. The soil temperature at this time warms up to 5-7 ºС.
Such conditions in the Moscow region begin on the 20th of April, in the southern regions 2-3 weeks earlier. In the northern regions, on the contrary, it is better to plant 2-3 weeks later, that is, in the last days of April - the first days of May. At the same time, different temperatures for growth and development are needed.
- And at the initial stage of the growing season, 10-15ºС is sufficient;
- During the period of teeth formation – 15-20 ºС;
- For ripening, a temperature of 20-25 ºС is required.
When warm weather arrives and the earth warms up more, the plant stops developing and the bulb stops forming.
Brief description of cultivation
- Landing . Garlic cloves are planted in open soil at the beginning of spring after the soil has warmed up to 5–7 degrees.
- Illumination . Needs plenty of bright sunlight.
- Soil . Nutritious cultivated loamy or sandy loam soil of neutral reaction is suitable.
- Watering . During the active growth of the above-ground part of the garlic, it is watered frequently and abundantly. From the middle to the end of the growing season, watering is reduced to moderate, and if it rains regularly, then the bed may not be watered at all.
- Fertilizer . The first fertilizing is carried out at the beginning of foliage growth, and the second one after half a month, and a nitrogen-containing fertilizer is used for this, for example, a solution of bird droppings (1:12) or mullein (1:10), you can also take an infusion of grass. During the formation of cloves, which is observed in the last days of June or the first days of July, the plants are fertilized with wood ash. It is not recommended to feed garlic with large amounts of mineral fertilizers. In mid-August, all feeding is stopped.
- Reproduction . Vegetative (teeth).
- Harmful insects . Onion flies, thrips, moths, secretive proboscis, hoverflies, stem nematodes, root mites and four-legged garlic mites.
- Diseases . Black mold, fusarium (bottom rot), downy mildew (downy mildew) and white rot.
Preparing the soil for planting spring garlic
It is better to prepare the soil for planting from autumn to early spring. As soon as the soil conditions allow, level the surface of the bed and make grooves for planting. When preparing the soil, per 1 sq. m add 20 g of superphosphate, 1 glass of wood ash, and a bucket of humus.
If it was not possible to prepare the beds in the fall, you can dig up the beds in the spring after the snow has melted. Dig the soil to the depth of a shovel and fill the soil with humus and wood ash.
Preparing garlic for planting in spring
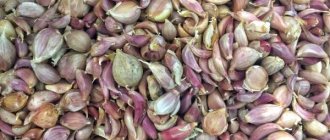
When purchasing planting material for spring garlic, you need to carefully examine the cloves for damage. Healthy garlic has a dry husk and bottom with no signs of rotting. The lobules are elastic and dense. If the clove is freed from the husk, its flesh should be creamy white, without ulcers or yellowness.
Important! For planting, select slices of approximately the same size, the larger the better.
If the health of the planting material is in doubt, before planting it is pickled in a solution of Fitosporin M or in a pink solution of potassium permanganate. The teeth are kept in the solution for 20 minutes, after which they are allowed to dry and planting begins.
To speed up germination, garlic can be soaked in warm water for 10-12 hours, to which a few drops of Heteroauxin or Epin have been added. The drugs can be replaced with aloe juice, a natural growth stimulant.
Preparation of planting material
Healthy, strong bulbs are selected for planting. Immediately before sowing, the onions are disassembled into individual cloves. Moreover, cloves located in two outer rows are suitable for planting. The inner cloves are small, they will not grow into good garlic, they are left for eating. The yield of garlic directly depends on the size of the teeth.
The prepared teeth are wrapped in a towel soaked in cold water and stored for several days in a cool place, for example, in the refrigerator. A few hours before planting, the planting material is taken out and left at room temperature. Disinfection is carried out for several minutes in a pink solution of potassium permanganate or in a 1% solution of copper sulfate. For disinfection, you can use an ash solution (400 g of ash is diluted in 2 liters of water, boiled for 30 minutes), soaked for 2 hours.
Harvesting
The time for harvesting garlic from the beds comes closer to mid-August, at the moment when part of the tops of the plant have already fallen onto the beds and turned yellow. It is not worth keeping the plant in the ground for too long, as this will cause it:
- internal membranes are damaged;
- The teeth begin to fall apart.
4-5 days before you decide to remove garlic from the garden, you will need to stop watering it, and it is best to remove the surface layer of soil from the beds in order to free the upper level of the “onions”, giving them:
- ripen in the sun;
- dry out.
It is best to harvest garlic on sunny days, so that later in storage the vegetables do not rot from excess moisture.
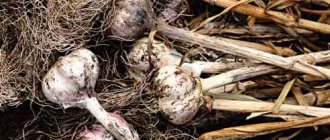
On a sunny day, crops are also harvested from the beds. After pulling it out, it is advisable to dry the plant right in the same place for another 5 days, or under a canopy if you suspect that rains are about to come.
The fruits are dried together with the leaves, and after the end of the above period they are cut off, but not completely:
- tops (up to 2-3 centimeters from the bulb);
- plant roots (up to 3 millimeters from the bulb).
It is necessary to store the harvested and dried harvest in a dry room where ventilation is carried out regularly; it is advisable that the air temperature in it is kept at 15-20°C at all times.
Initially, the fruits are dried along with the leaves, and then the tops and roots of the crop are trimmed to the required size
Planting spring garlic
In beds with prepared soil, make longitudinal grooves 2-3 cm deep. The distance between the rows is 20 cm, and in the row itself between the cloves - 5-6 cm. Since the cloves of spring garlic are smaller, therefore, unlike winter garlic, garlic is not planted deep . They are stuck shallowly into the soil, trying not to bury them too deep.
At first, in the first month before germination, garlic grows slowly. When the root system is formed, the growth of the plant accelerates significantly. As for the period of teeth growth itself, it lasts 3-4 weeks.
Sometimes garlic is grown from seeds. When they are planted, single-toothed bulbs grow towards the end of the growing season. Garlic seeds are obtained from bulbs. After a season, the one-toothed ones are used to grow full-fledged heads. Garlic seeds are very small and have good keeping quality.
The planted garlic is covered with mulch on top; for this, hay, straw, sawdust, etc. are used. Mulching is done so that the top layer does not warm up too much at first and does not dry out.
Landing
There are several types of planting material, each of which, after planting and cultivating, will produce a harvest:
Teeth
In order to plant garlic in the spring using a head, you must follow several rules:
- The distance between the rows should be about 25 cm. Place the garlic in the grooves.
- There should be about 10 cm of free space between the teeth.
- Planting depth is 6 cm; garlic cloves should be placed exactly vertically, without tilting.
- Immediately after you planted garlic, you need to mulch the beds. Straw and wood sawdust are suitable for this.
- For a good harvest and development of the vegetable, you need to water and feed it.
Planting with bulbs
The bulbs are called garlic seeds. Planting this way guarantees a good, healthy harvest.
This method takes about two years. However, it is likely that you will end up with small, single clove garlic heads in the first year.
Before planting the bulbs, they need to be wrapped in newspaper and stored in a dark place at a temperature of approximately +20 degrees. 1.5 months before planting (planting is done in the spring), transfer the bulbs to the cold: you can place them in the refrigerator or wrap them in cloth and put them in the snow. Before planting, take them out, dry them, ventilate them and keep them in a weak solution of potassium permanganate for a couple of hours to remove all harmful bacteria.
Garlic should be planted in this way to a depth of about 4 cm, and there should be 15 centimeters between the bulbs. After planting in each hole, fill the garlic with soil and level the soil. It is also advisable to mulch the top with straw or dry grass, as is the case with planting cloves.
Caring for garlic plantings
Caring for garlic is not much different from caring for its winter counterpart or onions. To grow a good harvest, it takes all season
- timely watering,
- feeding every 2-3 weeks,
- weed removal and loosening,
- control of diseases and pests.
Watering
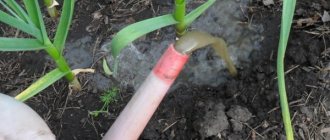
The plant is very demanding of soil moisture. Therefore, during the first two months from the emergence of seedlings, the soil must be kept moist and watered. In the absence of rain, watering is mandatory, and the soil must be watered, shedding the soil deeply.
However, remember to be careful not to overwater. Although garlic grows well in moist soil, if there is too much moisture, the plant can rot.
Feeding
Garlic is very responsive to fertilizers. To do this, in early June, when the height of the green stems is 6-10 cm, it is time to apply nitrogen fertilizers. A solution of mullein and urea is better suited: add 1 tbsp to a 10-liter bucket of water. l. urea and 1 glass of mullein, let it brew for 5-6 hours. Water the plants under the roots at the rate of 3 liters of solution per 1 square meter. m.
Then, during the period of formation of 5 leaves, it is fed at the root with a solution of potassium permanganate or an infusion of green herbs.
During the formation of the bulbs, feed:
- superphosphate solution (per 10 liters of water + 2 tablespoons of superphosphate);
- infusion of wood ash (150 g of ash per bucket of water).
Feeding is carried out 3-4 times during the summer. When fertilizing, it is important to maintain proportions, otherwise the garlic heads may crack due to an excess of fertilizers.
Pest Control
Most often, garlic is affected by the onion fly. Fighting the onion fly is quite difficult, but there are still effective ways to help cope with the pest.
Sometimes the heads are affected by root mites. The female of this pest lays eggs directly in the cloves, which subsequently rot. More often, such a pest appears if garlic was preceded by planting tomatoes, cabbage or cucumbers. Therefore, it is important to observe garlic crop rotation and choose good predecessors.
Garlic diseases
The following diseases most often affect garlic:
- Cervical rot;
- Bacteriosis,
- Green mold,
- Yellow dwarfism.
As a rule, pathogens penetrate the tissue of the head through mechanical damage that appears during the process of caring for the plant. The trouble is that the signs of disease are not immediately recognized. Only some time after the start of storage, signs of disease can be seen on the cloves: discoloration, softening and rotting of the onion tissue.
Types and varieties of garlic
Garlic can be spring or winter. In structure, both varieties are similar, but there are significant differences between them: in spring varieties, medium-sized cloves are arranged in several rows, and in winter varieties, the bulbs consist of one row of large segments. In addition, in winter varieties of garlic, after ripening, part of the flower shoot remains in the bulb - a kind of dividing rod around which the bulbs are located, but in the bulbs of spring varieties there is no such rod, since it does not shoot.
Winter garlic can be planted in the spring, but in this case it will not have time to split into cloves by the fall, so it is better to plant winter varieties in the fall. Winter garlic reproduces by both cloves and bulbs.
Planting and caring for winter garlic
To get a good harvest, you need to choose the right variety of garlic. Since spring garlic does not tolerate changes in climatic conditions, it is necessary to choose zoned varieties for planting. Varieties of spring garlic are divided according to ripening periods into early, mid-ripening and late, as well as into bolting and non-bolting, although this division is conditional: in a cool climate, bolting varieties may not produce bolts, and non-bolting garlic in a southern climate, on the contrary, acquires the ability to throw out peduncles. Shooting varieties are often grown as winter crops.
- Celandine: properties and contraindications, cultivation
The most famous varieties of spring garlic are:
- Gulliver is a productive, disease-resistant, long-storable mid-late garlic of universal use. This is the largest spring garlic, the heads of which weigh 95-115 g, although sometimes they can weigh 250 g. The bulbs are covered with gray scales and contain 4-5 large cloves of pungent taste;
- Aleisky is one of the best spring varieties zoned for the conditions of Siberia, although it grows well in warmer climates. The variety has good yield, the average weight of the head can reach up to 25 g. In terms of taste, this garlic is considered spicy. The disadvantage of the variety is instability to fusarium;
- Elenovsky is a recently bred universal frost-resistant, disease-resistant, productive, non-shooting variety of medium ripening with densely structured heads weighing up to 35 g, consisting of 7-9 cloves. The main advantage of the variety is its ability, if properly stored, not to lose quality for 2 years;
- Sochi 56 is an early-ripening, consistently productive variety, resistant to diseases and cold conditions. The head weighing up to 45 g is covered with white durable scales. The variety has an excellent taste, which is due to the presence of sucrose in its composition. Sochi bulbs are stored for a year and a half;
- Permyak is a non-shooting mid-season variety intended for cultivation in summer cottages in the northern regions. The average weight of the head is 34 g, the number of cloves in the onion is 15-16 pieces. The taste is very pungent due to the high content of essential oils. Garlic can be stored for no more than 10 months;
- Victorio is a mid-season, productive variety with a semi-sharp taste, also intended for growing in garden plots. The bulbs weigh 40 g and contain up to 13 cloves. Garlic of this variety can be stored for 8 months;
- Abrek is a very sharp-tasting mid-season variety, the heads of which, consisting of 13-16 cloves, reach a mass of 25 g. Shelf life - no more than 7 months;
- Moskovsky is a non-shooting, mid-season, high-yielding, low-sharp variety with rounded multi-toothed heads of high keeping quality with an average weight of up to 14 g;
- Ershovsky is also a semi-sharp, disease-resistant, non-shooting variety, the bulbs of which consist of 12 cloves and can weigh up to 35 g. The shelf life of garlic of the Ershovsky variety is no more than 7 months;
- Degtyarsky is a variety of Ural selection with bulbs weighing up to 38 g, consisting of 15-18 cloves. The outer scales are reddish, covered with purple streaks. Leathery pink scales. The pulp of the cloves is white, with a pungent taste. Shelf life is no more than 10 months.
The following foreign varieties of spring garlic for open ground have also proven themselves to be excellent in our latitudes:
- Cledor is an elite French mid-season productive variety with high resistance to fungal and bacterial diseases. The head reaches from 45 to 55 mm in diameter and contains from 16 to 20 large cloves in a pink integumentary shell;
- Flavor is a mid-season French variety with a medium-sharp taste, well known in Western Europe. The heads in shiny pale pink scales reach a mass of 80 g, small pastel cream-colored teeth with a total number of 15 to 20 are arranged in two rows. When properly stored, the variety retains its quality until the next harvest.
Harvest
Spring garlic is harvested 1 month after winter harvest. Usually this is the end of August - beginning of September. Signs of harvest readiness are yellowing of the lower leaves and lodging of the upper ones. 2-3 weeks before harvesting, stop watering the garlic. To harvest garlic, choose a dry day.
The heads of garlic are removed from the ground using a fork or a small spatula, being careful not to damage the garlic itself. The remaining soil is shaken off and the plants and tops are removed to dry in a ventilated room for 5-7 days.
The harvested crop is sorted into 2 parts:
- planting material,
- onions for food.
To do this, larger onions are left for planting, and medium-sized onions are left for eating. The main condition for selecting planting material is the absence of mechanical damage and signs of disease on the bulbs. The cloves themselves should be strong and dense.
Common Mistakes
The most common mistakes when sowing are:
- Incorrect sowing time. As soon as the snow has melted, you should plant garlic before the soil warms up. If you are late with sowing, the harvest will decrease by 2 times.
- Wrong choice of location. Spring garlic is poorly affected by temperature changes, so you should plant it in a well-lit place with sunshine and make sure there are no drafts. It is also wrong to plant garlic in lowlands, as water will stagnate there.
- Do not buy planting material in the store, since it is not known how long ago it was collected and how it was stored. In this case, you cannot be sure that you will get a good harvest of tasty garlic.
- Do not use small cloves for planting.
From the video we will learn the secrets and subtleties of planting spring garlic in the spring - what the planting material should be, when and how to plant it correctly:
Planting spring garlic is quite simple and caring for it does not present any difficulties. You just need to follow the planting rules and take into account all the tricks, and then you will get a good harvest of delicious spring garlic. This means that there will be vitamins on your table all year round.
0
0
Copy link
Storing spring garlic
The roots of dried garlic are carefully cut off, and the dried tops are shortened to 10 cm. The harvested crop is stored in a cool, dry place. To preserve the harvest until spring, garlic heads are periodically checked for signs of disease. Damaged bulbs are removed immediately.
With the remains of the tops, the bulbs are woven into braids or bundles, and in this form they are stored in a ventilated room or on the walls. If you cut the tops shorter, then the garlic can be stored simply in a basket, in a nylon net, or in wooden boxes.
Peeled garlic cloves can be stored in a jar with salt or vegetable oil. By storing garlic in oil, you will also get very tasty garlic oil, which you can use to dress salads.
I wish you good harvests!
Spring garlic - description
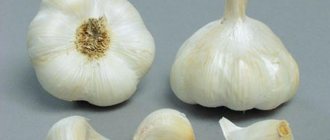
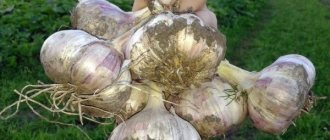
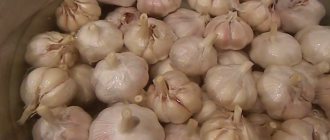
The round, somewhat flattened garlic bulb has a complex structure - in the axils of the scales, from two to fifty children covered with hard, leathery scales are formed, which are commonly called cloves or cloves. The bulbous cloves are oblong, triangular in cross-section, thickened towards the middle, with a convex outer surface. The color of the covering scales of the bulb can be white, yellowish, pinkish or dark purple.
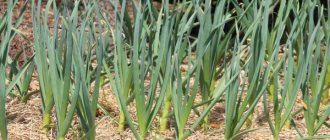
The leaves of garlic are narrow, lanceolate, elongated, grooved, keel-shaped on the underside, pointed towards the ends, drooping or erect, reaching 1 cm in width and from 30 cm to 1 m in length. The next leaf grows from the axil of the previous one - this is how a strong leaf is formed false garlic stalk.
Growing garlic in open ground - planting and care
The flower arrow can reach a height of 60 to 150 cm; at the end it twists into a spiral and ends with an umbrella-shaped inflorescence, covered with a film before flowering. The spherical inflorescence of garlic consists of white or lilac sterile flowers, bulbs and a dense covering.
- What is the difference between amaryllis and hippeastrum?
The fruit is a capsule, but garlic does not form seeds - what are usually called seeds are actually aerial bulbs, so the propagation of garlic by these bulbs is not seed, but vegetative. Garlic seeds can be found only in ornamental species, as well as in perennial garlic, which is popular in Central Asia and does not form bulbs.
How to properly plant spring garlic in open ground
The crop does not make any special demands on the place of growth and soil composition, but it is necessary to follow several recommendations when planting.
Selecting a location
The vegetable is placed on flat areas open to the sun and wind. Garlic prefers elevated places, without stagnant melt water. If the site is in a lowland, high beds are built for the crop, at the bottom of which thin branches and straw are laid as drainage.
Preparing the bed
Garlic loves fertile, loose soil, with acidity in the range of 6-7 units. Light loams are ideal for the crop.
Soils with unsuitable composition are brought into compliance with the requirements of the crop:
- Heavy clay soils are lightened by adding sand or SGS (sand-gravel mixture), up to 8 kg per 1 sq. m. m;
- humus and turf soil are added to the sand (garlic is grown on light soils using mulch);
- the high acidity of peat soils is reduced with the help of wood ash (400 g per 1 sq. m), lime or dolomite flour (250 g per 1 sq. m).
The bed intended for sowing garlic is dug to a depth of 25-30 cm, selecting the roots of the weeds and adding the necessary additives.
For every sq. meter of area fertilizers are applied:
- 5-7 kg of humus (rotted cow or horse manure, mature compost);
- 40 g of superphosphate and 20 g of potassium sulfate.
Together, you can add a complex universal composition for vegetables (Kemira, OMU, Agricola, AVA).
Accounting for predecessor plants
Spring garlic is placed in the garden after legumes, cucumbers, zucchini and pumpkins, melons and watermelons, and cabbage. These plants have almost no common diseases or pests.
You cannot plant garlic after onions, potatoes, tomatoes and eggplants. The crop is returned to its original place no earlier than after 4 years.
On a note! Sowing green manure crops will help simplify crop rotation in a small area and improve the soil health. These are mustard, phacelia, rye, lupine. These plants grow quickly and produce a lot of greenery, which, when planted in the soil, provides food for worms and prevents the spread of infection.
Compatibility with other crops
In one bed, spring garlic can be placed with carrots, beets and radishes (planted as a compactor). It is believed that the pungent smell of garlic leaves repels some pests, so it is recommended to plant the crop close to strawberries, tomatoes and potatoes.
Garlic does not go well with beans and cucumbers. Due to different care requirements, garlic is not planted together with cabbage and green crops.
Planting scheme
For garlic, beds are prepared, 90-120 cm wide and of arbitrary length. To prevent irrigation water from rolling onto the paths, form an earthen roller around the bed, 10 cm high.
The rows for planting garlic are spaced at a distance of 20-25 cm (that’s 4-5 rows in one bed). Between the plants in the row, gaps of 15 cm are left. Garlic plants are lowered to a depth of 5-7 cm. Deeper planting can lead to a delay in the emergence of seedlings and a general weakening of the plant.
Read more in the article: planting onions - sowing in open ground in spring
