Answers to frequently asked questions
- Should I fertilize potatoes when planting? No, all the necessary nutrients are already contained in the tubers.
- How to fertilize tubers throughout the season? No need to fertilize.
- What about watering the plant? Watering is pointless and will only spoil the plant. Eighty percent of potatoes are water.
- What happens if the weeds grow and destroy the potatoes? The weeds will die. Under a layer of compost they are deprived of light. In addition, their roots will also die.
- Should you grow potatoes from seeds? It depends on what kind of seeds. It takes three years to get good seeds. But you don't have to use your own. There are many options sold in stores.
Care
Active growth of tubers occurs when potatoes are flowering. Generative reproduction takes too much energy, so the tubers begin to grow worse. By preventing potatoes from flowering, you will automatically improve the harvest. Experienced gardeners notice that varieties created abroad do not bloom. Breeders specially achieved this effect.
It is clear that if you have a huge plantation, it is unrealistic to pick all the flowers on the potatoes. But if you are an ordinary summer resident and have a couple of beds, then carrying out the procedure will not be difficult. And as a gift you will receive a large harvest with large tubers.
How can you tell when potatoes are ripe? This is usually done by color. Sacrifice one shoot and leave flowers on it. As soon as they begin to wither, get ready to harvest your first harvest. Thanks to Galina’s method, you don’t have to dig up the potatoes. It is enough to move the compost aside and get the largest and most successful tubers. Then return the compost to its place.
Some useful tips
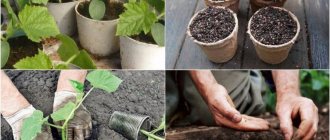
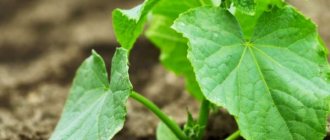
To grow tomato seedlings, it is better to use seeds of determinate varieties or hybrids.
It is better to sow them at the end of March. Since it will take no more than a month and a half to obtain seedlings, this period is the optimal solution. Important: Indeterminate varieties of tomatoes are not suitable for this method, since the formation of bunches occurs during the growth process. As a result, it branches into 2 or 3 sprouts
During transportation, tomato seedlings experience serious stress. This is especially true for changes in temperature and humidity levels. Therefore, they should first be treated with a small amount of “Healthy Garden” product. This will protect the growing tomato sprout from negative environmental factors, as well as protect it from stress that occurs as a result of their transportation.
Galina insists that seedlings are watered when necessary. First of all, the soil moisture level is determined. To do this, you need to insert your finger into the package. If it remains dry, then the tomatoes need urgent watering.
When growing tomatoes, fertilizing the plants is no less important. For the first time, fertilizers are applied one and a half weeks after picking. For this, it is recommended to use diluted mullein. To prepare the solution, you need to add 1 liter of organic fertilizer concentrate to a bucket of water. It is carefully introduced into the root zone. To do this, use a watering can that has a thin spout.
Advantages and disadvantages of the method
The classic method of growing tomatoes involves sowing seeds in a container with soil. Often pots, glasses and other products are used for this. But, according to the Kizima method, sowing of seed material is carried out in non-woven material. In this case we are talking about dense polyethylene film. With its help, a small volume of soil is formed, which is enough to grow high-quality seedlings.
Galina Alexandrovna’s method is also called “diaper” or “Moscow style”. This is due to the fact that the residents of this particular city were the first to use the technology. When it came to growing seedlings, many Muscovites faced such a problem as a lack of free space in the apartment. Kizima's method made it possible to easily resolve this issue.
Before planting tomato seeds, you need to carefully study the disadvantages and advantages of the technology.
As for the advantages, the author of the technology here draws attention to the following:
- You can place a record number of sprouts on one windowsill without hassle. This allows you to save space, which is often in short supply.
- Picking seedlings is quite easy and quick. To do this, you just need to unfold the “container” and take out the sprout. Subsequently, they are planted in the prepared container.
- You don't need a lot of land to grow seeds. So, for example, to plant one hundred sprouts you need no more than 5 kg of soil.
- This growing method helps protect tomatoes from diseases. This is especially true for blackleg. The chance of its occurrence is reduced to a minimum.
- Transparent containers make it easy to check which seeds have sprouted and which are just about to germinate.
The method from Galina Kizima has many advantages. But, unfortunately, there are several disadvantages here:
- Tomato seedlings do not have enough space for germination. Also, the dense arrangement of “pots” leads to a decrease in natural light. All this leads to the fact that the sprouts grow and develop relatively slowly. Therefore, in order to obtain material in time for planting in open ground at the beginning of the season, it is necessary to sow the seeds in advance.
- As a result of growing seeds in films, the plant has a strong and stable stem, which cannot be said about the root system. Therefore, when planting in unprotected soil, you should take care of strengthening it.
The “Moscow style” method is recommended for cold-resistant plants. This will greatly simplify growing tomato seedlings. Of course, if necessary, it can also be used in the case of heat-loving plants. But, here it is necessary to carry out the picking of the sprouts.
Features of potato care according to Mitlayder
This agricultural technology for growing potatoes allows you to get an excellent harvest, but the gardener must provide the plantings with appropriate care. This care consists of:
- in the timely destruction of weeds,
- regular watering,
- feeding growing bushes.
Make sure that the soil in the beds does not dry out. Potatoes cannot tolerate a lack of moisture, which leads to a significant reduction in yield. Each plant should receive the same amount of fertilizer and water when feeding and watering.
The optimal temperature for potato growth is 22-26 degrees. When the air temperature rises above 30 degrees, the growth of the vegetable stops. In this case, it is necessary to additionally feed the plantings with mineral fertilizers and ammophos. Also, in hot weather, it will be necessary to provide abundant watering to the plants, since they actively consume water from the soil.
Watering the beds is not difficult. The presence of sides and a flat surface allows you to water from a hose, from which water flows with light pressure. Automation of watering is also possible, for which you need to use an electric timer and a small water pump.
Just remember that water for irrigation should be used at ambient temperatures and at ambient temperatures.
It must be said that potato agricultural technology according to Mitlayder involves applying the required amount of fertilizer and abundant watering of the vegetable crop. Ideally, a gardener should water the beds daily. We can recommend that you install an automatic watering system, which will greatly simplify the care of your plantings.
The first application of fertilizers is carried out when seedlings appear. The next feeding is done when the sprouts reach a height of 15 centimeters. The third and last time the plantings are fed before the formation of buds on the bushes. Any complex fertilizer containing nitrogen can be used as a fertilizer. You can also fertilize with a light mullein solution. Remember that hilling of plantings is not required when using this method. This simplifies the care of the beds.
How to care
So that your work does not go in vain, and you get a good and quick harvest, you should properly care for such potatoes.
To do this, you need to pay attention to the following points:
Location of bags. The container with planted potatoes should be placed in a well-lit place. Provide good warming for faster germination. One option is to place them along paths or in flower beds
It is important not to forget about ensuring stability (they may fall over). To do this, you can lightly dig the bags. Watering
The moisture from the bags will quickly evaporate, and it is very necessary for the formation of tubers; it is important to water the plant on time. There should be a covering under the bag that will well absorb excess moisture that will come out of a special hole. This can prevent rotting due to excess moisture. Before the first shoots appear, you should not water the plant. You need to moisturize with 3 liters of water per day, provided that the weather is dry. Feeding. The soil is quickly depleted, so fertilizer must be applied at least once a season. Prepare the preparations according to the instructions and use at the rate of 1 liter per 1 potato plant
Watering
The moisture from the bags will quickly evaporate, and it is very necessary for the formation of tubers; it is important to water the plant on time. There should be a coating under the bag that will well absorb excess moisture that will come out of a special hole
This can prevent rotting due to excess moisture. Before the first shoots appear, you should not water the plant. You need to moisturize with 3 liters of water per day, provided that the weather is dry. Feeding. The soil is quickly depleted, so fertilizer must be applied at least once a season. Prepare the preparations according to the instructions and use at the rate of 1 liter per 1 potato plant.
You can start harvesting in mid-August. There are two ways:
- Turn over and empty the contents (this way the bag will remain intact and can be used next year); if further use of the container is not planned, then you can cut it.
- If the bag is equipped with special valves, then it is easy to get ripened tubers through these holes.
Note! Usually up to 5 kilograms of large potatoes are collected from one bag. The most basic recommendation is not to forget about watering
Potatoes in bags need it regularly. You need to make sure that the plant is covered with soil up to the leaves. Do not forget about timely application of fertilizers and ventilation
The most basic recommendation is not to forget about watering. Potatoes in bags need it regularly. You need to make sure that the plant is covered with soil up to the leaves. Do not forget about timely application of fertilizers and ventilation.
In European countries, farmers have long been using this growing technology, as it allows them to get early potatoes right near their homes. In Russia, the cultivation of potatoes in bags is just beginning. Those who have tried this method leave positive reviews, noting its effectiveness and simplicity, saving space in their summer cottage. For easier understanding, it is better to watch the video.
The method of growing potatoes in bags is convenient. The whole process, from planting to digging up the crop, does not take much time and effort. You can even plant such a bed on the balcony. If you follow all the rules for planting and care, you can get a more abundant harvest than with regular planting.
But it is important to choose the right variety
How to plant and grow potatoes using the Kizima method
Preparation of planting material
Select healthy tubers that are the size of eggs laid by a chicken. Tubers begin to be prepared 1-1.5 months before planting.
They are washed, placed in a basin, filled with clean water at a temperature of +45 degrees, and left until the water cools. Dilute potassium permanganate and gradually pour it into a basin a little at a time, thoroughly mixing water and potassium permanganate, the water should turn pink.
Then leave for 15 minutes, drain the water, wash the potatoes and dry. This procedure removes bacteria and germs from the peel.
Or replace potassium permanganate with a solution of Fitosporin, diluting a small portion of Fitosporin in water so that the solution is almost transparent. Pour diluted Fitosporin into a basin with tubers and water, leave for 30 minutes, then dry the potatoes, in this case there is no need to wash them under water.
The tubers are placed in the sun for 3 weeks so that they turn green. Then a poison, solanine, will appear in their subcutaneous layer, and the tubers will not be of interest to mice, hares, or other pests.
You can put the tubers in glass jars and place them on the windowsill, turning the jars after a certain amount of time. Or you can put a newspaper on the windowsill and place tubers on it.
Next, the potatoes are germinated, they are put into a cardboard box, where they germinate in the dark and warm.
Place them in 1 layer in a cardboard box so that they do not lie end to end, cover the top with newspapers and place another layer on them, and then more newspapers and a third layer of potatoes. Close the box and place it on a stool near the battery. For the eyes to grow into sprouts 4-5 cm long, it takes about 2-3 weeks.
Step by step process of planting potatoes
It is well known that tubers do not grow on rhizomes, but on horizontally located shoots growing at the very bottom of the stems, called stolons. Stolons do not require soil, they require shade.
There is no need to dig up the soil. Place the sprouted tubers on virgin soil directly on the weeds.
In central regions, place a very early variety in one row and a mid-season variety in the other. And in the north, plant an early variety and a mid-early one.
Potato care
The main thing is to protect the beds from return frosts. Because of this, cover the potatoes with hay, but not straw. It is not suitable because it attracts mice. You can cover the ridges with dry fallen leaves. If you don’t have any of this, then cover it with newspapers or wrapping paper, after cutting it into pieces and crumpling it up. There is no need to cover the row spaces.
To ensure that all this covers the bed and does not fly apart, place spunbond or bags on top. You cannot use film, as the plantings and weeds under it will begin to rot.
At the end of the return frosts, remove the spunboy and place on the bed all the materials from which you make the compost heap: weeds, grass. Place this on hay or newspapers, but not on potato seedlings. Do this all summer, hill up young potato shoots not with soil, but with mowed grass.
So, you do not apply mineral fertilizers and manure, do not moisten the plantings, since compost from weeds consists of 80% water, and when they rot, it is released and flows down to the root system of the potatoes.
At the same time, the weeds that lie under the plantings do not grow, but die, since they are not illuminated by the rays of the sun. When the potatoes bloom, tubers will begin to grow on the stolons. Pick off the flowers, as it takes a lot of effort to grow them and after picking, the potatoes will use all their energy to form tubers.
If your planting field is too large, then simply tear off the tops of the bushes as soon as the bushes close. This way your tops will not grow in height and 2-3 additional tubers will form.
How and when to harvest
Simply move the compost and pick up the largest potatoes, then carefully place the compost in place. With this collection, the stolons will not be damaged and they will begin to grow more tubers.
When you have collected all the potatoes from the first row, spread out the tops to dry. In general, it is not recommended to put tomato and potato tops in the compost heap, since they contain corned beef, but the corned beef will be destroyed by sunlight, precipitation and air. Leave it all for the winter.
Unrotted compost has slightly acidic and or sour characteristics; when overrotted, they become neutral. But potatoes can be planted in slightly acidic or acidic soil.
Potato planting process
The peculiarity of the Kizima method is that the tubers are laid out on the weeds. Make 2 rows, leaving a distance of 50 cm between them, and 20-25 cm between the potatoes. On each side of the edge of the bed, leave 25 cm per 1 m, placing 4 tubers in each row. The resulting bed takes from 80 to 100 cm, the length is determined by the summer resident.
Why is it so important to select tubers of a certain size? Potatoes that are too small will produce a poor harvest
Planting material that is too large will develop powerful stems. Large root vegetables must be cut lengthwise into 2 halves. Let it sit for several days, then dust it with wood ash. Only then plant in prepared compost.
To increase the number of stems, 7 days in advance, cut off the skin in the middle of the potato in a thin strip across the tuber. This will help awaken the sleeping kidneys that are in reserve.
The final stage of planting is protection from frost. Dry and breathable material is used to protect potatoes. To prevent the wind from blowing away dry plant residues, hay or leaves, use burlap or spunbond. Do not apply film under any circumstances, as this will cause the covering material to begin to rot.
Landing rules
The gardener chooses potatoes whose size is comparable to a chicken egg. If small tubers are planted, then they are planted in threes to ensure the required number of stems. Before planting potatoes, you need to make sure that they are sprouted. The recommended height of the sprouts is 5 cm. If the figure is less than the specified value, then there is a high risk of crop loss in cases of a sharp rise in temperature.
For planting, choose an open area with sufficient sunlight, but there should not be too much of it. The second rule is that Galina Kizima suggests reducing the above-ground part of the bush so that more resources are spent on the formation of tubers. Direct immersion of planting material into the ground is carried out at a time when the soil is dry. Other recommendations:
- First, remove the top layer of soil, which is placed directly on the bed;
- the marking of the beds is done according to the area of the site;
- you cannot dig up the soil;
- lay out the tubers strictly according to the markings;
- the recommended step size between tubers is 25 cm, and the distance between rows is 50 cm;
- Early-ripening varieties are placed in the first row, and mid-ripening ones are in the middle.
When to dig potatoes after flowering: timing, recommendations Gardeners begin harvesting potatoes at different times.
But the period of mass digging traditionally falls on... In the central and northern regions, early ripening varieties are chosen. They are collected 55-70 days after planting. In addition to the described method of protecting tubers from frost, there is another one. The summer resident uses covering material with good air permeability. One option is hay. If it happens that nothing like this was prepared in advance, you can take old newspapers. Only the beds are covered.
On a note! To prevent a gust of wind from blowing away the covering material, newspapers are covered with burlap. As soon as the frost has passed, the hay and burlap are removed. They add organic matter. The second rule is that film cannot be used as a covering material.
What is the essence of technology
Kizima has several books in her “luggage” on growing various garden crops
They provide not just a selection of descriptions - the author tested each method on her site, taking into account the characteristics of the plants
So Galina Kizima plants potatoes in an original way, without digging up the ground and preparing holes. There will be no need for watering or loosening the soil - and without these procedures you can grow a large harvest.
Landing design
The peculiarity of the development of a potato bush is that tubers are formed on stolons. To do this, it is enough to provide shade to the roots, natural nutrition and the necessary humidity. All this is provided by ordinary dried grass collected from the site.
This mulch perfectly maintains the required humidity even on hot days. The lower layers of hay, being processed naturally, become an excellent fertilizer for garden beds. The same material is used to hill up bushes several times a season.
Interesting. This technique not only facilitates planting and caring for the plantation, but also makes it possible to easily make an intermediate selection of mature tuber crops. To do this, just rake the mulch around the tops and select the necessary potatoes, giving the plant the opportunity to continue to grow new ones.
You can add waste to your garden beds to form compost heaps. But Galina Kizima advises not to use straw - it attracts rodents and pests to the garden.
Landing Features
Gardeners have been planting potatoes in the ground for years, applying fertilizers and treating them with chemicals. Galina Kizima introduces innovation in this regard, inviting summer residents to try planting tubers in a compost heap on the surface of the soil. The beds do not need to be watered, weeded, or fertilized. The potatoes themselves do not need to be buried or dug up. In addition, if necessary, you can take a small part of the crop, and the rest of the bush continues to grow and form tubers without visible damage.
Practicing gardener Kizima took into account the peculiarities of the growth and development of potato crops in her observations.
According to her method, potatoes are laid directly on the ground, covered with mown grass or hay. As the bushes grow, the stems are covered with straw or weeds from another part of the site. Under no circumstances should tubers be exposed. They will begin to turn green, accumulating substances harmful to the human body.
Skeptics consider this method unaesthetic, since from the outside the potato beds appear unkempt. Galina herself advises carrying out a series of works sequentially:
- Preparation of planting material.
- Planting.
- Caring for plants.
- Harvesting.
She describes each point in detail in her writings.
How to plant potatoes using this method
The method requires preliminary preparation of planting material, which takes 1-1.5 months.
Selecting root vegetables
The seeds are suitable for strong, healthy potatoes, the size of a chicken egg. If the tubers are smaller, this can significantly reduce the yield; large specimens are cut in half lengthwise so that there is an equal number of sprouts on each part.
Disinfection
The potatoes are washed well, and then immersed in a container and filled with clean water at a temperature of +45 ° C. A concentrated solution of potassium permanganate is gradually added to the water until the water in the container turns a soft pink color.
You can treat them with Fitosporin. A small portion of the product is diluted in water, the tubers are placed in the solution for half an hour, then they are dried. Planting material should not be washed off from Fitosporin.
Germination
After processing, the potatoes are laid out in the sun so that the tubers turn green when exposed to light. Can be placed in rows on a windowsill or placed in a glass jar. The tubers need to be rotated to ensure uniform release of chlorophyll.
After the tubers have uniformly greened, which takes 3 weeks, they are placed in rows in plywood boxes or wicker baskets, each layer lined with newspaper, and placed in a dark and warm place for germination. The tubers are completely ready for planting when the sprouts reach 4-5 centimeters.
When and how to harvest
By learning how to plant potatoes using the Kizima method, you can get a good harvest. However, cleaning work should be carried out correctly. You can start harvesting the moment the flowers become limp.
First you need to move the compost, select large tubers, and return the compost to its place. This will allow you to harvest again after some time.
After all the potatoes have been collected, the tops need to be dried. It should not be placed in a compost heap. This is due to the fact that the tops contain corned beef, which is destroyed under the influence of sunlight.
Which is better to plant potatoes - in narrow or wide beds?
Sergey Kostenko
Actually there isn't much difference. It’s just that now the accepted width is 70 cm or more - this is a tribute to the accepted technology for using tractors, since the wheels of a tractor are 40 cm wide, it can easily drive in row spacings of 70 cm without running into the rows themselves. At one time they tried 40 X 40 cm and 50 X 50 cm, etc. They also tried 140 cm rows (these were used in the Far East). The main thing is how many plants per unit area. The norm is about 400 tubers when planted for food purposes. When the seed is thicker. Of course, this may vary depending on the zone and variety and soil. Of course, it is better to plant so that the feeding area under the bush is closest to a circle or square. . But wide ridges are not much less productive.
Andrey Sagan
I would advise you to plant potatoes “Under straw”, a very popular technology now, it has many advantages: 1-constant preservation and accumulation of moisture. 2-very reduced likelihood of weeds appearing. 3-in such an environment, saprophytes develop incredibly quickly, which of course affects the development of the crop! And it’s also not so labor-intensive! You can find out more here: https://www.liveinternet.ru/users/consort/post158346858
TULEPASHA
In areas with high humidity - on wide ones. It also depends on the variety. There are bushes that have meter-long tops (for example, TEMP). If you want to grow planting (seed) potatoes, use narrow ones.
Victoria Tchaikovskaya
https://blogs.mail.ru/mail/viktoria1.chaiko/52A3DA984DF93536.html - topic ;Planting on ridges and in trenches. label - ridges, soil mixture for pots and tablets the choice depends on you, how convenient it is for you.
- Sprouting potatoes for planting video
- Planting potatoes in sawdust
- Time to plant potatoes
- Planting potatoes in Ukraine
- Potato planting care video
- How to germinate potatoes for planting
- Planting potatoes in a greenhouse
- Growing potatoes, caring for potatoes
- Feeding potatoes before hilling
- What type of potato is best to plant in the Moscow region?
- Potatoes and heat
- Watering potatoes
- Watering potatoes with cold water
- What's the best way to water potatoes?
- Potato variety delicious
- Potato planting care
Answers to frequently asked questions
- Should I fertilize potatoes when planting? No, all the necessary nutrients are already contained in the tubers.
- How to fertilize tubers throughout the season? No need to fertilize.
- What about watering the plant? Watering is pointless and will only spoil the plant. Eighty percent of potatoes are water.
- What happens if the weeds grow and destroy the potatoes? The weeds will die. Under a layer of compost they are deprived of light. In addition, their roots will also die.
- Should you grow potatoes from seeds? It depends on what kind of seeds. It takes three years to get good seeds. But you don't have to use your own. There are many options sold in stores.
Planting potatoes according to Gordeev
According to the Gordeevs’ method, you need to prepare the land in late autumn - dig it up with manure or compost. You can also leave hay and grass in the summer and plow everything up before winter. And in the spring, nitroammophoska is added to the soil and loosened a little with a rake.
The location for planting potatoes must be changed every year. It is advisable to grow it after grains.
You need to prepare the material in early spring, germinating sprouts on tubers. To disinfect them from diseases and fungi, you need to soak them in special preparations.
It is advisable to water the soil before planting. The beds are made with an interval of 70-80 cm. For planting, trenches are dug into which the vegetables are lowered. The distance between them should be up to 40-50 cm. They are covered on top with earth mixed with ash and compost. After the first hilling, the beds are mulched with hay.
The essence of Galina Kizima’s method for planting and growing potatoes
Everyone knows that usually planting potatoes turns into deep digging of the soil while simultaneously burying seed tubers in holes. According to Kizima's method, digging is not used at all: the tubers are laid out on the surface and covered with a fertile mixture, often just compost.
Galina Kizima is the author of many popular books for “lazy” gardeners
Advantages and disadvantages of the method
Potato tubers form on so-called stolons - underground shoots. For this to happen, a certain shading is required by the roots at depth, the required amount of nutrients in the soil and moderate humidity. All this can be created without digging holes, but simply by covering the tubers laid out on the ground with the right amount of nutrient mixture, even dried grass. Of course, after this moderate watering and other agrotechnical measures are required, but physically they are easier to carry out than with the traditional method.
Of course, work on potatoes is still necessary, but it is much easier to do than with traditional cultivation
It is also important that with this technology it is possible to easily carry out selective harvesting, raking a thick layer of mulch and selecting the largest young tubers. In a loose layer of mulch, potatoes warm up better, as a result of which the crop ripens earlier, and with the necessary moisture there can be more
The advantages of the method are:
- no need for digging;
- absence of fertilizing operation;
- increasing the quantity and quality of tubers;
- ease of harvesting.
Another advantage is that the harvest can be obtained a little earlier: after all, planting according to the Kizima method is possible already when the soil surface dries slightly; In the usual case, you have to wait for it to warm up to a considerable depth.
Perhaps the only relative disadvantage is that the moisture content of the substrate will have to be monitored more closely: potatoes will grow in such an environment without watering at all, but in order for the harvest to be really large, timely moisture will be required in many regions.
In many regions of Russia it will still be impossible to do without irrigation.
What types of potatoes can you use?
There are no fundamental restrictions on the choice of varieties for planting using the method under consideration. It is known that there are very different varieties in terms of ripening time. For example, early ones (Zhavoronok, Vega, Bryansk early, etc.) are ready for harvest within two months after emergence, for mid-early ones (Nevsky, Charodey, Fakel, etc.) it takes 70–80 days, and late ripening ones (Bryansky red Atlant, etc.) are ready for harvest so late that they are not grown at all in the northern regions.
It is optimal to plant several varieties with different ripening periods, alternating them in rows. At the same time, in the middle zone it is better to use the earliest and mid-ripening varieties, in the north - early and mid-early. Any tubers are prepared for planting within a month or a month and a half. The best seed potatoes are the size of a chicken egg. In addition to the usual germination carried out in the sun, the author of the method advises making a transverse cut on the tuber a week before planting.
Tubers are germinated using conventional technology
Planting potatoes according to Gordeev
According to the Gordeevs’ method, you need to prepare the land in late autumn - dig it up with manure or compost. You can also leave hay and grass in the summer and plow everything up before winter. And in the spring, nitroammophoska is added to the soil and loosened a little with a rake.
The location for planting potatoes must be changed every year. It is advisable to grow it after grains.
You need to prepare the material in early spring, germinating sprouts on tubers. To disinfect them from diseases and fungi, you need to soak them in special preparations.
It is advisable to water the soil before planting. The beds are made with an interval of 70-80 cm. For planting, trenches are dug into which the vegetables are lowered. The distance between them should be up to 40-50 cm. They are covered on top with earth mixed with ash and compost. After the first hilling, the beds are mulched with hay.
Planting potatoes before winter, advantages and risks of this growing method
For those who like to enjoy young potatoes on the first warm days of spring, experts advise trying the original method of growing them. Residents of the south can safely use one of the technologies for planting potatoes before winter. It is in these regions that the climate is perfectly suitable for obtaining an early harvest of a variety of vegetables, including potatoes.
- What are the advantages of planting potatoes before winter, the negative aspects
- How to plant potatoes in autumn
- Once again about planting material
- Technology of planting potatoes under straw before winter, features of the method
- Caring for potato beds in spring
What are the advantages of planting potatoes before winter, the negative aspects
Although this method of growing potatoes has been practiced for a long time, it is associated with some risks, mostly for the reason that no one can accurately predict what autumn, winter and spring will be like.
It is worth considering that winter and spring temperatures can vary significantly depending on the region. This factor directly affects both the timing of planting tubers and the timing of their ripening.
It is no secret to experienced gardeners that those tubers that for some reason were left in the soil during the autumn harvest begin to grow much earlier than the plantings made in the spring. But not all potatoes can survive normally in the ground until spring; some of them are lost due to deep freezing of the soil.
It is inspiring that the bushes grown from potatoes overwintered in the ground are much stronger than others and more resistant to low temperatures. The number and size of tubers in such bushes differ significantly from spring plantings, and are also less susceptible to the influence of various diseases and pests.
The method, of course, has its drawbacks - the potatoes may freeze due to sudden temperature changes or severe frost, but it’s still worth the risk.
The advantages of the method include higher yields compared to those tubers that were planted in the spring, and an earlier ripening time.
How to plant potatoes in autumn
The main and important feature of this method is the correct planting depth. For example, tubers that remain in the soil for the winter at a depth of 0 to 12 cm will most likely freeze and not only not produce a harvest, but will not even sprout.
Calculating the planting depth
Those potatoes that, when plowing the soil, ended up at a depth of 20 cm to 30 cm will be pressed down by a dense layer of earth, therefore, their sprouts will take longer to break out and will spend a lot of effort on this process - which means they will be too weak and painful. In other words, they will not give the desired harvest.
Having made simple mathematical calculations, you can understand that the optimal depth is from 12 cm to 20 cm.
Weight of planting material
The weight of the tubers selected for planting remains an important factor. It is quite possible that a potato sprout will sprout from a depth of 20 cm, but the weight of the planted tuber should be about 100 grams.
When to plant and where
Time also plays a minor role and directly depends on weather conditions: if in the morning the soil is not very frozen, but by about noon it begins to thaw, then it’s time to start work.
In order to get a high-quality and good harvest of potatoes planted for the winter, you should take care of the planting site and prepare it properly. in the fall, after harvesting the entire crop, the soil with plant residues must be treated with a disk unit, organic fertilizers applied and plowed.
After the first rainfall, cultivation will need to be carried out. The plot should not be blown by the wind from the north side.
Preparing potatoes for planting
The tubers themselves should be carefully prepared. This is done as follows: for two weeks, the containers with potatoes are exposed to the sun.
Over time, the tubers will become green both outside and inside. You can determine whether the greening of the material is complete by cutting several tubers.
By acquiring a green tint, the potatoes are filled with solanine, which will further repel vegetable pests.
Immediately before planting, the material must be treated with a composition specifically designed for this process. You can purchase it at any specialized store, having previously consulted the dosage with a sales consultant.
Once again about planting material
For winter planting, it is better to use those potato varieties that were bred for cultivation in northern climates. This will significantly increase the chances of surviving the winter cold normally and will subsequently produce a good harvest.
Externally, the tubers should be without visible damage, weighing from 50 g to 100 g. For planting at the beginning of winter, the tubers should be without sprouts, at the end of winter - with sprouts.
The depth of immersion of tubers in the soil depends on time: at the beginning of winter from 13 cm to 15 cm, at the end from 10 cm to 12 cm.
It is advisable to fertilize the planting with wood ash and compost. After the first shoots appear, the planted area must be subject to timely hilling and weed elimination.
Technology of planting potatoes under straw before winter, features of the method
This technology involves the following scheme: on a plot of land 5 meters long and approximately 70 cm - 80 cm wide, tubers are planted in two rows, deepening them by 10 cm. Wood ash and compost must be added to each of the holes made.
Planting material must be without sprouts.
The holes are dug in the usual way and the planted bed is covered with small branches, which will create a kind of drainage. A layer of approximately 40 cm of organic material is laid on the branches, most often it is straw, but you can use dry tops that are left over from the autumn harvesting of vegetable crops.
To create such a layer, the following are quite suitable: tops, straw, foliage, grass, and so on.
The time period for field work of this kind should be chosen in accordance with weather conditions, that is, precisely when the ground does not freeze much in the morning, but thaws closer to the middle of the day.
After covering with organic material, the area should be covered with polyethylene. This step should be done without fail.
The film will help protect the planting from the formation of an ice crust, the threat of which is quite real during winter temperature changes (freeze and thaw). Otherwise, there is a high probability that the tubers will freeze even before the time when the first shoots appear above the ground.
The entire area should remain in this “wrapped” state until the arrival of spring.
Caring for potato beds in spring
With the arrival of spring, the film and mulch should be removed, but not thrown away. Wire arches should be installed over the potato rows and covered with previously removed plastic film. If suitable wire is not available, it can be replaced with slats or suitable branches.
The area with winter potatoes must be mulched with compost. All activities carried out in the spring will contribute to faster and better warming of the soil with plantings.
You shouldn’t count on the first shoots to appear quite quickly. As the earth warms up, the tubers will begin to develop a root system.
During this period, special attention should be paid to the condition of the soil under the film. It will have a tendency to dry out.
It should be eliminated in a timely manner, but not overdo it. They say correctly: there should be moderation in everything.
https://www.youtube.com/watch?v=wtnf6NsWtxc
After a certain time, sprouts will appear above the ground. After they reach approximately 15 cm, the previously removed mulch must be returned to its place or, if desired and certain possibilities are available, it can be made from new material; it is best to use fine wheat or barley straw.
You will learn more about the original method of growing potatoes by watching the video:
Source: https://OgorodSadovod.com/entry/3613-posadka-kartofelya-pod-zimu-preimushchestva-i-riski-etogo-metoda-vyrashchivaniya
Choosing a place and soil for planting potatoes
The right place and suitable soil for planting and growing potatoes are very important. When choosing, you should be guided by the following rules:
- The place should be open, well lit by the sun during the day.
- The site must be level, without slope.
- It is recommended to avoid lowlands in which moisture accumulates, as well as excessively waterlogged areas and places with high groundwater levels.
- The soil should be loose, fertile, nutritious.
- The culture prefers light loamy or sandy loam soils.
- Heavy, clayey soils are not suitable, since this crop requires a lot of oxygen for normal growth and development, and such soils have poor air permeability.
Good and bad predecessors
For successful cultivation and a good harvest of any vegetables, you need to follow the rules of crop rotation (that is, alternating crops on a site over time and in territory). Crop rotation rules for this crop:
- It is recommended that potatoes themselves be planted annually in a new location to prevent soil depletion and the accumulation of pathogens and pest larvae in the soil.
- Good predecessors after which it is recommended to plant potatoes: corn, cabbage (and other cruciferous vegetables), garlic, onions, various root vegetables, pumpkin crops (zucchini, cucumbers, pumpkin), legumes (beans, peas), grain crops (wheat, rye) , various green manures - mustard, radish.
- Bad predecessors: other representatives of the nightshade family (peppers, eggplants, tomatoes, physalis). The fact is that potatoes and its other “relatives” have the same diseases, for example late blight.
Positive and negative sides
The proposed growing method causes controversy among summer residents and botanists. Skeptics say that the garden plot will become like a landfill if the beds are fertilized with old plant debris. Galina Alexandrovna's supporters do not agree. Her advice helps to grow a large potato harvest without the use of labor-intensive agricultural techniques. Other advantages and disadvantages.
| Advantages | Flaws |
| Harvesting is much easier | The vegetable garden takes on an unattractive appearance |
| No need to dig up the area | The technique is only suitable for small areas |
| Plants need less water | Low level of protection against pests and diseases |
| Summer residents need less fertilizer | — |
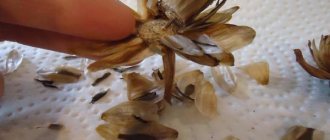
Another controversial point is that Galina Aleksandrovna recommends removing the buds at the stage of inflorescence formation. Manipulation increases the amount of resources that seedlings will direct to the development of the root system. Botanists object. Such actions in cool and humid summer conditions will weaken the potato’s immunity.
Is it necessary to pick off flowers from potatoes: why is this done? During their development, potatoes go through a flowering phase, after which berries and seeds are formed. Usually for...
Selection of containers
To grow potatoes in bags, you need durable containers. Paper and fabric bags will not work. They deteriorate too quickly. Typically, containers woven from strips of polypropylene are used for planting vegetables. They have good strength and are breathable. It is advisable to choose light-colored containers. It will heat up less in the sun and the soil inside will remain moist longer. If the bags are dark, you need to carefully monitor the condition of the soil in them to prevent drying out.
On a note! You can plant the tubers in durable plastic garbage bags. Then they need to be pierced with an awl in several places to facilitate ventilation of the roots and prevent stagnation of water.
It is most convenient to use a bag with a large valve at the bottom. With its help, tubers are harvested without damaging the plant, and the roots are ventilated. This device is easy to make yourself. But if you don’t have the skills, you can purchase ready-made durable bags with a valve in the store.
In addition to bags, you can plant potatoes in boxes or boxes. Old car tires and plastic buckets are also used for this purpose. First, a hole is made in the bottom of such a container, which will help harvest the crop.
Containers are placed in any suitable place. To do this, select an open area so that the plants are always well lit. For greater stability, they are sometimes slightly dug into the ground or installed next to a support. In this case, the plants must be accessible from all sides. You should not install the bags near the wall of the house so that rainwater from the roof does not flow into them.
Step-by-step instruction
The method is accessible and simple; the bed does not need to be fertilized, watered or hilled.
Timing and technology of planting work
The sprouted tubers are laid out over a selected virgin plot in the garden. There is no need to dig up the soil or remove weeds. Lay out the potatoes in 2 rows with a distance of 40-50 centimeters between them. Between tubers, 20-25 centimeters is enough. We get a bed of any length with a width of 80-100 centimeters.
Small tubers need to be placed in 2-3 pieces. Large potatoes are cut in half lengthwise, the cut is allowed to dry for a couple of days, and then placed in the beds. The number of eyes on a tuber can be increased by cutting the potato crosswise a week before planting, or removing a thin layer of peel across the bottom of the potato.
Important: this operation will awaken the reserve buds of the tuber.
Then the bed is covered with a layer of hay. Straw is not used - it is too attractive for rodents; plastic film is not suitable because it does not allow the tubers to breathe.
See also
Description and treatment of potato wrinkled mosaic, prevention
Read
If there is no hay, dry leaves, grass and even paper will do. The covering material must be dry and allow air to pass through to the tubers. If there is a threat of return frosts, the bed is additionally insulated with burlap, spunbond, and lutrasil. As the weather gets warmer, the covering material is removed.
Garden bed care
Then all the weeds collected on the site during the season are laid out on the garden bed. It is necessary to ensure that when the compost layer shrinks, the growing tubers are not exposed. Kizima advises pouring slop between the rows. The moisture released during the decomposition of weeds is sufficient for potato bushes; they do not need watering or hilling.
When the plants bloom, it is necessary to tear off the inflorescences so that the plant devotes all its energy to the formation of root crops. You can leave one inflorescence per bush so that you know when to harvest the first harvest. To harvest potatoes, lift the layer of covering material, collect the tubers and return the grass to its place. The potato bush will continue to grow.
In the fall, you should simply lift a layer of compost and harvest, and leave the remaining grass in the beds until the next season.
Galina Kizima - popular varieties of strawberries
Galina Kizima, having gained bitter experience, always advises to refrain from buying strawberries for planting from unverified sellers, in spontaneous markets, and even from friends. The fact is that by purchasing strawberry seedlings in this way, you can not only plant a variety that is unsuitable for your site, but also introduce dangerous pests or diseases.
Her point of view is that it is permissible to buy planting material only in specialized nurseries. They scrupulously monitor the cleanliness of the plants, in addition, this way you can avoid mis-grading. Remember that when choosing plants, you should purchase zoned varieties of strawberries (intended for growing in your region).
Galina Kizima advises to always approach the choice of strawberry variety wisely. They differ from each other not only in taste, but also in the color of the berries, their weight, fruiting period and care requirements.
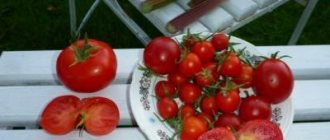
The best early varieties of strawberries according to Galina Kizima, description with photo
Galina Kizima considers the following early strawberry varieties to be the most promising:
Joseph Mohammed - is drought-resistant and tolerates frost well. The berries are juicy, sweet with a delicate sourness, their weight exceeds 30 g. The berries ripen in June.
Alba - medium-sized berries of bright scarlet color. They are practically not damaged during transportation. The variety bears fruit abundantly at the end of May.
Octave - large berries (more than 30 grams), with dense and very juicy pulp. The bush is squat with a dense deciduous rosette.
The best late strawberry varieties according to Glaina Kizima, description with photo
Mid-late and late strawberry varieties have a denser skin structure, less juice and a weaker aroma. Galina Kizima recommends growing these varieties for harvesting berries for the winter, for example, for freezing, since the loss of juice in late varieties does not exceed 20%.
Popular varieties:
Malvina - deep red berries native to Germany. The fruits ripen by mid-August; they taste sweet, but the flesh is a little “tight.” The variety is immune to diseases.
Bohemia is a late-ripening strawberry whose berries ripen in October. The variety is characterized by large sweet-tart fruits, weighing 35 grams.
Adria is an Italian variety with scarlet cone-shaped berries, originally from sunny Italy. Fruiting occurs in August-September.
Remontant varieties of strawberries, description with photos
Remontant strawberries are a long sunny day crop. It bears fruit twice a year, does not tolerate frost well, and after 2-3 years it begins to lose yield.
Promising varieties:
Temptation is a hybrid with juicy, large berries that exude a musky aroma. The variety ripens in May. Can be grown in gardens, on balconies or simply as an ornamental plant.
Diamond - distinguished by sweet berries of pale pink color. Fruits in May and June.
Moscow delicacy - the hybrid bears fruit until frost. The berries are small, juicy, weighing up to 20 grams.
For which tomato varieties is this method suitable?
For growing in “diapers” it is recommended to take low-growing determinate and ultra-determinate varieties. Many summer residents plant hybrids because they get sick less. The author of the method did not use hybrid tomatoes, since she preferred to take seeds only from plants that she grew herself, and the varietal characteristics of hybrid tomatoes are lost in the second year.
It is better not to grow indeterminate varieties in plastic bags. Their hand formation may be impaired.
It branches into 2-3 processes. Seedlings grow longer than most determinate tomatoes, and by the time they are planted in a permanent place, the stems have time to become very elongated.
Landing in trenches
Potatoes have been grown in trenches for a long time; this method gives good results in small areas. Experts say that the potato yield in trenches can be twice as large as when using traditional technology. However, this method is quite labor-intensive, and, apparently, that is why it has not yet become widespread among vegetable growers.
Preparation for planting in this way begins in the fall. A trench about 50 cm deep is dug along the entire length of the bed. It is filled with organic matter - a mixture of peat, humus, sawdust, fallen leaves, straw, etc. The bed is left in this form until spring, and with the onset of the first warm days it is covered with black plastic film for better heating .
For a large amount of planting material, not one, but several trenches will be required. They are made by retreating to a distance of up to 70 cm. Unused soil is left between the rows; it may still be needed during the season.
Sprouted potato tubers can be planted in a trench when the substrate temperature reaches +6...+8 °C. The top of the potatoes is sprinkled with a layer of soil or compost and covered with film. When the shoots appear, holes are cut in the film cover so that the stems can grow freely upward. This technique allows you to retain moisture around the bushes and at the same time get rid of weeds. You don’t have to use film, but simply sprinkle the grown stems with the soil remaining on the sides of the trench.
Planting potatoes in trenches is completely unsuitable for areas with high groundwater levels. There is a high probability that in conditions of high humidity the potatoes may suffocate and rot. In this case, you should not bury yourself in the ground, but, on the contrary, raise the beds higher.
Planting and growing
Potatoes are always planted in spring or early summer. Choosing the right time to deepen planting material into open ground is only part of the success of obtaining a good harvest.
It is important to follow the rules of planting and caring for tubers
Preparation
The first stage of land work is preparing tubers for planting. It consists of several important steps:
- Sorting. Only tubers weighing from 50 to 80 g, having a perfectly smooth surface without signs of damage, are suitable for planting. Tubers affected by scab and cracks are not suitable for this purpose. They will not sprout.
- Germination. 2-3 weeks before the expected planting date, transfer the tubers to a warm, bright room. Don't be alarmed if they turn slightly green. This indicates that solanine has accumulated in their composition, which will prevent them from getting sick in the future.
- Treatment. Be sure to treat the planting material with a solution of boric acid and copper sulfate in a ratio of 1 g of active ingredient per 10 liters of water. This is necessary to disinfect vegetables from diseases and pests. The procedure is carried out immediately before planting after germination. For 100 kg of tubers, 1.5-1.8 liters of solution is enough.
Before planting potatoes, inspect them again and sort whole tubers from damaged ones. This type of vegetable is very light and heat-loving. Therefore, choose a place on the site that is well lit by the sun; there should be no tall buildings or trees near it that create shadow.
Attention! Treatment of planting tubers is mandatory. If this is not done, then the risk of pest damage and disease increases.
This means that the entire ridge is at risk. Consequently, the harvest may grow meager.
Soil preparation
Prepare the soil for planting in the fall or immediately before planting days.
After digging up the previous crop, be sure to free it from the tops, burn it and move it to an area away from the site. If this is not done, the insect larvae and harmful bacteria that have accumulated on it will move into the soil and infect the new crop. Before planting, clear the soil of weeds, dig and loosen it. This is necessary for improved oxygen circulation and creation of the necessary humidity. It is recommended to use a pitchfork instead of a shovel for digging. Be sure to feed the soil at least once every 3 seasons. Use rotted manure or ash for this.
Landing
Planting tubers in open ground is carried out as follows:
- Loosen the soil, making its surface level.
- Dig furrows along the bed. The distance between them should be at least 60-70 cm. If you want to make them even, it is better to mark them with a rope in advance. Instead of furrows, holes can be made at the same distance from each other. The recommended depth for planting potatoes is 8-12 cm.
- Distribute the tubers with the sprouts facing up so that the distance between them should be 10-15 cm.
- Fill the furrows or holes with soil.
Gardeners believe that the best time to plant tubers in open ground is cloudy, windless weather. If frost returns after this, to protect the planting material, cover the ridge with thick plastic film.
Care
An important part in caring for potatoes is watering. If it rains regularly in the summer, there is no need to do this. In dry summers, be sure to water twice per season - after germination and during flowering.
Another important part of care is hilling. It is necessary to ensure that the tuber does not move outward, and that the root system is firmly anchored in the soil. Hill up the potatoes several times a season after the stems reach a height of 15-20 cm, after which you can sprinkle the bush with soil several more times as it grows.
Attention! The most dangerous enemy for potatoes is the Colorado potato beetle. Regularly monitor the condition of the bushes; if you find traces of insects or bite marks on its leaves or stems, collect the pests and spray them.
Preparing seed potatoes
For germination, place them in vegetable boxes. Lay in 1 layer. Put it in the light. Every 7 days, spray the tubers with a superphosphate solution. Before planting, the sprouts should be strong and not long. Seed potatoes can be cut into pieces, each with a peeking eye.
With the help of seedlings you can speed up the harvest. To grow it you need boxes and sawdust. They are poured with a layer of 3 cm, watered with copper sulfate (a 0.2% solution is prepared). The potatoes are laid out close to each other and covered with a 1-1.5 cm layer of sawdust.
Potato seedlings are grown at a temperature of 12-14 °C. She is ready for transplantation in 7-10 days. Roots and green shoots appear on the tubers. On the day of planting, the seedlings need to be watered with complex fertilizer for potatoes.
Preparing a site for planting potatoes
Proper planting of potatoes is based on careful selection of growing conditions. Potatoes should absolutely not be planted where not only they or other nightshade crops grew in the previous 3-4 years. Ideal precursors for such a beloved root vegetable are legumes, cabbage, cucumbers, radishes, and beets.
Potatoes need to be planted on fertile, loamy and sandy loam soils, cultivated and light. It is advisable to prepare the site for planting in the fall, improving the characteristics of the soil with organic (except manure) and mineral fertilizers (for example, adding compost or humus in the amount of 5 kg, 300 g of ash, 30 g of superphosphate and 15 g of potassium salt per square meter). In order to save money, it is more rational to apply fertilizers to the planting holes, and not to the entire area; in this case, use a handful of organic fertilizers and a tablespoon of mineral ones.
Before digging up the area, it is thoroughly cleared of all weeds, fertilizer is scattered over the surface and the soil is dug deep onto the bayonet of a shovel, without breaking up the lumps. In the spring, before planting potatoes, dig up the soil again, but less deeply, or loosen it with a pitchfork. Too large doses of fertilizers, especially organic ones, should not be applied, because this increases the ripening time of potatoes and the percentage of nitrate content.
Potato planting dates
The timing of planting potatoes is determined by weather conditions, focusing on the temperature of the soil, which should warm up to 6-8 degrees at a depth of 10 cm. Evidence of such warming is usually the intensifying flowering of trees, in particular, popular beliefs recommend planting potatoes during the flowering of bird cherry or the blossoming of leaves on birch.
Reviews from summer residents
A beginning gardener is looking for help from like-minded people. To do this, he visits websites and looks for comments from experienced gardeners. The following is said about the Kizima method:
- Gregory: “I’ve been growing potatoes using her method for several years. This is not to say that it is simple. But it works great, the yield increases, and the potatoes are clean.”
- Ekaterina: “I didn’t like planting potatoes this way, the garden is like a landfill. And you need to tinker a lot.”
Galina Kizima calls herself a “smart sloth” who, in order to save time and effort, invents more efficient ways to grow crops in small areas.