To grow good, strong seedlings at home, you need to follow the rules followed by experienced gardeners. One of these rules is proper watering. After all, if you don’t maintain the balance and simply water it abundantly, noticing that the soil has become dry, then you can ultimately harm the plants. Moreover, not every liquid is suitable for irrigation; choosing the right water for seedlings is also an art that needs to be learned. So, how to water seedlings correctly.
Features of watering on the windowsill
If you have a green vegetable garden on your windowsill at home, then it is important to learn how to water it correctly.
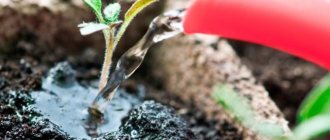
- The first time is watered when the seeds are sown in moist soil placed in boxes.
- The second watering is when the shoots appear. Water should be poured carefully, under the roots, being careful not to wet the tender leaves.
- The third time the watering is normal. The guideline here should be the drying soil, which needs to be moistened regularly.
Experienced gardeners recommend watering in the morning. The water should be at a comfortable temperature - about 20-25 degrees Celsius.
What should be the water for irrigation?
The water temperature for irrigation should be from 20 to 25 degrees Celsius. A little colder or, on the contrary, hotter - and the plant will become uncomfortable. To bring water to the desired temperature, gardeners often heat it slightly and then measure it with a water thermometer. The main thing here is not to overheat the water and under no circumstances boil it. Of course, hot water can then be cooled to the desired temperature, but boiled water is poor, deprived of the oxygen needed by plants. Such watering does not bode well for seedlings.
The second option is without heating: water is poured into a container and left in a heated room. The water itself gradually warms up until it reaches room temperature. In addition, while the water heats up naturally, it settles, which is also good. The seedlings love this kind of water.
Water the seedlings with filtered water. And if you also add a peat tablet to the water (1 tablet per 10 liters of water), then watering will be very useful. Another option is to dissolve 1 gram of citric acid in 10 liters of water; the sprouts will also like this water.
The best option for irrigation is rain or melt water - of course, this method is only good for areas with unpolluted, clean air, where there are no industrial metallurgical or chemical plants, otherwise the water will contain the entire periodic table and turn into poison for seedlings.
How often should you water at home?
Seedlings usually “sit” in boxes with soil on the windowsill. The ideal option is if the windows face south, then the plants receive enough sunlight. Experienced gardeners first place a pallet on the windowsill, and then a box of seedlings on the pallet. This is done so that it receives enough moisture when watering, and the soil remains moderately moist, but not soggy. So, when you water the soil, excess water goes into the pan.
If water accumulates in the soil, it will become “swampy” and the plant will get sick. Therefore, a tray under the drawer is a good solution to the problem. Water the seedlings, focusing on soil moisture. Once or twice every seven days. Before and after picking, the plants are left without water. This must be done so that the seedlings take root in the new container and strengthen the roots. After the diving procedure, the plants are usually kept without water for five days, then watered as usual.
Before germination
Of course, the seeds are placed in moist soil and the soil is covered with glass or film to create a greenhouse effect. In a moist, warm environment, the seeds will hatch faster. While the seeds are still sitting in the soil, no sprouts are visible, the soil is simply refreshed by sprinkling. The water clouds of the spray moisten the surface of the soil, preventing the appearance of a crust. After moistening, the glass or film is returned to its original place.
After germination
Watering changes when the first shoots appear. The glass (polyethylene) is removed, the sprouts begin to reach for the light. When the covering material is removed, the seedlings are not watered for a couple of days. This is necessary so that the seedlings get a little stronger. Then hilling and thinning should be carried out. Sprouts should be watered once a week.
When the sprouts are decorated with the third true leaf, they need to drink a lot. To ensure that the roots of the seedlings do not experience a moisture deficiency, the soil must be moist not only at the top, but throughout the entire volume of the box. You can check soil moisture using wooden tools. For example, by dipping a stick into the soil until the very day and then removing it, you can determine the soil moisture.
Watering flower seedlings
We recommend reading our other articles
- Advantages and popular models of Xingtai tractors
- Tomato variety Gina
- Description of the breed Toulouse geese
- What to feed turkey poults
Flower seedlings are usually so small that watering them can be very difficult. Because of this, it is usually not watered until sprouts appear (the seeds only need the water that was added during sowing). After the sprouts appear, water begins to be added every 5-7 days. The easiest way in this case is to use a spray bottle or a simple syringe for watering. Another option is to water the seedlings from a watering can, over the edge of the container. Do not forget that for normal development of the root system it is necessary to water the plants in moderation, not too often.
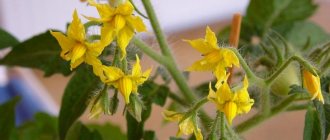
It is very important to water petunia seedlings immediately after sprouting.
- Petunias are not difficult to grow using the seedling method, but you need to add water on time. It is very important to water the seedlings immediately after sprouts appear, otherwise they will fall down and not rise again! Before this, the soil is moistened occasionally and only from a sprayer. When the petunias grow, they begin to be watered using the usual method - as the soil dries.
- When growing lobelias, the seeds are sown only in moist soil. After sprouting, the sprouts cannot be sprayed, otherwise they will rot! But how to water lobelias correctly? The simplest method of moistening the soil is to place a box of seedlings in a basin of water for a few minutes. After this, the pot is taken out and the excess water is allowed to drain. From above, the soil is moistened exclusively with a syringe.
How to water correctly
There are different watering methods:
- Sprinkling - using a mesh from a watering can, pour water onto the leaves.
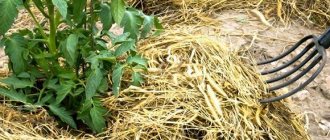
- Under the root - water should not get on the leaves. This method - to avoid late blight - is used for watering seedlings of tomatoes, peppers, and eggplants.
- Irrigation - using a spray bottle, apply moisture to the plants and soil several times a day.
In peat pots
If the seedlings “sit” in a peat pot, then when watering you need to monitor how wet the peat base is. In this case, watering is carried out once a week (depending on the temperature in the room), and there should be little water. The fact is that peat is a porous structure, so it allows air to pass through well, which prevents the base from drying out quickly.
In peat tablets
As already mentioned, peat has a porous structure and high moisture capacity. In order for seedlings in peat tablets to thrive, first, even before sowing or planting, the peat material is soaked. Then the seed or sprout is placed. Watering seedlings in peat tablets is as follows - you need to pour water into the tray where these tablets are located, the peat gradually absorbs moisture and nourishes the plants.
In boxes
Young sprouts will be comfortable in a seedling box if you follow the following rules:
- Do not allow moisture to accumulate at the bottom of the box. For this you need a pallet. This will allow excess water to drain out of the soil.
- It is necessary to ensure that the soil does not dry out. If the room is hot, you should water it a couple of times a week. If the temperature is below 25 degrees Celsius and within 20 degrees, watering once a week is enough.
- You need to check the soil moisture like this: lower the wooden skewer into the soil until it stops, then pull it out and look at the condition of the wooden “tool”.
In "snails"
If the seedlings are placed in a “snail”, then special watering is required. There is not much soil in this device, so it also dries out quickly, which can negatively affect the sprouts. Watering must be constant so that the base does not dry out. Each layer is spilled with water from a watering can. The watering container should have a thin spout so that water flows into the desired turn of the roll with seedlings. It is important not to flood the “snail”, otherwise mold will appear, which is difficult to get rid of. “Snails” should be kept in a room where there is a lot of light and air, then no fungal diseases are scary.
No. 1 Water for irrigation
Water is the source of life
Water quality plays an important role in irrigation. Use warm water at room temperature (+20-+25C). From the tap it sits for 2 days. During this time, chlorine evaporates, and salts settle at the bottom in the form of flakes.
The ideal approach is rain, melt or well water, but this option is only available to rural residents.
Using tap water does not promote seedling growth
Distilled liquid that is devoid of salts is not suitable. Boiled water is not suitable, it has no oxygen, and some useful salts turn into an insoluble precipitate. Chlorine forms toxic compounds after boiling. In addition, after heat treatment, the structure of water changes. Watering with cold, unsettled water causes the death of immature shoots.
Hard water that is saturated with salts can be softened in the following way:
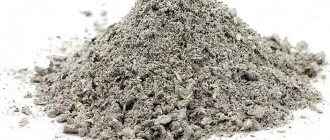
- add 2 tbsp to 2 liters of water. l. ash
- dilute 100 g of fresh peat in 10 liters of liquid
- stand for 1-2 days, draining the sediment
How to prepare melt water
Melt water is distinguished by its structure and has a beneficial effect on the growth of seedlings
Melt water is one of the most useful. It is believed that it has a special structure that has a beneficial effect on the growth of plants in general and seedlings in particular.
If snow and ice are not available, then we create melt water ourselves:
- pour tap water into the bottle, leaving room for the liquid to expand after freezing
- wait until the bulk of the moisture freezes
- drain the liquid from the central part of the bottle: it contains harmful impurities and salts
- let the remaining ice melt naturally and use it for watering
Natural melt or rain water can only be used if industrial facilities are located remotely. Far from the city, in rural areas, such water is most useful for seedlings.
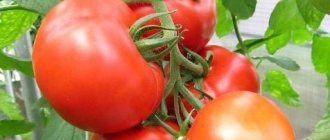
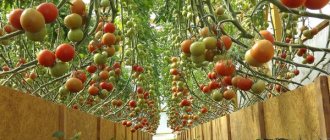
How to water tomatoes correctly
First, when the seeds have not yet awakened, the soil is sprayed and covered with polyethylene or other covering material. Soil irrigation takes place daily, in the morning.
When the seedlings appear, the covering material is removed and the seedlings stop watering. This should take from two to four days. Afterwards, the watering schedule changes: the sprouts are watered no more than twice a week, trying to ensure that the soil is not too dry or too wet. It is important to consider the room temperature. If the air is hot, above 25 degrees, then watering is necessary more frequently.
When the plants are about to be planted, watering should be stopped a couple of days before. When the seedlings are transplanted into separate cups, there is no need to water them. You need to wait four to five days. Then water once a week.
How to grow tomatoes at home
Start of the summer season. How to grow healthy seedlings
The seedlings smell of spring, sun and happiness. It’s a small miracle: watching the seeds hatch overnight, and then the green sprouts begin to stretch upward. We have prepared detailed tips for you on how to grow high-quality seedlings on a windowsill.
High-quality seedlings are the key to a rich harvest. Four reasons why you should start a “green kindergarten” on your windowsill:
- you will get an earlier harvest;
- plants will get sick less, suffer from weeds and pests;
- you will know exactly which varieties grow in the beds;
- Growing seedlings yourself every year is more profitable than buying ready-made seedlings: you just need to purchase phytolamps, stands and boxes once, and they will serve you for several seasons.
Deadlines
To find out when to plant seeds, you need to find out on what day, according to statistics, the last spring frosts occur in your region. Count the required number of weeks from this date - this data is usually indicated on the seed packaging.
How many weeks before the last frost date should seedlings be planted?
- leaf lettuce - 4-5 weeks;
- cabbage - 5-6 weeks;
- sweet and hot peppers - 8-12 weeks;
- tomatoes and eggplants - 6-8 weeks;
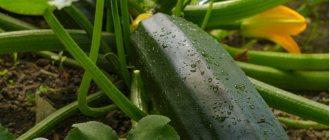
- cucumbers, pumpkin, zucchini - 2-4 weeks.
It turns out that on average the first seedlings can be planted in February-March.
Temperature and lighting
You have decided which seeds you will plant and when. It's time to prepare the window sills. They should be warm and well lit. Priority is given to windows facing south, followed by the east and west sides. If you have wooden frames, seal the cracks - young plants are afraid of drafts.
Each crop requires its own temperature for seed germination and seedling development. To understand how warm it is on the windowsill, you will need a regular outdoor thermometer. Just don’t hang it on the glass, but secure it in the same place where the boxes with seedlings will be.
Optimal temperature for seedlings:
If your windowsills are not warm enough, you can buy mini-greenhouses. For example, this miniature model with a transparent lid. And there are more massive shelves with a cover: height 105, width 46 and depth 24 cm.
In addition to the right temperature, green babies need good lighting. Ideal conditions for germinating seeds are 12-14 hours of bright light per day. Seedlings need to be illuminated - phytolamps are suitable for this. Remember to rotate the containers with plants from time to time so that the sprouts receive even light.
Lamps for plants can be diode or fluorescent, made in the form of light bulbs or flexible tape. For those who love technical innovations, there are tabletop phytolamps with a timer. Another unusual option is a lamp that works for growing seedlings, and out of season can be used for decorative lighting of an aquarium or for reading at a desk.
A convenient format for novice gardeners is containers with built-in LEDs. They look stylish and technologically advanced. To prepare seedlings for all the beds, of course, you will need too many such devices. But if you want to experiment with 10-15 bushes of plants that you will plant on the terrace or small garden bed near the house in the summer, this is your option.
Three technologically illuminated containers:
If you have a warm glazed balcony, loggia or terrace, you can install a special shelf there. And if you live in the south, where in March the temperature outside is already above zero, a greenhouse for open ground is suitable.
Three greenhouses for the balcony:
Seed preparation
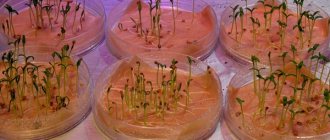
To give your sprouts a strong start, you can place the seeds in a germinator. A sprouter is a container with a compressor that saturates the water with oxygen.
Sprouters are suitable not only for pre-sowing seed preparation, but also for hydroponics.
Hydroponics is a method of growing plants without soil. Roots receive nutrition from water/nutrient solution
In addition to preparing seeds in germinators, you can:
- grow green onions;
- sprout wheat, alfalfa, chickpeas and other crops (sprouts are eaten raw and steamed; they are popular among healthy eaters and vegetarians)
- grow grass for cats - in winter, pets may lack vitamins, they will happily eat fresh shoots; Grain mixture for them can be purchased at pet stores.
But let's return to our seedlings. To start working with the germinator, you need to follow three simple steps: fill the container with water, place the seeds in special compartments, and plug it into a power outlet. The seeds will be saturated with oxygen and germinate within one to three days.
Three sprouters from the Leroy Merlin range:
How the germinator works:
Another way to help seedlings is to soak the seeds in growth regulators and stimulants. These are natural substances and are safe for plants, humans, animals and insects. For example, the Zircon fertilizer is isolated from the Echinacea plant.
Stimulants can also be used at subsequent stages of seedling life. Regulators are a good help for seedlings that have experienced stress: frost or lack of lighting.
Cassettes, soil tablets and pots
We recommend using sprouters to help the seeds sprout faster. But this is not a required step. But choosing the containers in which you will plant the seeds is an important step.
If you are going to plant grown seedlings, you can sow the seeds in common seedling boxes. And when the second or third leaf appears on the plants, transplant them into separate pots.
Picking is replanting or transshipment of young seedlings. Proponents of this method believe that it helps strengthen the root system and allows you to grow stronger plants.
While the seed germinates and the seedling gains strength, it does not require a large area, the main thing is that there is enough oxygen in the soil.
Summer residents who choose the picking method are advised to first plant the seeds in cups with a volume of no more than 100 ml. And then change them to larger ones, about 500 ml in volume. Proponents of the method are confident: changing the “place of residence” gives the sprouts an additional incentive to grow and develop, protects the plants from intertwining roots, and helps select the strongest seedlings.
The answer to the question why you can’t immediately plant seeds in large pots: in large containers, small roots will not have enough oxygen.
There is no consensus among gardeners whether seedlings should be pruned. Those who are against this stage argue that additional replanting puts the plants under stress.
If you are planning a pick, choose seedling cassettes, sets with peat tablets or soil tablets for the first stage. Peat and soil tablets are convenient because with them you will definitely not damage the root system when replanting. To plant plants, it will be enough to transfer them along with lumps of earth into larger pots.
This is what soil tablets with grown seedlings look like:
For the second stage, transplanting grown seedlings, reusable plastic containers or disposable peat containers are suitable. Plastic pots are good because they can be washed and used next year. Peat ones - because you don’t have to pull out the plants when transferring them to the ground, which means they will take root faster.
If you plan to do without picking, we recommend planting the seeds in medium-sized peat pots.
Useful tips
If you use peat tablets, maintain a constant level of moisture to prevent the roots from drying out.
If you plant seedlings in plastic cassettes/pots, make sure they have holes to drain excess moisture. If there are none, make holes about 5 mm in diameter using a hole punch, nail or knitting needle.
Priming
You can buy special soil for seedlings. At Leroy Merlin you can choose packages ranging from up to liters.
The advantage of ready-made soil is that it is purified and the composition is balanced. Does not contain weed seeds, pest larvae and harmful impurities. Soil for seedlings is made on the basis of peat and river sand, agroperlite, hydrogel and fertilizers are added.
You can make a soil mix for seedlings yourself if, for example, you live in a private house and plant a vegetable garden right on the plot. Take three parts of humus and garden soil and four parts of sand. Sift the ingredients through a fine garden sieve and disinfect the mixture.
There are four ways to disinfect soil at home:
- freeze;
- calcinate;
- steam;
- etch.
Freezing
Take a bag of soil and take it outside during severe frosts (-15-20°C).
Leave for three to five days. Then bring it into a warm room and leave it for three to five days. Repeat two to three times. Calcination
You will need a metal tray.
Spread the soil on it in an even layer about five cm thick. Heat the oven to 70-90°C and place the soil for half an hour. Cool Steaming
This method is good because it not only disinfects the soil, but also saturates it with moisture.
Pour the soil into a colander, stirring constantly, and place over a pan of boiling water for seven to eight minutes. Cool the mixture . Treating
The easiest way to disinfect the soil.
Prepare a pink solution of potassium permanganate and pour the soil . To improve the quality of the mixture, you can add vermiculite, agroperlite or ordinary perlite, as well as hydrogel.
Agroperlite, perlite and vermiculite are natural minerals. Makes the soil looser. They easily absorb moisture and then release it to the plant roots for a long time. Saturate the soil with oxygen
Hydrogel is a polymer that can absorb large amounts of water and then release it to plants for a long time.
12 mistakes when growing seedlings
Mistake #1 | improper seed storage
Until sowing/germination, seeds should be stored at temperatures up to 10°C and humidity 55-60%. The best packaging is paper bags and glass jars. Seeds in plastic can become moldy.
Mistake #2 | too active pre-sowing preparation
Preparation is the right thing to do. But choose one proven method and drug. If you use a germinator, that's great; if you soak the seeds in a growth stimulant, that's great, but don't mix the two processes. Also, you should not mix different fertilizers and activators. If you overdo it with the procedures, you may not wait for the shoots.
Mistake #3 | too early/late sowing
If you plant seedlings too early, the plants will become too elongated; if they are planted too late, they will lag behind in development.
Mistake #4 | improperly prepared soil
It is not enough to simply collect soil on the plot. If you decide to make your own soil mixture, do not forget to add peat and sand, sift and disinfect the soil.
Mistake #5 | planting seeds too deep
If you plant the seeds too deep, the seedlings will appear too late or not at all. On average, vegetable seeds need to be sown to a depth of 1.5-2 cm. If we are talking about some rare crops, remember the rule: the planting depth should be equal to two diameters of the seed.
Mistake #6 | watering immediately after sowing
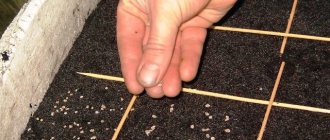
Do not water the soil immediately after you have planted the seeds. Otherwise, the seeds will go deep into the soil. Water the soil before sowing, and then spray it with a spray bottle.
Mistake #7 | sowing too thick
In city apartments it is often difficult to find enough space for seedlings. But due to too dense planting, it may grow weak. The correct distance between seeds is at least 1-1.5 cm.
Mistake #8 | improper watering
Seedlings need to be moistened every day and little by little. The soil should not dry out, nor should it be too wet. If you notice that you have overfilled the water, sprinkle the soil with sand or wood ash.
Mistake #9 | lack/excess of light
If the seedlings don't get enough sun, they will become thin and weak. If the rays are too strong, the leaves will get burned. Illuminate the seedlings with phytolamps, avoid midday sunlight.
Mistake #10 | belated pick
If you decide to pick seedlings, do it when the second or third leaf appears, not later. Otherwise, the plants will stop growing and begin to get sick.
Mistake #11 | no hardening
In order for the seedlings to survive the transition to open ground well, they need to be hardened off. It is worth starting 10 days before disembarkation. Ventilate the room thoroughly. If the outside temperature is above 13-15°C, take the plants to the balcony. Start with one hour and increase your “walk” time every day. If you don't have a balcony, leave the seedlings near an open window.
Mistake #12 | overgrown seedlings
Plants need to be planted in the ground on time. Overgrown seedlings look large and powerful, but do not take root well and are often affected by pests and diseases. If you overexpose the plants, bury them in the soil up to the cotyledon leaves - this stimulates the growth of new roots, and the seedlings will grow stronger faster.
We wish that work at the dacha brings pleasure, and that the harvest brings joy and pride! Choose products in the Garden section on our website or come to Leroy Merlin hypermarkets. We will be happy to help you with choosing any products for your personal plot!
How to water peppers correctly
Watering pepper seedlings is no different from watering tomato seedlings. First you need to slightly moisten the soil where the seeds are placed and covered with glass or film. In the morning, the film is removed, the soil is sprayed and covered again. So - until germination.
Sprouts have appeared - the material used to cover the soil is removed. Leave the seedlings without water for three to four days, and then water them well twice every seven days. It is necessary to monitor the condition of the soil: if it is dry, watering is required.
Before diving, stop watering. This needs to be done a couple of days before the dive. When the seedlings are already in separate cups, they begin to water again, but after five days. Let the plants first get used to their new “home”. Then water once every seven days. If the room is hot, watering can be made more frequent, but do not flood. Water is poured under the root, without getting on the leaves.
How to grow bell peppers
Watering small seedlings
Small seedlings that have just hatched need to be watered very carefully. How to water depends on the thickness of the soil layer. If the soil layer is no more than 3-4 cm, then it is better to pour water to the very bottom of the box. I don’t make holes in such shallow boxes.
Nowadays, I often plant seeds in a large amount of soil at once, so as not to bother with transplanting tiny plants. In this case, I water each sprout from a syringe at the root, so that the ground is saturated by five to six centimeters. And I sprinkle dry soil right up to the cotyledons.
This type of watering usually lasts for almost a week. And by that time, the roots of the plants will already be stronger and will be able to draw water from the bottom. Then there are no more problems with watering - you can put the container in a tray, pour water and watch how it saturates the soil.
For small seedlings, a disease called blackleg is very dangerous. It appears on the stems where they emerge from the wet soil. I don’t let the water rise to the very top; the surface of the soil of my seedlings is always dry and loose. Thus, I prevent this destructive disease from developing.
How to properly water petunia
Petunia requires special treatment. Water for irrigation should be used moderately warm and settled. Water the petunia when the top layer of soil begins to dry out. You need to pour water at the root, a little at a time. For these purposes, a regular injection syringe is useful, but without a needle. Water is drawn into a syringe, and then the stream is carefully injected under the root of the sprout. Another method of watering is irrigation from a spray bottle. In this case, irrigation is carried out three times a day.
Watering and feeding adult seedlings
Adult seedlings older than 2-3 weeks can be watered from a regular watering can or water bottle. Now only one rule applies: water the seedlings only with warm water , carefully, without overwatering.
It is better to water a little more often than to overwater and then dry out. Young seedlings are still too weak for such changes. But at the age of more than 1-2 months, she will already be able to withstand slight forgetfulness of her owners.
You can start feeding seedlings at one month of age. Next, the seedlings are fed once every 10-14 days with a special liquid fertilizer for seedlings. Dry fertilizers and long-lasting, slow-release fertilizers are more suitable for mature seedlings and indoor plants. For young seedlings it is better to use liquid fertilizers.
In addition, it is useful to alternate watering with liquid fertilizers with foliar feeding (feeding with a weaker solution of fertilizers by spraying seedlings).
If there is excess moisture, the soil can be additionally sprinkled with perlite/vermiculite or sand.
The main mistakes when watering seedlings of tomatoes, peppers and eggplants
Many summer residents, when watering their garden, are content with the knowledge they received from neighbors, relatives, or guided by their own experience. Under such circumstances, it is possible that some errors may occur, which may have a significant and negative impact on the future harvest and plants. These types of errors include:
- Watering tomato, pepper and eggplant seedlings with cold water from a hose. Of course, sometimes you want to quickly sort out your duties in the garden and go relax. But it is strictly forbidden to water tomatoes or peppers on top of the leaves with cold water. For these purposes, it is best to keep a barrel of water painted black. During a hot day, the water will heat up and at sunset you can water tomatoes, peppers and eggplants exclusively at the root with full confidence that such actions will not harm the plants and harvest;
- Watering tomatoes at noon. A common and very dangerous mistake. This kind of action also negatively affects the condition of plants. A drop of water that accidentally falls on leaves or fruits on a sunny day plays the role of a magnifying glass. It burns the place it hits;
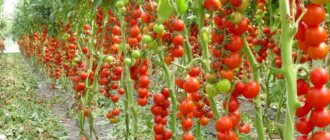
- Water tomatoes, peppers, and eggplants daily and in large quantities. Tomatoes, like peppers and eggplants, do not like to be watered too often. Their root system and stems become overly susceptible to disease and rot. Therefore, there should be a measure for everything.
All plants in the garden beds need proper care and watering. Water is an important source of plant life, but it must be used wisely. Thus, if you follow all the necessary rules, and not forgetting about common mistakes, you can achieve amazing results in caring for seedlings of tomatoes, peppers and eggplants.
How to water
Water falling on the leaves of tomatoes, peppers or eggplants can trigger the development of late blight in these plants! Therefore, it is recommended to water the seedlings of these plants with a directed stream directly under the root to prevent drops from getting on the leaves. It is better to water cucumber and cabbage seedlings using the so-called sprinkling method - from a watering can with a mesh nozzle. The soil under cabbage seedlings should ideally always be slightly moist.
How to water plants
Watering seedlings with iodine
Iodine helps the plant to take root and has a beneficial effect on the formation of fruits. Make such a solution with iodine: add a small drop of iodine to three liters of water and mix thoroughly. Seedlings are watered at the very base of the root. This feeding is done once.
Watering seedlings with potassium permanganate
It is very important to adhere to the dosage when feeding seedlings with potassium permanganate. If you create a very concentrated solution, the plant may die. For 10 liters, take 3 g of potassium permanganate and water (or spray from a sprayer) the soil with an interval of ten days.
Manganese promotes intensive growth of seedlings, has disinfecting properties, and increases plant resistance to disease.
Watering seedlings with ash
Root feeding with ash is mainly useful for mature seedlings. It is done shortly before planting the seedlings in the soil, the day after watering. Add 1 tbsp to eight liters of warm water. wood ash, infuse during the day and night, then filter and water the soil (no more than 0.5 tbsp. per 1 plant). Ash stores a large number of nutritional components that have a beneficial effect on plant development. Additionally, it is a source of phosphorus, potassium and many microelements needed for plants.
Watering seedlings with yeast
Yeast feeding activates growth and increases the endurance of seedlings. 100 g of dry yeast is poured into 10 liters of water, mixed with 50 grams of sugar and left for two hours. Next, the infusion is diluted with water (1:5) and the seedlings are watered.
If the yeast is “live,” then a pack (100 g) is dissolved entirely in ten liters of water, then the mixture is infused for a day and the seedlings are also fed.
How to water the seedlings to prevent them from stretching out
The plant withers and stretches out - this means excessive watering, in this case, if the seedlings begin to stretch upward, the stems become very thin, and the leaves become faded, it is urgently necessary to reduce the frequency and volume of watering and eliminate all fertilizing.
This is interesting: wick watering
This method of watering can be useful for those who have a lot of flowers and do not have enough time to moisten them. How to make wick watering. A cord is required - choose it according to the diameter of the pot and planting.
Insert the cord into the drainage hole of the pot before adding soil. If the pot is not small or there is a lot of soil, use more wick. Throw expanded clay onto the bottom of the pot and fold the cord sinuously, add soil and plant a flower or seedling. It is necessary that the cord is in the ground and not lost in the expanded clay.