A warm floor in a greenhouse is an excellent way to provide plants with a warm winter. The process of installing a heated floor is very similar to installing heating in a house or apartment, and the same tools are used for the work. But there is one difference - there are no requirements for the interior of the greenhouse, which greatly simplifies the insulation process. More details about the types of ground heating in a greenhouse, as well as methods for installing such systems, will be discussed in this article.
Warm floor in a greenhouse
Why do you need a heated floor?
To create optimal conditions for the growth of different crops, it is not necessary to heat the air in the greenhouse. You can get by by heating the soil, due to which the plants can receive the right amount of heat. Installing a heated floor will allow you to save a little on electricity . A properly installed heated floor will provide year-round heating of the soil and, as a result, create an optimal microclimate for growing crops in a greenhouse.
Warm floors in the greenhouse create optimal conditions for the growth of different crops
The advantages of underground heating compared to external heating are as follows:
- the air in the greenhouse is not dried;
- oxygen is not burned out of the air;
- the risk of burns on leaves and shoots is reduced;
- the soil warms up well, so the plant roots do not freeze;
- Electricity is consumed several times less.
With heated floors, oxygen is not burned out of the air
Note! In the middle of the 17th century, potatoes were considered the main greenhouse vegetable, so they were grown in almost every greenhouse.
Warm floor - advantages of the system
What you need to know when arranging soil heating in greenhouses
When the soil is heated, the situation is somewhat different from the usual: the soil dries from the bottom up. Be that as it may, you will have to either conserve the moisture that is available or arrange watering. You can preserve moisture by laying mulching film (black). And if you moisten the soil, it is advisable to moisten it by drip: it is both more economical in terms of water consumption and better for plants. In general, it is optimal to do both mulching and watering in combination.
We invite you to familiarize yourself with: Proper arrangement of a polycarbonate greenhouse inside with your own hands: planning tricks. How to equip a greenhouse: how to make beds, watering system? Photo and video
A heated floor system without a circulation pump is possible in principle, but it is absolutely unprofitable (you need to bury pipes of a much larger diameter) and ineffective. The speed of movement of the coolant in such systems is so low that the soil in the greenhouse does not warm up. Why are such systems made? To avoid freezing during a power outage.
A warm water floor without a circulation pump in a greenhouse will be ineffective
If interruptions are short-term, an uninterruptible power supply (not a computer) with several car batteries connected in parallel is sufficient. This system can provide several hours of boiler and pump automation operation.
If outages are long, you need a diesel generator (or gas). To automatically turn on the generator in the event of a power outage, you also need an ATS (automatic transfer switch). This device automatically starts the generator in the event of a power failure. All this together costs quite a lot of money, but the heating in your greenhouse will work without failure. If you wish, you can save a little: the starting system can be assembled by any normal electrician. He can connect everything.
Of the nuances, that seems to be all. The question remains, what type of fuel should be used to heat the heated floor in the greenhouse. There are no options: the cheapest available. If you don’t see any, you can try to prepare some of the fuel yourself:
Despite the fact that alternative energy is not yet very developed in our country, many people use it very successfully. Why not try it?
The main task of any person installing heated floors in greenhouses is to ensure uninterrupted operation of the chosen option. The first condition that must be met is the removal of fertile soil for a while. Waterproofing material is laid at the bottom of the trench. You can use polystyrene foam or polyethylene with foil elements.
Cables or mats are laid on top of the film, and then all this needs to be covered with hydraulic material and a film that will provide thermal insulation. Then comes the turn of heating cables with mounting mesh or tape.
The main tips are as follows:
- to protect the heated floor from mechanical damage, a reinforcing mesh is laid;
- the thickness of fertile soil should be at least 30 cm;
- after the heated floors are installed, you need to level the soil layer and you can start sowing the seeds;
- To control the heating system, special sensors are used that monitor the temperature of the air or soil.
The use of sensors greatly facilitates the gardener’s task of growing certain crops. To increase productivity, 2 devices are installed that will monitor the necessary parameters. Excessively warm soil causes plants to slow down their growth, reduce the number of fruits and may eventually die.
The main task of any person installing heated floors in greenhouses is to ensure uninterrupted operation of the chosen option. The first condition that must be met is the removal of fertile soil for a while. Waterproofing material is laid at the bottom of the trench. You can use polystyrene foam or polyethylene with foil elements.
Types of heating systems
| Photo | Name | Rating | Price | |
| #1 | Water | ⭐ 99 / 100 | More details | |
| #2 | Electric | ⭐ 98 / 100 | More details | |
| #3 | Infrared | ⭐ 97 / 100 | More details | |
| #4 | Air | ⭐ 96 / 100 | More details |
There are several types of heated floors for greenhouses, but the basic ones include water, electric, infrared and, of course, air systems. Each type of heating is described separately below.
Water
The most universal underfloor heating system is water. With its help, heating water that is underground can be done in different ways: with a boiler, hot water from a pipeline or a good old boiler. But the technology for installing heated floors is the same, regardless of the method of heating the water.
Water heated floor in a greenhouse
Pipes for water heated floors are made of polymer or metal. Polymer is cheaper, but it does not transfer heat well. Therefore, experts recommend using steel. The pipes must be laid correctly so that the heat is distributed evenly.
Prices for pipes for heated floors Rehau
Pipes for heated floors Rehau
Electric
This is an expensive way to heat the ground, so electric cables are not used so often. Heated floors require copper wires that are evenly distributed across the floor surface of the greenhouse. But it is worth noting that not only the wires are expensive, you will also have to pay for electricity.
Electric heated floor in a greenhouse
On a note! Electric heating can also be provided by cable mats. This is a special design consisting of a metal mesh and wires.
Prices for heating mats "Teplolux"
heating mats "Teplolux"
Prices for heated floors REHAU
Warm floors REHAU
Infrared
Another way to insulate the floor in a greenhouse is using infrared film. It does not have a high thermal effect, so deep laying of the film is not required. The optimal depth for laying the film is 15-20 cm, so when performing greenhouse work there is a possibility of damage to such elements (for example, with a hoe or shovel).
Infrared heated floor in a greenhouse
The advantage of infrared heated floors is saving electricity. In addition, the generated heat is distributed evenly over the surface, which is very important for growing various greenhouse crops.
Types of IR film floors
Prices for infrared heated floors
infrared heated floor
Air
The principle of air heating is to install special ventilation devices on the foundation. Warm air is supplied upward through pre-installed sleeves made of polyethylene. Perforated hoses are usually installed in the lower section of a heated greenhouse.
Air heating in a greenhouse
Water heating in a greenhouse
You can arrange water heating for a greenhouse in winter with your own hands if you have minimal knowledge of construction. In this case, the heating is identical to what we enjoy in city apartments - the heated coolant circulates through the piping system of the entire house.
You can use any type of boiler - gas, electric, solid fuel (wood). You will also need pipes (preferably metal), a thermostat and a pump for forced circulation. The boiler should be installed next to the greenhouse - if it is adjacent to the house, you can use the interior of the house. Pipes are laid underground and along the walls of the greenhouse.
There are two ways of coolant circulation - natural and artificial (forced). To heat the greenhouse, it is better to use forced circulation using a pump; in this case, the liquid moves faster through the pipes, eliminating the possibility of freezing. Do not use water - the chances of it freezing are quite high. It is better to buy special antifreeze.
After installing the equipment, all that remains is to connect all the system components and do a test run. It is important to regularly check the pipes for leaks, as well as monitor the temperature inside the greenhouse.
How to choose the right system
When choosing a floor heating system, you need to take into account not only your financial capabilities, but also the features of the greenhouse. If there is a source of warm water nearby, then the choice of heating method is obvious. Even if there is cold water, heat can be provided by installing an inexpensive coolant.
Types of heated floors
On a note! Also, when choosing a system, it is necessary to take into account the cost of the coolant. The price range of such devices can fluctuate greatly, which will affect the work budget.
When choosing a heating system, consider the cost of the coolant
Installation of a water floor
Before installing a water heated floor, you need to remove a small layer of soil (approximately 40 cm). Some craftsmen recommend removing a smaller layer so that eventually a layer of soil rises above the floor surface. This will greatly facilitate the process of caring for crops. In addition, the soil will receive additional air heating.
Laying a water-heated floor in a greenhouse
Next, you need to perform several steps in the same sequence in which they are listed below.
Heated floor pipe circuit length calculator
Go to calculations
- Compacting the site. It is advisable to walk around the entire perimeter with a roller or compact it with your feet.
- A layer of sand (approximately 8-10 cm) is laid on the compacted surface. Before falling asleep, the sand must be cleared of various shells and pebbles.
- Watering the sand layer. The use of water is required to compact the material. Also, after watering, air bubbles will not appear on the floor.
- Installation of the mounting grid. This is required for subsequent fixation of the heating elements. Thanks to the installed mesh, all elements can be fixed in the desired position.
- Installation of hoses or cables. This is an important stage, since the efficiency of the heating system will depend on the correct installation of the cable. The cable should cover the maximum amount of area, so it is recommended to lay it in a snake pattern.
Pipes for water heated floors
- Installing a temperature sensor. The type and dimensions of the sensor, as well as its installation location, are selected individually.
- Output of all control and power wires.
- Laying the second layer of sand and its subsequent watering. The thickness of the sand layer should also be from 8 to 10 cm.
- Installing a protective mesh and laying a 25 cm layer of soil. The mesh is an important element of the underfloor heating system, since it will protect the heating elements from mechanical damage.
- Connecting a temperature sensor. With its help it will be possible to regulate the temperature of the water in the system. This is the last and most difficult stage of installing a water floor in a greenhouse.
With a warm floor, plants in the greenhouse will be more comfortable
Note! Depending on the selected heating system model, the installation technology may have some features. This must be taken into account at the planning stage of repair work.
Which boiler to use
Here again there are two approaches:
- Use metal (for example, corrugated stainless steel) with high heat transfer. In this case, the installation step is made larger - the heat is transferred well. But here you need to be careful not to burn the roots of the plants.
- Use plastic or metal-plastic pipes. Their heat dissipation is much lower than that of metal, but for some cases this is not bad. For example, pyrolysis boilers do not work well at low return temperatures. In the case of metal-plastic or polypropylene, the temperature difference will be more or less comfortable for such a unit. If you lay metal, then almost cold water will reach the boiler, which will immediately lower the temperature and may disrupt its operating mode. If this situation repeats constantly, expensive equipment (pyrolysis machine) will simply fail.
At low supply temperatures (40°C and below), ordinary black polyethylene pipes can be used. But the reviews here are different. For some they work, others are dissatisfied because they constantly leak from under the fittings. In general, the situation here is this: which pipes in the region are sold cheaper from suitable materials, those are the ones they take.
The length of the circuits for heating the soil in the greenhouse is quite large, so this approach is justified. All existing pipes for a warm water floor are also acceptable for heating the soil in a greenhouse (except copper ones, and only because of the price). The only question is cost and feasibility. Therefore, everyone chooses what they consider necessary.
You can use any pipes - the temperatures will obviously be low.
Most often they buy those that are cheaper in a particular region. The system can be organized in different ways. It all depends on volumes and needs. But it’s more rational to do it through a standard comb for a water floor with minimal bells and whistles. Just with shut-off valves and an air vent. Or make a similar design yourself.
We suggest you read: How to fertilize the soil in a greenhouse in the fall - Garden
Since it is important to maintain a constant temperature in the greenhouse, the best option is automatically controlled boilers paired with a thermostat inside the greenhouse. But it's a matter of means. All these units are not cheap at all. However, if possible, buy automated ones. In addition to maintaining a stable temperature, they also save fuel. How?
They produce the amount of heat that is currently needed to maintain the set temperature. That is, they will not allow your plants to freeze (if there is fuel) when the temperature suddenly drops, delivering their maximum power. But they will not produce excess heat during an equally sudden warming.
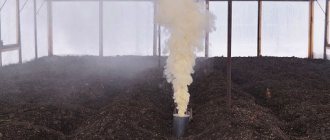
If you are going to heat with wood or coal, pay attention to pyrolysis boilers. Although they are expensive, wood in them burns for up to 8 hours, and coal lasts for 24 hours. And you don’t need to “live” in a greenhouse or keep a stoker.
Boilers with automated controls performed best in the greenhouse, and you need to choose any fuel that is available and at the same time inexpensive
How to calculate the boiler power for a greenhouse? In general, the surface area of the greenhouse is multiplied by the heat loss coefficient for the material with which the greenhouse is covered, and all this by the required temperature difference.
For example, we will be heating from February to April. The lowest temperature, let it be -18°C, will be maintained inside at 20°C. Total delta (difference) 38°C. Now let’s calculate the boiler power for such conditions in a greenhouse 10 x 5 x 2.5 m. Covered with double film. The area of all “film” surfaces of the greenhouse is approximately 150 m2, the coefficient of heat loss through the double film is 3.5.
Electrical system installation
The step-by-step instructions below show the process of installing an electrical cable in a greenhouse with dimensions of 3x6 meters.
Calculator for calculating the length of the heating cable and its laying pitch
Go to calculations
Step 1. Prepare the heating cable and thermostat. You need to choose a product taking into account your financial capabilities. You also need to buy some insulating material for laying between the cable and the ground.
Preparing the heating cable and thermostat
Step 2. Connect all necessary wires to the thermostat according to the manufacturer's instructions. In this case, the thermostat was purchased on Aliexpress, but even there there are instructions in Russian.
The wires need to be connected to the thermostat
Step 3. Remove a layer of soil (20-25 cm) using a regular shovel. This is a difficult job, so it needs to be done in the warm season, when the ground has not yet frozen. In order not to take the soil outside, you can carefully throw it to the other side of the greenhouse. And after installing the cable, throw it back.
The top layer of soil must be removed
Step 4. Cut small hooks from metal wire. They will be needed to secure the cable at the edges. Any scrap wire will do. You can do without it, but when covered with soil there will be a risk of accidentally moving the cable out of place.
Metal wire hooks
Step 5. Cut out small strips of thermal insulation material (foil insulation). In this case, strips 6.5 cm wide are used. To do this, use a stationery knife or ordinary scissors.
Strip width - 6.5 cm
Step 6. Lay out the cable around the perimeter in the form of a snake, placing previously cut sheets of insulation under it. Make sure to maintain the same distance between the cables. This is important for the normal functioning of the heated floor.
Sheets of insulating material are placed under the cable
Step 7. Half the work is already done. All excess foil insulation must be removed so that the material does not wrap and cover the wire.
The cable is laid
Step 8: Don't forget to use metal hooks. Press the laid cable against the ground surface with them.
Don't forget to use metal hooks
Step 9. Once the cable is routed, proceed to install the temperature sensor. It is advisable to cover all wires with a plastic corrugated tube, thereby protecting them from mechanical damage.
The wires must be covered with a plastic corrugated tube
Step 10. Pass the sensor wire under the cable and secure it with a metal bracket, as shown in the photo.
Fixing the sensor
Step 11. Additionally secure the sensor with a second hook. It won't be superfluous.
The sensor is fixed with a second hook
Step 12. This is what the installed sensor looks like. If desired, you can build a special shelf for it or simply place it on a hill so as not to touch it during gardening work.
Installed sensor
Step 13. Proceed to cover the electrical cable. Try to do this carefully so as not to damage the cable or move it out of place.
Backfilling of electrical cable
Step 14. The cable is completely buried. The warm floor is ready for testing.
You can start testing the heated floor
Step 15. The thermostat is in working order. The temperature outside is -6°C, but inside the greenhouse itself it is much higher.
Everything is fine with the thermostat
Important! For a 6x3 greenhouse, an electrical cable 57 meters long should be enough. It is also necessary to take into account Folgisol.
Prices for sensor for heated floor Devi
floor heating sensor devi
Electric heating of the greenhouse
This is the most popular heating method, because the range of heating devices is quite wide. The following devices are most often used among summer residents:
- Warm floors (heating cables and mats)
- Convectors
- Fan heaters
- HPS lamps
- Infrared heaters and lamps
One of the most convenient methods of heating is the installation of heating cables or mats, and it is the cables that break all sales records. The fact is that the difference between a cable and a mat is in the design - you need to lay the cable yourself, placing it in special clamps. The mat has a larger area than the cable, but it is easy enough to lay on the surface. The standard width of a heating mat is about 50 cm - it may simply not fit into the aisles, because summer residents save every centimeter of space. That is why heating cable is more in demand. It works on a simple principle - the cable heats up, and the resulting heat enters the upper layers of the air, as a result of which we have uniform heating, and this without the need to constantly look after the greenhouse.
Convectors are convenient and safe - their surface does not heat above 85 degrees, and for some models this temperature is about 60 degrees. There is no danger of plant burns, and the heat is even.
Fan heaters are only good for temporary heating. They quickly warm up the air, but it is unwise to use them as constant heating for a greenhouse in winter. Firstly, electricity consumption is quite high, and secondly, not all of them are able to withstand high levels of humidity.
HPS lamps are a special way of caring for plants, which consists not only of heating, but also of the optimal spectrum of rays necessary for proper growth. Plants need not only warmth, but also adequate lighting, and here HPS lamps are simply irreplaceable. Of course, lamps alone will not be enough for heating, but you can successfully combine some kind of heating device with sodium lamps.
Infrared heaters are also popular among gardeners, along with IR lamps. These devices do not heat the air, but the objects and surfaces inside. The air does not dry out, the immunity of plants increases, oxygen is not burned, you can buy a heater with the ability to locally heat problem areas - these are the main advantages of IR radiation. In addition to heat, infrared heaters have good quality of light, because their spectrum is dominated by red rays, which are necessary for plant growth.
Temperature support
For optimal growth of greenhouse plants, it is necessary to maintain a temperature of +30°C. But depending on the type of crop, the temperature may vary slightly. To regulate the temperature regime, it is recommended to install two sensors in the greenhouse at once - to monitor the temperature of the air and the soil. Below are recommendations for controlling the temperature using a regulator.
It is important to maintain the correct temperature
Table. Controlling the temperature in the greenhouse with a thermostat.
| Function | Features of work |
| Thermostat operation | The device begins to work only after the temperature reaches the desired level or decreases. |
| Soil heating | The temperature rise is gradual, so you need to touch the soil to check the system. |
| Termination of work | The thermostat stops working after the temperature rises to the specified level. |
Expert opinion
Afanasyev E.V.
Chief editor of the pol-exp.com project Engineer.
Proper care of the system and installed thermostats will ensure a constant temperature in the greenhouse for many years. But it is also important to choose high-quality products, so you should not skimp on materials when installing heated floors.
Thermostat for greenhouse
Do-it-yourself greenhouse floor made from boards
A greenhouse is a great option for growing vegetation all year round. However, in order to reap a solid harvest, it is necessary to properly equip the greenhouse. Proper arrangement of paths in a greenhouse is as important as the internal organization of the frame and covering - after all, such walkways are both practical and convenient. Our article invites you to familiarize yourself with recommendations for equipping paths in a greenhouse with your own hands.
There are several types of arrangement of beds; the gardener gives preference based on the most suitable option for his greenhouse and the plants being planted.
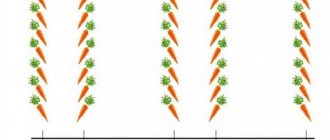
If there are beds inside and your structure is small, then you need to make a path exactly in the middle . In this form, the beds will be on both sides of the aisle.
The path must be at least 500 mm wide, but you can arrange a passage of different widths, both larger and smaller. In the first case, more internal space is occupied, and this may negatively affect the quality and quantity of grown plants, for example, strawberries, and in the second, you will not be very comfortable caring for the plants.
Awareness of this fact shows that the bed size of 500 mm is considered the most optimal.
Such a passage will be convenient for moving and caring for grown crops, but at the same time it will not affect plant growth.
- Regarding the temperature conditions and climate in the greenhouse garden, it must be remembered that the humidity level in the greenhouse is quite high and this can affect the material from which the path is made, so the best solution would be to use brick or fine gravel . Such a coating will be stable and also guarantee minimal slipping in conditions of high humidity.
- If it is necessary to equip a greenhouse of a much larger area in a similar way, then in this case the beds are made wider, and accordingly the best solution would be to arrange several paths parallel to each other. And the beds will be located between these paths.
- It is necessary to equip the greenhouse with beds so that nothing interferes with comfortable care and watering. You need to understand that all processes are carried out directly on the track. For example, in wide large greenhouses you can make several rows of beds , parallel to each other, and the paths will take the desired position between them.
- When creating walkways, fencing is of particular importance. Your greenhouse will look neater and more well-groomed if the paths are clean and there is no soil. Knowledgeable gardeners advise using boards pre-treated with special agents against fungi and rot.
- To do this, make a small depression in the ground, insert the board sideways and dig in. You can make fences this way: drive small pegs along the path , insert a board, resting on these pegs, and directly install additional support on the other side of the side. It should be taken into account that the edges of the fences should not be excessively high, because this makes it difficult to care for crops. The optimal height of the side to protect the passage from the ground and pleasantly care for plants is approximately 20-30mm.
If the greenhouse is of any rectangular shape, made of polycarbonate, then in this case you can make beds along the walls.
To do this, it is necessary to lay a walkway from the entrance to the center of the greenhouse and several smaller paths deep into the rows of beds. It is advised not to leave the path unpaved so that it is not slippery, wet and practical.
If it is planned to install a heated floor in the greenhouse, then it must be laid under the paths with all layers of soil, including drainage. Under the tubes of such a floor, a thermal insulation layer is made of polystyrene foam or foil film. Such materials retain heat and do not allow it to go deep into the earth.
What materials are used to create walkways in the greenhouse and in the garden?
The concept of an “experienced summer resident” implies an economical approach to arranging a greenhouse or greenhouse farm. Alleys in the country are created with your own hands from all available materials. You can also add country garden ingenuity and individual design to this.
Recently, bulk paths made of gravel and crushed stone have become very popular - they are simple, functional and low-maintenance, and are also affordable. Gravel material has several varieties:
- Pebbles are small round-shaped pebbles, which are poured in an even layer of about 5 cm. The fractions are characterized by little adhesion to each other, as a result of which they immediately “spread” to the sides. Increasing the layer of gravel path too much will make it difficult to walk on.
- Crushed gravel (“crushed stone”) consists of fractions of different shapes, and this gives them quite good adhesion. The crushed stone path preserves its appearance well and does not create any inconvenience when walking along it.
- Crushed slate - this natural material is used when arranging paths mainly for a decorative effect - near flower beds, shrubs, trees and other components of a greenhouse or garden.
Thus, gravel is excellent for constructing functional paths in a greenhouse, and is a promising and optimal option. To build a gravel path, it is necessary to study in detail the placement methods, size, quantity, dimensions and all possible types of bulk material.
To create a nice path in a greenhouse or in a country house, you need to decide which natural material is most suitable. The following can be used as a basis for a greenhouse stone path: sandstone, gravel, granite, dolomite, flagstone, sea pebbles, paving stones.
Chip and tile stones have all the necessary properties for a stylish greenhouse path. However, this material also has one drawback - high cost. But at the same time, the long service life, high strength coefficient and excellent decorative properties of the stone completely compensate for this minus.
Let's consider the most popular types of natural materials:
- Chip paving stones. A special mixture of granite and shungite hard fragments with characteristic chipped sharp edges of a rectangular shape. Working with such tiles is easy and quick.
- Flagstone. This material contains fragments of various shapes and sizes, and this allows you to form an original and rather unusual path.
- Sawn stone. Before reaching the buyer, this product undergoes preliminary cutting and polishing - at the end you will receive a rectangular stone with a smooth and almost mirror-like front.
- Cobblestones and boulders. These stones are similar in round shape, but differ in size: cobblestones are small, and boulders are larger. The wide range of colors of these natural gifts opens up limitless space for amateur gardeners to create their own unique flower arrangements and original patterns and elements.
Whatever natural stone you prefer, the creation of a greenhouse stone alley will begin with the design of its future contours. This means that the size, shape and functionality of the path are determined by your wishes and needs. Therefore, you first need to mentally imagine your future path with all the nuances, and only then begin to act.
For flooring in greenhouses and greenhouses, deck boards are often used, which contain natural materials with a wood-polymer composite.
Such boards are easy to install, come with additional elements (support beams, clamps, strips), coated with “breathing” oils and are famous for their non-slip, pleasant surface.
The wood is processed using a special technology and, as a result, is stable and durable under mechanical loads, resists temperature fluctuations and high humidity, ultraviolet radiation, is resistant to various biological factors (rotting processes, fungi, bacteria and insects), is not subject to deformation, and that most importantly, it is durable.
Having cut the logs into small stumps of 10-20 cm, they can be used as the basis for a path in a greenhouse or summer house.
This is an economical, budget option for building a path in a greenhouse with your own hands. However, it should be noted that this natural material is impractical - over time, the wood rots and crumbles. Even the most thorough treatment of wood with antiseptics and paints and varnishes does not guarantee durability. The maximum service life of turf flooring is approximately 10-12 years.
At the same time, numerous variations of combined paths using crushed tree bark, shavings, sawdust and concrete slabs, or wood with brick borders, etc. look beautiful and cozy.
A walkway made from old car tires
is of high quality, durable, resistant to external weather influences , has anti-slip properties, and its most important feature is its simplicity and ease of creation.
- When laying out paths in a greenhouse or garden, you can make your own flooring from old tires or use special rubber tiles - a product of recycling the same tires. Such a path will be more neat and beautiful.
- A strip of tires of the same size is easy to lay and install. The path can be of different widths and consist of several tread strips, but there must be a small gap between them - this will ensure water drainage and quick drying of the flooring.
- A rubber path is a great way to create a convenient and safe passage along the greenhouse beds without significant expense.
One of the budget and simplest ways to solve the problem of convenient movement along the beds and design of paths in the greenhouse is to pour a special cement mortar into the prepared formwork.
- Concrete is durable, resistant to various climatic and mechanical influences. To properly design paths inside the greenhouse, it is necessary to calculate its area, as well as calculate the amount of materials required. Having drawn up a plan, calculated all the costs and prepared the necessary materials, you can begin the breakdown.
- Working with cement mortar includes mandatory compliance with all time cycles. The strength of a concrete alley depends on the speed of casting and the absence of interruptions in work. For these reasons, to create paths in a greenhouse with your own hands, all the necessary tools and materials are fully prepared in advance.
- To facilitate the creation of a cement path, you can use plastic templates (forms) - a special stencil of various configurations and sizes, which is filled with solution.
Designing paths in a dacha or greenhouse using this popular building material will cost you little, and at the same time will allow you to easily realize your design and creative ideas.
Paving slabs are made from natural, eco-friendly components and have the following advantages: they are resistant to various weather conditions, have increased strength, thereby ensuring the durability of the path, and are easy to maintain .
Laying paving slabs is carried out on the basis of a sand cushion and is considered quick, easy and economical. To build paths in a greenhouse or on a garden plot, you will need only a few components: concrete finishing tiles, clean sand and cement mortar.
Brick is similar in physical properties to paving slabs. However, building bricks are not suitable for forming paths. It is not resistant to water or constant contact with the ground. And after 5-10 years it will become deformed and crumble.
Having chosen a suitable brick, it is necessary to make preliminary calculations of the area and amount of material. This material allows you to lay out paths in various ways.
The general style of landscape design and the own plans of summer residents allow the use of various types of brickwork: parquet, diagonal, straight with offset stripes, circular, Venetian masonry in the form of scales and its varieties.
To create a passage in the greenhouse and greenhouses, high-quality wall bricks or clinker bricks are used.
This artificial stone has “high-quality” characteristics and outstanding decorative features.
This material is gaining increasing popularity among gardeners. It is highly durable, beautiful and is available on the construction markets in a wide range - this makes it possible to choose the color and texture of the future “road” to suit any, most demanding taste.
A good solution for arranging paths in a greenhouse is plastic.
This building material is inexpensive, practical and easy to maintain, resistant to biological influences and operational loads. A special corrugated coating can prevent slipping during high humidity in a greenhouse or during rain on the site.
- Plastic coatings are characterized by imitation of various textures - tiles, wood, natural stone, marble, metal, ceramics and others. As a result, plastic is very popular in finishing work.
- A special plastic tile called decking (a tile made from several connected planks) has outstanding attractiveness properties. It contains wood flour and various polymer additives. This type of flooring will look like a regular parquet board.
- You can easily make a garden path or a passage in a greenhouse out of plastic with your own hands, using available materials such as plastic bottles. To do this, you will need a choice of caps, pieces or whole bottles. The walkway will look more interesting and creative if, before filling the sand mixture inside, you place multi-colored candy wrappers, pebbles, pieces of glass, pieces of paper or foil in the bottle container.
Another affordable option for a path for a greenhouse or cottage is the use of lawn gratings. Thanks to them, you can strengthen the lawn for walking on it without undesirable consequences. And for the greenhouse it will also be a good eco-friendly path. To lay such an element, you need to make a base - a sand and gravel cushion. You can also lay lawn plastic directly on the grass, without preliminary work.
A lawn grid is placed on the prepared area. To fill the structure, a mixture of fertile soil, grass seeds and various fertilizers is used. This type of flooring needs to be watered several times a day. And then the track is used for its intended purpose.
In this country house solution, priority is given to aesthetics and style . The financial side of the issue is secondary. Today, the easiest way to design a glass walkway beautifully is to fill it with colorful crushed glass stones. This is not specially broken glass, but an industrial material, without sharp edges or chips, so you can safely walk along this path without shoes.
- It is worth noting that such a path will still be “expensive” for the owners. The price of glass material is approximately $1 per 1 kg. And for an average country path about 10 m long, approximately 200 kg of “glass” will be required. But the effect is amazing! With the right lighting in the garden, such a sparkling inlaid alley will become the main attraction of the dacha and garden.
- A path made of crushed glass is created quickly and easily. Markings are made, a layer of earth is removed at a depth of 10-15 cm. Experienced gardeners use a mixture of geotextiles for the lower layer. This connection prevents the settling of crushed glass, protects against erosion and protects from unwanted vegetation. Glass crushed stone approximately 2.5 cm thick is poured on top of the geotextile layer. And your glass path is ready!
- For the greenhouse, you can make borders - a series of small stones of various shapes, and all this together will look harmonious with the surface, with the beds and give a complete, well-groomed look.
To lay paths in a greenhouse using whole glass bottles or to lay out an original and beautiful ornament from them in a garden plot, first of all, you will need to get a large amount of glass material somewhere.
Arrangement of the path involves preliminary marking of the future passage or the desired figure or pattern. In place of the path, soil is selected to the appropriate depth (along the height of the bottle). Glass containers are installed bottom to top, close to each other, and the distance and openings between them are filled with soil. Having made a couple of such rows, you need to fill the cracks with water so that the soil settles, and be sure to add more. Good showers will cause the ground to sink further and then it is recommended to add sand on top. Thanks to such wonderful glass paths, the greenhouse will be internally transformed, and the nondescript summer cottage will sparkle with multi-colored lights.
A fairly simple task for a gardener - building paths in a greenhouse - can turn into complications. The hobby of gardening is very popular in our country. Moreover, people are not always interested in the harvest.
The opportunity to spend the summer in nature surrounded by a landscape created with your own hands is a pleasant prospect. Gone are the days when gardeners focused only on the harvest, saving every centimeter on their plot. Nowadays, the first place is taken by the improvement of living space outside the city, i.e. It is the aesthetic component that prevails. And not least of all is the question: how to arrange a greenhouse and how the greenhouses will look inside.
A greenhouse has become an obligatory attribute of the landscape design of a country house, and its arrangement is one of the important tasks.
You spend a lot of time at your summer cottage in a polycarbonate greenhouse. Therefore, the arrangement of the greenhouse inside is important. How comfortable you will feel inside is determined by both the general layout and the ability to properly arrange the interior of the greenhouse, one of the defining elements of which is the paths in the greenhouse. There are many options for arranging the interior of a polycarbonate greenhouse. The abundance of options depends on the size of the structure, the functional purpose of the plantings, the climate zone and the features of the landscape. And after you have figured out the theory, you are faced with the question: how to make a path in a greenhouse. This article is devoted to the topic “How to equip a greenhouse.”
When planning the arrangement, in particular, the construction of paths with your own hands, you should take into account a number of important factors that depend on the size of the greenhouse, the number and layout of the beds, the choice of material and, finally, on your financial capabilities.
First of all, you need to properly plan the placement of the beds inside and decide on the choice of plants. As an option, it is better to draw up a drawing plan indicating the selected dimensions.
There are a huge number of arrangement options. But whatever type of material you choose, it must meet safety rules - absorb moisture well and not slip under your feet.
Experienced gardeners know that setting up a greenhouse requires certain rules, proven by many years of experience. The main requirement is that the paths in the greenhouse must provide a convenient, unobstructed approach to the plants in the garden bed for processing and watering.
If your polycarbonate greenhouse is wide enough to accommodate three beds, there should be two paths. Accordingly, if there are two beds, then one path in the center of the greenhouse is enough. The beds, accordingly, will be located on both sides. The width of the path should allow you to freely pass between the beds with buckets or a watering can in your hands without damaging the plants. The most optimal width should be from 60 centimeters.
Passages differ in the material from which they are made. To arrange the greenhouse inside, you can use the most suitable one.
- The easiest way to arrange a path for a greenhouse inside is to leave a natural earthen covering, which should first be leveled and compacted. The disadvantage of this design is that during watering, moisture is poorly absorbed into the dense soil and the path becomes slippery, and therefore unsafe;
- Filling the passage with sand or sawdust. Such a path absorbs moisture well, but sand and sawdust will stick to the shoes and spread throughout the entire area;
- A simple and affordable material is a gravel mixture. A serious disadvantage in using such a coating is that when remodeling a greenhouse, it is quite difficult to remove gravel pressed into the soil from the inside of the greenhouse;
- Some summer residents successfully use wooden sidewalks to cover the passages between the beds. This is a simple and accessible method, if not for one “but”: ants and other insects that are of little use for the garden love to “settle” under wooden blocks;
- Making paths from concrete is quite a budget option - it’s easy to work with this material, and it can come in a wide variety of shapes. The disadvantage is that the type of coating is not aesthetically pleasing: gray and monotonous. But the coating can be decorated by pressing colored gravel pellets into uncured concrete. When pouring, you should carefully monitor compliance with the technology - if it is violated, the coating will be covered with a network of cracks, and if moisture gets into the cracks, the concrete will fall apart into pieces after the first frost;
- A path made of brick, paving slabs or paving stones will serve beautifully, aesthetically and functionally. It is difficult to name the disadvantages of these materials, except that setting up a greenhouse using them is quite expensive.
Among other things, the choice of path covering depends on what type of greenhouse you want to build. Based on their functional purpose, they are divided into two main types.
Greenhouses, inside which it is planned to grow seedlings for future crops, are called rack greenhouses.
As the name suggests, inside such a greenhouse there are racks with seedlings. The specifics of the design also require a specific arrangement with a special arrangement of paths.
If you are planning to equip a greenhouse for growing plants, then this type of greenhouse is called a ground greenhouse and involves laying out beds inside. The width of the beds should be such that it is convenient to work with it without leaning on the bed with your hands or stepping on the ground. The usual width is 1 meter or a little more. Arrange the garden bed “for yourself” for reasons of convenience.
The beds are fenced off from the path with boards pre-treated with antiseptics, or polycarbonate, or other material. As an option, the walls of the bed are lined with bricks or fenced with galvanized steel. The fence is made to prevent soil from spilling onto the path from the beds. The beds should be raised above the path to a height of 20-25 cm.
There is a direct pattern: the higher the bed, the larger the fertile layer, which means the better the yield. Raised beds are easier to cultivate and more convenient to water. In addition, the soil in such beds warms up better, since heating occurs naturally not only from above, but also from the sides.
But you need to be prepared for the fact that raised beds require more water for irrigation due to increased drainage properties.
In Siberian conditions, when choosing a material for a path, you need to take into account the frost resistance of the coating. Some artificial materials crack even at low temperatures.
To fill the beds with soil, you can independently prepare the soil recommended for these plants with your own hands, consisting of garden soil, humus and washed sand in specified proportions, or you can purchase soil from an agricultural company or a specialized store.
As an option, you can equip the greenhouse with “warm” beds. At the site of the future bed, a ditch is being prepared to a depth of 50 centimeters. The bottom layer is laid with coarse remains: straw, cut branches, fallen leaves, rotted sawdust. The second layer is compost or manure. Layers alternate up to 3 times. The fertile layer up to 10-15 cm consists of mixed soils or purchased land for seedlings. For setting and timely subsidence, the bed should be watered abundantly several times.
When we take on the construction of paths, we inevitably encounter how they harmonize with the beds, and the purpose of the beds dictates the choice of a polycarbonate greenhouse. In turn, it is important to fit the greenhouse into the overall landscape of the dacha.
Additional recommendations
Having equipped the greenhouse with a warm floor, you should remember that the soil in such conditions will dry out from the bottom up. Therefore, timely and high-quality watering of plants is important here. Mulching will also help protect the soil from excessive evaporation of moisture. The optimal combination is drip irrigation and mulching. This is the only way to provide the plants with enough moisture.
Heating, heating the greenhouse in winter
Note! To prevent overheating of the soil, you need to monitor the temperature of the water for irrigation. The water should not be too hot.
Infrared heating film is ideal for heating soil in garden beds
It doesn't matter what heating system was installed. The greenhouse needs to be ventilated. To do this, a ventilation system is installed to ensure air circulation in the heated greenhouse. The created conditions will allow you to grow not only cucumbers, peppers or tomatoes, but also exotic plants that cannot be grown without a heated greenhouse.